Introduction
Most air mattresses have velour or "flocking" on the top side to keep bedding from sliding off and to prevent static electricity, this "furry" side is very useful for these reasons. However, these little hairs do prevent glue or patches from sticking! In this guide, we will show you a creative approach on how to fix it.
Tools
-
-
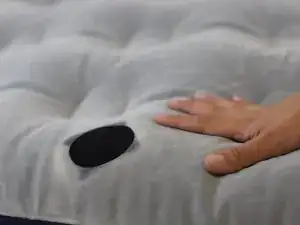
Lay the deflated air mattress on a flat and clean space.
-
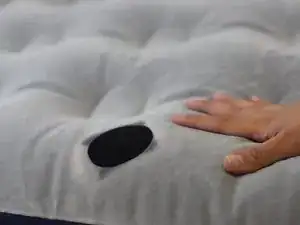
Locate the hole that needs to be fixed (red circle), and prepare the main tools to be used.
-
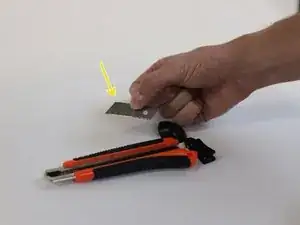
Note: In this example we have used a new blade from a utility knife (yellow arrow), but a new shaving razor can be used instead.
-
-
-
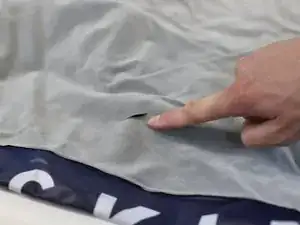
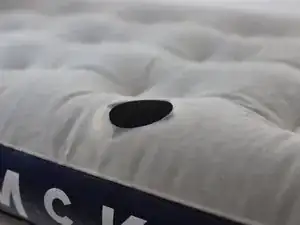
Flatten the area around the hole to make it smooth as possible.
-
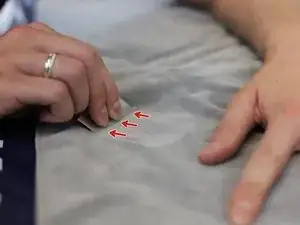
Start to "shave" the fur towards you (red arrows).
-
Note: You will notice that the "shaved" area will start to become darker and that "fur dust" will accumulate at the edge of the repair area, this is completely normal.
-
-
-
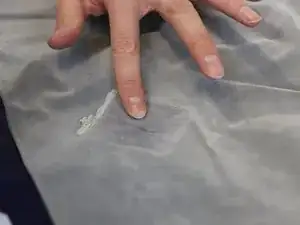
Use a piece of paper or cardboard to collect the "fur dust".
-
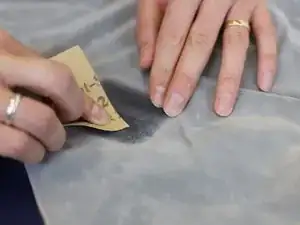
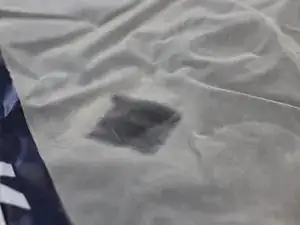
Once all the "dust" has been collected, sand the "shaved" area until the texture is rough and no longer "furry".
-
Note: This step is key to ensure the adhesion of the patch.
-
-
-
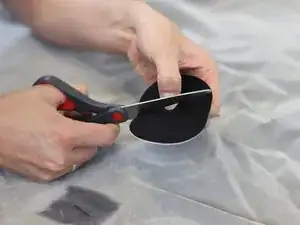
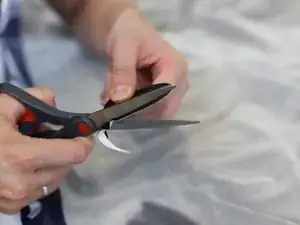
Cut the patch to fit the size of the repair.
-
Tip: Ensure that the patch it is large enough to cover the hole. As an approximate guide, the patch should be 10mm wider than the hole on all sides.
-
-
-
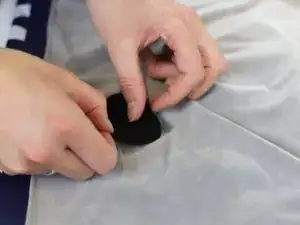
Carefully remove the patch from the backing paper liner. Avoid touching the adhesive surface too much, as this will reduce the durability of the repair.
-
Place the first side of the patch onto the mattress and apply pressure with a slow and careful movement.
-
-
-
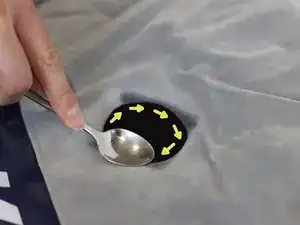
Continue to apply pressure, this time use a spoon and move it in circular motion (yellow arrows).
-
Use an air pump to inflate the air mattress and check the repair.
-
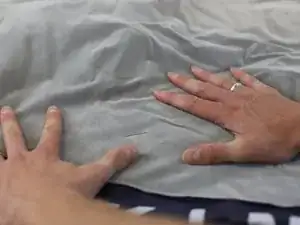
Note: To verify that the fix is working correctly, you can apply pressure with one hand next to the patch and check if it stays firm.
-


In need of another repair? Don't worry! Check out our other guides to find quick solutions for your favourite clothing, footwear and equipment!