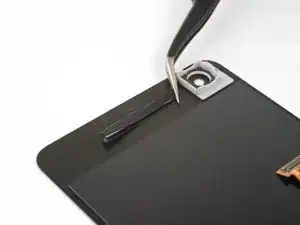
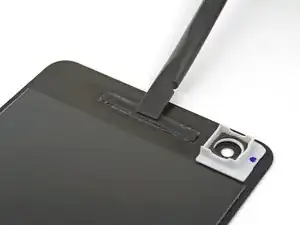
Introduction

This repair guide was authored by the iFixit staff and hasn’t been endorsed by Google. Learn more about our repair guides here.

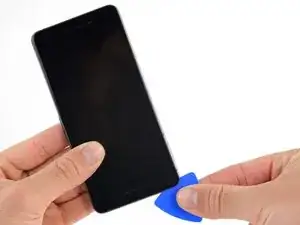
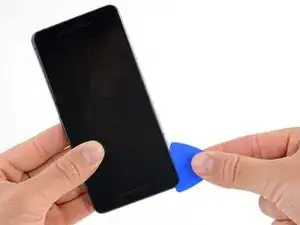
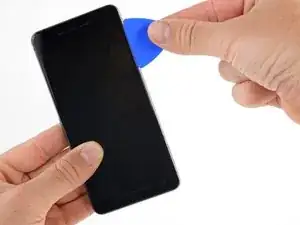
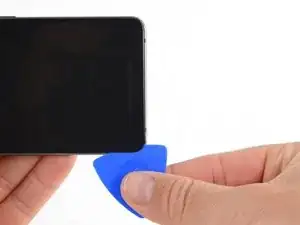
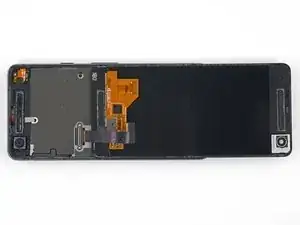
Use this guide to replace a cracked or faulty screen, including the display and digitizer, on your Google Pixel 2. There may also be small parts that need to be transferred from the original display to the replacement. Inspect both displays closely to make sure all relevant components are moved from the original display to the replacement.

  1. wAO2rliBKNjRPNFp
    wAO2rliBKNjRPNFp
    sOF3jgMKtXwTw3QE
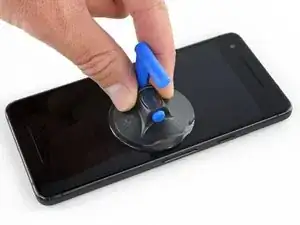
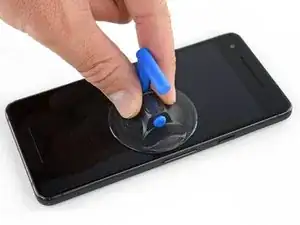
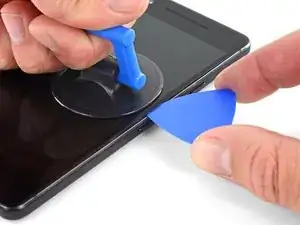
    • If your display glass is cracked, keep further breakage contained and prevent bodily harm during your repair by taping the glass. This also makes a smooth surface allowing the suction cup to bond.

    • Apply a suction cup as close to the volume button edge of the phone as you can while avoiding the curved edge.

    • The suction cup will not make a good seal on the curved portion of the glass.

  2. avTQkVCTMJZevgJY
    avTQkVCTMJZevgJY
    dJrwweYej11ijuYM
    txYtFqoGDv4UxBDE
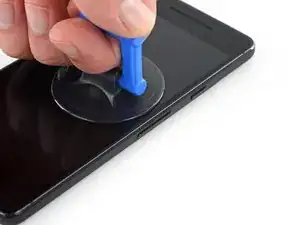
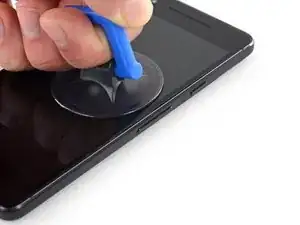
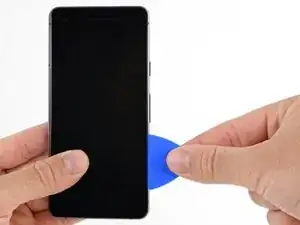
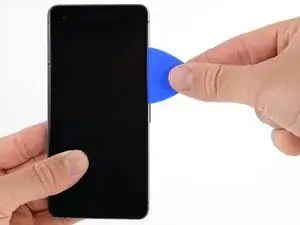
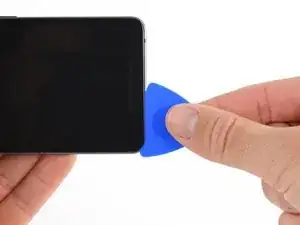
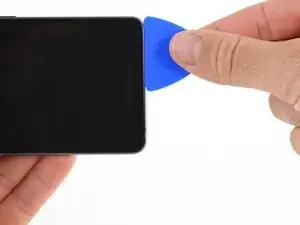
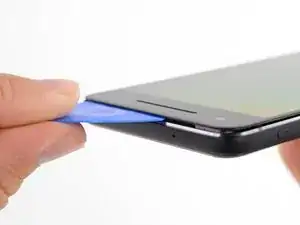
    • Pull up on the suction cup with firm, constant pressure and insert an opening pick between the front panel and rear case.

    • Do not insert the pick deeper than 1.5 mm, or you risk damaging the OLED panel.

    • This requires a significant amount of force and patience. If you have trouble, rock the suction cup and screen to weaken the adhesive, or apply heat with an iOpener, heat gun, or hair dryer.

    • The display panel is fragile. If you plan to re-use your display, take care to insert your tool only as far as necessary to separate the adhesive. Inserting the tool any further can damage the OLED panel under the glass.

  3. RSYXSBeeSGreK1tU
    RSYXSBeeSGreK1tU
    rJRrccJKxCssQRxL
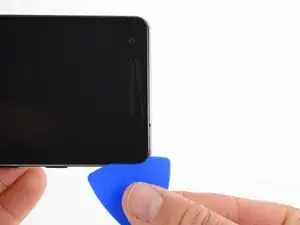
    • In the following steps, extra caution is required in certain areas to avoid damage to the phone:

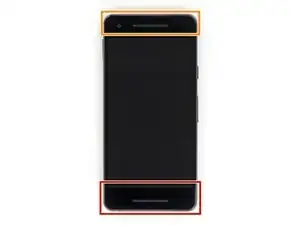
    • Do not insert the pick more than 9 mm into the bottom edge of the phone. If the pick contacts the folded portion of the OLED panel it can damage the display.

    • Only make very shallow cuts in the upper left corner, prying deeply can damage the front-facing camera.

    • Inserting an opening tool deeper than 1.5 mm into the sides of the device, or 9 mm into the top and bottom can permanently damage the display.

  4. EMmUoacoYJBggeoq
    EMmUoacoYJBggeoq
    aNShcRN3lT1gILvU
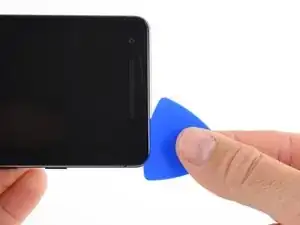
    • In the following steps, use the flat of the opening pick, rather than a corner, to cut here. This will help prevent inserting the pick too deeply.

    • Slide the opening pick up the right side of the phone to separate the display adhesive.

    • Take extra care with the side bezels, which are only 1.5 mm deep.

  5. 2ZereWB1RyT1fDqM
    2ZereWB1RyT1fDqM
    QheOxYBPND2qTmEW
    ABqclJOsvBrYbSRi
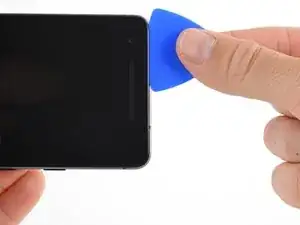
    • Slide the opening pick around the upper-right corner and along the top edge of the phone.

    • There's a mesh covering the earpiece speaker on the top edge of the screen. If you don’t have a replacement mesh, take care not to damage or lose this component.

  6. CSIHJiCWeWNvyTYT
    CSIHJiCWeWNvyTYT
    6nflAeiavcU2ayr4
    WjQhcowbgPGBLQPx
    • Slide the pick around the upper-left corner of the phone and down the left edge of the phone.

  7. tO5kFjHUNBjm4AsA
    tO5kFjHUNBjm4AsA
    WJIBfKgTsge5j4Yi
    FSAYTUP5IIkJH4Mo
    • Slide the pick around the bottom-left corner and along the bottom of the phone. Keep pick at a slight angle away from the screen to avoid damage to the OLED corners.

    • Take extra care not to insert the opening pick more than 9 mm to avoid damaging the OLED panel.

  8. JqE263rlSCiGMMPx
    JqE263rlSCiGMMPx
    ybiQ4Z6SU44i4TXK
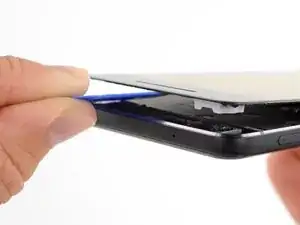
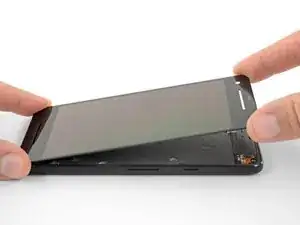
    • Reinsert the pick at the top edge of the phone and gently pry up the display.

    • If the display doesn't readily lift, do some extra prying to separate the last of the adhesive. The adhesive near the upper speaker is thicker than other places.

    • Don't try to fully separate the display yet, as a fragile ribbon cable still connects it to the phone's motherboard.

  9. AWBi6gyoZBNSFCVg
    AWBi6gyoZBNSFCVg
    2YNgAiW26hAJxtF2
    • Carefully lay the display down on top of the rear case as shown, making sure not to crease or tear the display ribbon cable.

    • Remove the two 4.0 mm T5 Torx screws securing the display cable bracket.

    • Throughout this repair, keep track of each screw and make sure it goes back exactly where it came from.

  10. HuntXSUMrTQOPvUT
    • Remove the display cable bracket.

  11. htMtx16FFYrRZWZB
    htMtx16FFYrRZWZB
    nbBnajSgXNRgYwgn
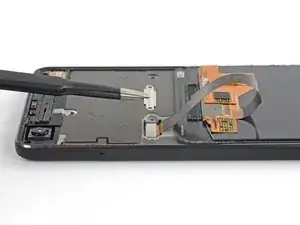
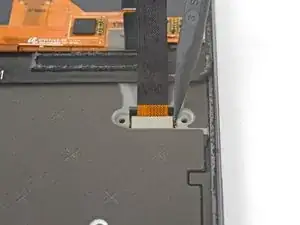
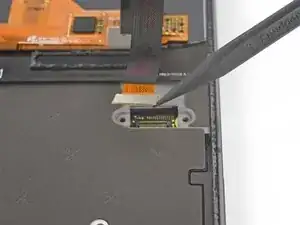
    • Use the point of a spudger to lift the display cable connector up and out of its socket on the motherboard.

    • Avoid touching the motherboard with the tip of your spudger. The components surrounding the socket are fragile.

    • To re-attach press connectors like this one, carefully align and press down on one side until it clicks into place, then repeat on the other side. Do not press down on the middle. If the connector is misaligned, the pins can bend, causing permanent damage.

    • If any part of your screen doesn't respond to touch after your repair re-seat this connector, making sure it clicks fully into place and that there's no dust or other obstruction in the socket.

    • During reassembly, pause here and replace the adhesive around the edges of the display.

  12. IqnjxPkUZpfKRIZt
    IqnjxPkUZpfKRIZt
    ZViI262FF1N4t6RN
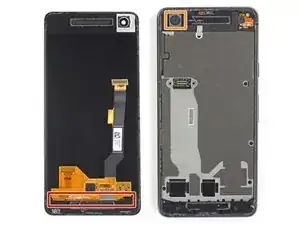
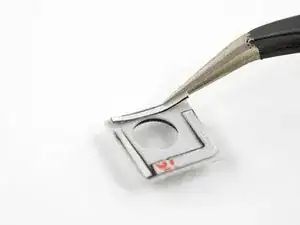
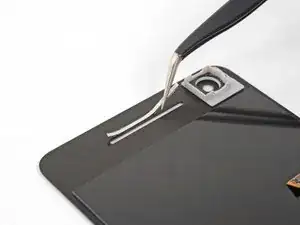
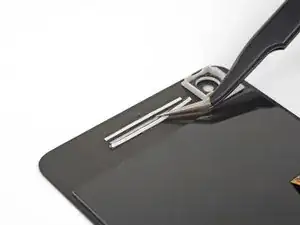
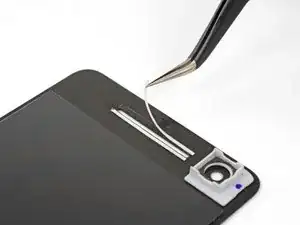
    • If your replacement display did not come with pre-installed speaker grilles or a front-facing camera bracket, carefully remove these parts from your old display. Follow the rest of the guide to install them on a new display.

    • To remove the camera bracket, apply heat, then use a thin metal blade to pry the bracket away from the old screen.

    • There are two layers that make up the speaker grille—the metal mesh grille, and a layer of thin fabric mesh behind it. Use tweezers to peel both layers off of the old screen together. Do your best to not separate those layers at all.

    • Make sure to install the grilles and gasket before applying display adhesive.

    • Cut two corners of a pre-cut adhesive card so that each side is no more than 12 mm (0.5 inches) long, or cut four 12 mm (0.5 inches) strips of double-sided adhesive.

    • The adhesive strips should be no wider than 1 mm.

    • Apply the adhesive strips to the edges of the flat side of the front-facing camera bracket. When you're done, there should be adhesive on all four edges of the camera bracket.

    • Gently press the adhesive into place using your finger or a spudger.

  13. 4VymQDCpFCGlhslL
    4VymQDCpFCGlhslL
    EdeG4gPKiQ5JiYsY
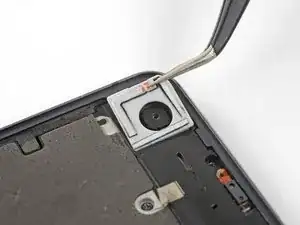
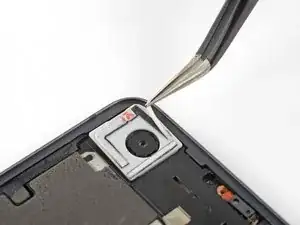
    • Place the camera bracket into its slot surrounding the front-facing camera.

    • Make sure the rounded corner of the bracket faces the upper left corner of the phone. If the bracket does not sit flush with the camera, it is not properly seated.

    • Peel the white backing off of the adhesive strips.

    As mentioned elsewhere, directly underneath the camera there is a tiny patch of conductive metal-mesh tape - not shown in this picture. It seems to connect the midframe to some other part. It might not be essential? I accidentally loosened it, and use two strips of adhesive tape on top of it, slightly overlapping, to bring it back to its place.

    arne -

  14. 1YKieaJ2DokwQ6OO
    • Use your finger or the flat edge of a spudger to reconnect the new screen's display cable connector.

    • To re-attach press connectors like this one, carefully align and press down on one side until it clicks into place, then repeat on the other side. Do not press down on the middle. If the connector is misaligned, the pins can bend, causing permanent damage.

  15. IN514G6DbxFqMXIl
    IN514G6DbxFqMXIl
    mOA3NCgaiN3uqYfU
    • In this step, you will temporarily install the new screen in order to properly align it with the front-facing camera bracket while adhering the bracket to the screen.

    • Make sure there is no adhesive anywhere on the screen before attempting this step. You should not seal the phone closed yet.

    • Very carefully align the lower edge of your new display with the lower edge of the phone case.

    • Set the lower edge of the screen in the case, and slowly hinge it down toward the phone case, being careful to keep it properly aligned with the case.

    • Set the screen down in the case and press down on the front-facing camera hole to ensure that the bracket is adhered to the screen.

    • Lift the screen up and away from the phone case and check that the camera bracket is adhered to the screen.

    • Disconnect the display cable.

    • During the boot-up process after reassembly, the screen will go through a calibration sequence. Do not touch the screen during this process, as it could result in improper touch calibration and create touch issues.

  16. dnF5tfYXpbQBC4T2
    dnF5tfYXpbQBC4T2
    LMpWKB4sPjnMsfOc
    e3OJgsh2Oy2NLUIX
    • Cut a strip of 1 mm wide double-sided tape to be about 3 cm long (1.25 inches).

    • Lay the adhesive strip along the upper edge of the earpiece speaker slot in your new display so that it's centered over the slot and touching the upper edge.

    • The adhesive strip needs to be as close as possible to the edge of the slot without overlapping.

    • Gently press the adhesive strip into place on the display with your finger or a spudger.

    • Repeat this step to apply a second, identical adhesive strip along the bottom edge of the speaker slot.

    • Peel the white backing away from both adhesive strips.

  17. SgMqRqhpiCwYKECb
    • Lightly set the speaker grille into its slot so that the curved grille sits in the slot and the flat side faces away from the screen.

    • Before pushing the grille down against the adhesive, make sure it is centered and properly seated in the slot.

  18. GiBgINAdqqUrFnKf
    • Use the flat end of a spudger or your finger to push the edges of the speaker grille down against the adhesive strips.

    • Repeat the previous two steps to install the lower speaker grille.

    • During the boot-up process after reassembly, the screen will go through a calibration sequence. Do not touch the screen during this process, as it could result in improper touch calibration and create touch issues.

Conclusion

Compare your new replacement part to the original part—you may need to transfer remaining components or remove adhesive backings from the new part before installing.

To reassemble your device, follow the above steps in reverse order.

Take your e-waste to an R2 or e-Stewards certified recycler.

Repair didn’t go as planned? Check out our Answers community for troubleshooting help.

Adam O'Camb

Member since: 11/04/15

209611 Reputation

21 comments

I removed my screen to change the battery but unfortunately I wasn’t careful enough and nicked the display on one of the corners resulting in a dead screen now.

I can replace the screen np, but I was wondering, I should be able to still connect my phone to my PC to check it is still working right? Because I have it connected now but there seems to be no power at all and my phone isn’t connecting to my PC to do a full backup. I have double checked all connections and held the power button in to try start it up or will it not start up if the screen is broken?

Leon Cope -

Have you gotten any further? I was doing a battery replacement and while removing the screen it cracked. Since I didn’t have a spare screen, I reassembled the phone with the cracked screen and saw some flashes of light but was dark. Upon attaching a replacement screen I get nothing on screen but can feel the vibration of the phone restarting. Tried a second replacement screen but no different.

Erik Karlin -

I needed to back up my files and pictures from my Pixel 2 to my PC with a dead screen just yesterday. I used the “squeeze” feature and asked the Google assistant to “turn on talkback.” This allows you to blindly navigate the screen (providing the touch functions still work). You can then use this feature combined with the Google assistant and fingerprint reader to open the navigation bar and change the PC connection from “charge only” to PTP. This will allow you to transfer your files. Hope this helps.

Sarah J. -

I recommend using a playing card instead of the plastic guitar pick to cut the adhesive once you get the side pried up a bit. It took just a moment for my hand to slip and the pick went too far in and chipped the corner of the OLED display. I also was trying to avoid using heat, but using even just a little of the low setting on my Harbor Freight heat gun really helped soften the adhesive up.

Chase Nachtmann -

This sounds like a great idea! I just put a pack of old playing cards in my repair kit. I destroyed my OLED display with a pick too. Hopefully next time I remember to use the playing cards and don’t mess this up.

Gabriel Staples -

I have replaced my screen with a new one but now the touch screen function doesn’t work. I can view the screen just can’t tap or select anything. does anyone have any advice? I have already detached and reattached the display cable connector but I’m still having the same issue.

Edward Aboagye -

I’m having the same issue. Did you find a fix?

Ryan Moeggenberg -

Try doing a hard reset. On my screen once I reset it the touch started to work.
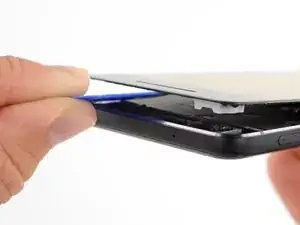
Drew Busmire -

I replaced both front and back screens and the rear lens cover on my Pixel 2.

Pretty easy going once the glass is removed.

I highly suggest buying the repair kit and not using a guitar pick unless you’re at least a semi-pro at this. Guitar picks come in an array of different thicknesses and some edges are quite sharp .

Thanks !

Genevieve Hewitt -

Any hints for applying the tesa tape around the edge of the phone without any folds? This seems like you only get one shot at it. How hard do you have to press the screen in place, assuming that’s the last step? Does it click/snap into place? It seems like there are some steps that are implied after Step 18, would be nice to know what those are.

Douglas Leenhouts -

No click or snap. The screen should just fit in perfectly, resting on the adhesive. It’s hard to not get any folds in the adhesive, I failed at this. In the end, I used a razor to cut out the folds and made all the adhesive flat again.

Alex Lawson -

My replacement screen came with a blue plastic on the back, which I removed. However, there was also a black sticker underneath that, which really wanted to come off with the blue piece. I couldn’t tell if the black film/sticker should stay on or if it should be removed. The original didn’t seem to have that, but there were other non-insignificant differences between the two which made me not really trust that comparison as an indication of what I should do.

I left it on in the end, but the screen doesn’t really want to sit down flush. I’m wondering if this thin film is part of the problem since every tenth of a millimeter matters with these things.

Raquel Smith -

I needed to remove my screen to replace the camera module (Common Pixel 2 camera problem which was solved by replacing the camera module) and I did not heed the caution warnings as well as I thought I did. BE VERY CAREFUL. These screens are damaged very very easier. Do not stick the pick in too far. Perhaps use playing cards as some youtube videos show. I know it’s a pain but USE A HAIRDRYER or other heat source, it softens the screen and speaker adehsive and makes things much easier and safer. Also, watch some youtube teardown videos. The proper tools from iFixit will help you a bunch. Don’t skimp on the tools like I did the first time around (regrets). All in all this job isn’t that hard. You just need to take your time and get it right.

Alex Lawson -

I totally agree! Destroyed my OLED screen 10 minutes into the repair as I tried to remove the screen so I could replace the battery. I have now bought ~$100 of tools from iFixit (got them on Amazon for faster shipping) and hope to get this right. The iOpener heating tool looks REALLY useful!—much better than a heat gun, as it uses conduction instead of convection, and can target just where you want to apply the heat!

Gabriel Staples -

Question.

Ordered a full kit, screen and OLED display. Removed the old screen and oled easy. Plugged my new oled panel in and its just pixelated, like old CRTV’s. Is the screen dead on arrival? I was very careful placing the new oled panel in the phone, careful to align the pins on the connecter and it went in very easy. Should I contact ifixit for another oled panel?

Christopher Carson -

Same thing that happened to Christopher Carson happened to me. New OLED display is pixelated. I’ve worked with these delicate connectors in the past and I was very careful (e.g. discharged static). Appears to be damaged in some way. Not sure I would recommend this repair on such an old device at this time. Not worth the gamble.

ndipatri -

FYI: I have a Google Pixel 2... not 2XL...

Does the phone have be powered off before removing the digitizer screen? Its not mentioned in this article...


Will the phone be damaged if the power is still on when disconnecting the broken screen?

Alex -

Same issue as Christopher Carson and ndipatri - Anyone have a sense if this is an OLED failure or the the connector has been damaged?

Daniel Sweeney -

Photo showing screen after replacement: https://drive.google.com/file/d/1O80ZVxY...

Daniel Sweeney -

I followed these instructions to replace a broken screen. Everything went smoothly. Thank you so much.

El Mouhandiss -

Warum darf man das OLED Panel nicht beschädigen obwohl man sowieso das ganze Display ersetzen will?

Mika Dankleff -