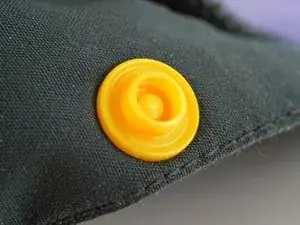
Introduction

Follow this guide to remove and replace a plastic snap (aka snap fastener, snap button, or press button) using a handheld fastener tool.

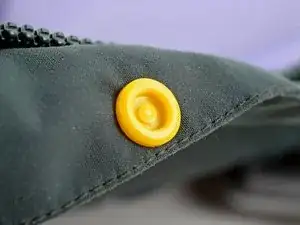
Before you begin, check the fabric around the old snap for tears or damage beyond a small hole. If the fabric is compromised, you'll need to sew a reinforcing patch before replacing the snap.

If you're installing a brand new snap, check out this guide.

If you're replacing a metal snap, follow this guide instead.

  1. sdeiS3EjtqxiNZgA
    sdeiS3EjtqxiNZgA
    WMBqCBSGpHunB4B3
    • A full set of plastic snaps consists of four parts:

    • Two caps

    • One stud

    • One socket

    • When the snap is installed, the socket and stud will lock together, while a cap holds each of them in place from the other side of the fabric.

  2. MBgQfPnaGJu3G1Ye
    MBgQfPnaGJu3G1Ye
    nYFUOUDFp4JfT2ew
    NPhMqUjMuGHRLqoI
    • Follow this step if you need to remove an existing plastic snap.

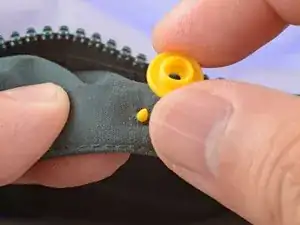
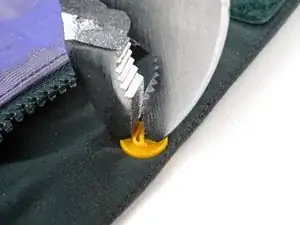
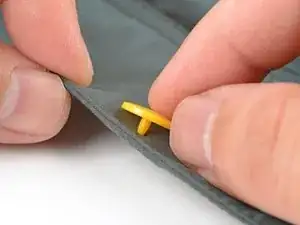
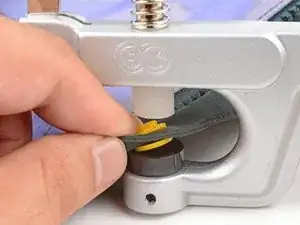
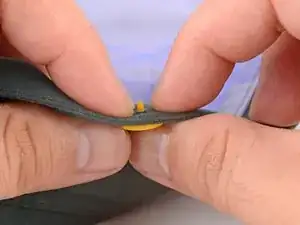
    • Use pliers to crush the plastic snap until it loosens from the fabric.

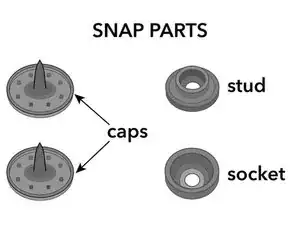
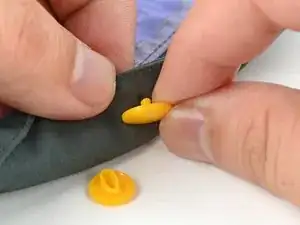
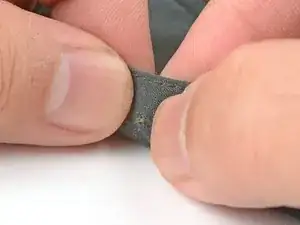
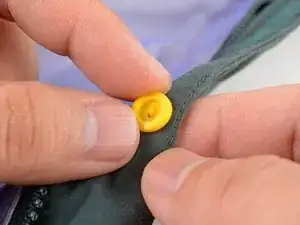
    • Remove and discard the broken plastic snap pieces.

    • You can't reuse plastic snaps even if they look undamaged.

  3. 5KCUPZWjO2EAqxDB
    5KCUPZWjO2EAqxDB
    x2a4XL5TnY2LuGSU
    • Push the point of an awl through the fabric hole to clear it for the cap.

  4. DvJYlbRxKvrd1iam
    DvJYlbRxKvrd1iam
    RE5C3eAKQi6f6U6L
    5FDVMww32sbhEaIO
    • Use your fingers to squeeze a cap pin through the fabric hole.

  5. oAObBFSg4CQoKAeO
    oAObBFSg4CQoKAeO
    GLrRbIqLjQMO1Zwm
    ONkKBjmCRbwSl434
    • Place either a stud or a socket on top of the pin.

    • If you can't see the pin after placing the stud or socket, the fabric is too thick for the snap. You'll need a cap with a longer pin.

  6. KpXbKo1JjYjPvIMU
    KpXbKo1JjYjPvIMU
    FyZGInEJHoQW1blk
    • Make sure the snap is facing the correct side for the clothing item.

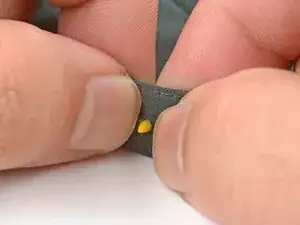
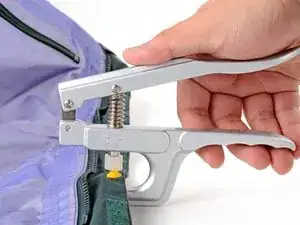
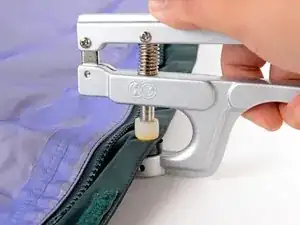
    • Center the snap components in the fastener tool. The cap should sit fully in the black die cup.

  7. 5BtnQZrH2l41ZkXf
    5BtnQZrH2l41ZkXf
    OVECxycCGfyECoFH
    IAUjpk4QSfrF3crD
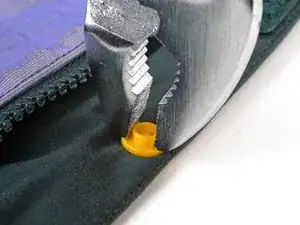
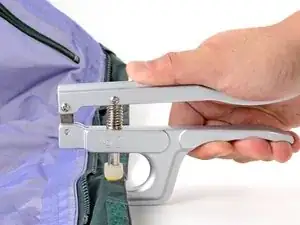
    • Firmly squeeze the fastener tool handles. The white rubber head should bulge slightly from the force.

    • Release the handles and remove the tool from the snap.

  8. gA2XWZQDSZrKDYuG
    gA2XWZQDSZrKDYuG
    l532KrJn2ITyWPIm
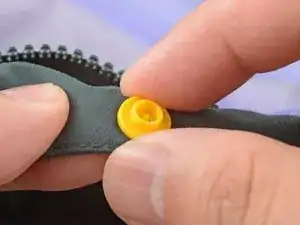
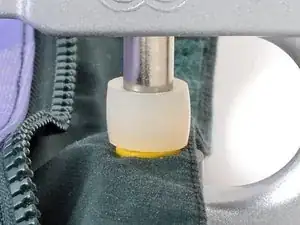
    • Visually inspect the snap. The center pin should be evenly flattened.

    • Pull on the snap. The snap shouldn't feel loose.

    • If the pin isn't evenly flattened or the snap feels loose, use the fastener tool to compress the snap again. If that doesn't fix it, remove the snap and start again.

  9. VJfioIuckOJcuoWJ
    VJfioIuckOJcuoWJ
    rZKXhno42WLRuHDP
    dwF3LywooQhyRpyn
    • Repeat the procedure to install the other half of the snap set.

Conclusion

For more clothing repair guides, click here.

Arthur Shi

Member since: 03/01/18

282916 Reputation

0 comments