Introduction

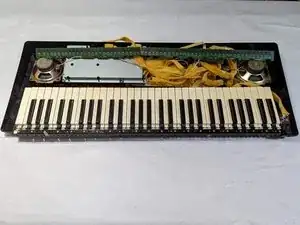
If you have an older keyboard such as this Yamaha PSR-330, it may need key replacements and/or repairs. The keys can get sticky, covered in dust and even physically broken. With this guide, you'll be able to remove the keys for a replacement or give it a much needed deep clean to start anew.

  1. CvjAvuXEtyeQtV6L
    CvjAvuXEtyeQtV6L
    GDfTfx1FjGDlqT3C
    JOpBPwQIyiTpTm2I
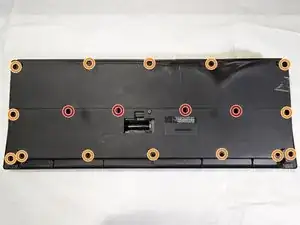
    • Unplug and flip the keyboard over.

    • Remove the 4 inner 25 mm screws using a Phillips screwdriver.

    • Remove the rest of the 7 mm screws using a Phillips screwdriver.

  2. PqFXARfGXdCfG3QF
    PqFXARfGXdCfG3QF
    GRNonl4dLLvGRSow
    • Carefully remove the back casing with both hands from the bottom.

    • The back casing is connected via a ribbon cable so make sure to hold it steady before proceeding.

  3. HxJpRdqjvDX1SXOE
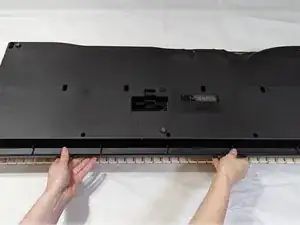
    • While holding the back casing, unplug the ribbon cable connecting both front and back casings together.

    • Set aside the back casing.

  4. HscFSRLhnGqgOeKX
    HscFSRLhnGqgOeKX
    nHEtHZLTNlJXBlS5
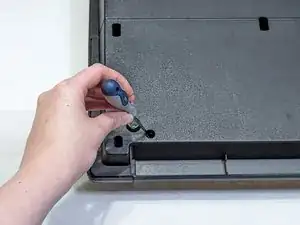
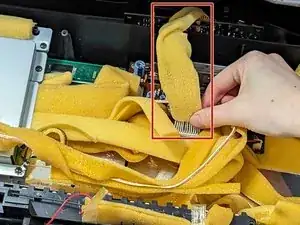
    • Remove both 7 mm Phillips #1 screws from the XR736(C) PCB.

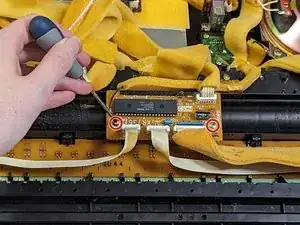
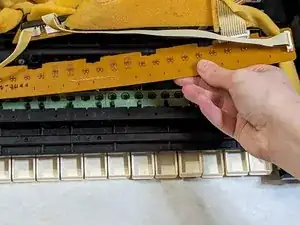
    • Carefully move the XR736(C) PCB away from the contact pad.

  5. kY6Vq3Ccm1s6tRoo
    kY6Vq3Ccm1s6tRoo
    AmgKMEK6ZPpWnlXq
    QoGCcF6Rwsm55DYI
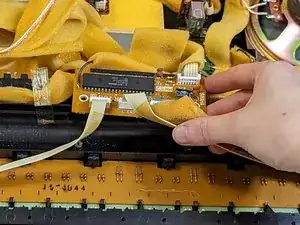
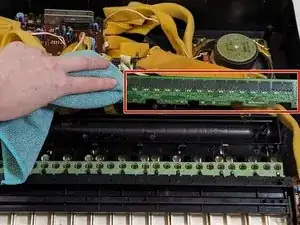
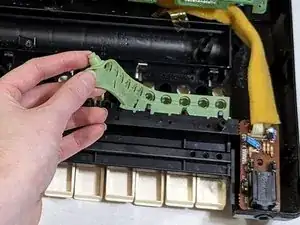
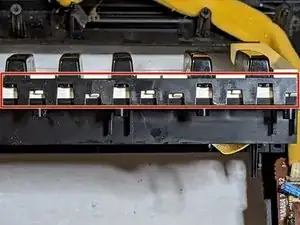
    • Push down on the black tabs on the contact pad.

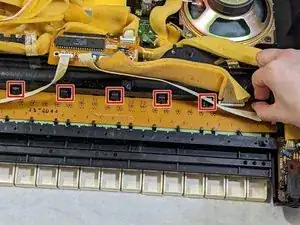
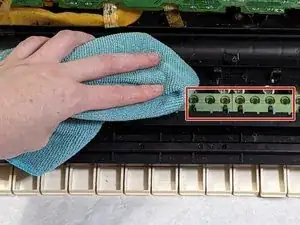
    • Starting from the ends, carefully remove the contact pad by wiggling it out.

    • Be careful of the smaller black hooks on the bottom. These are fragile.

  6. raEXwhMlDDHWfYAo
    raEXwhMlDDHWfYAo
    UvOYiX335OKRDmBt
    13q53TfCWhNdNsdC
    • Flip over the contact pad.

    • Using a clean cloth, dust the contact pad and the silicone molds.

  7. DskR4L16WQaGLlt6
    DskR4L16WQaGLlt6
    WtCWV25S4UVOE5CK
    QfgNq4EhesJML5oK
    • Remove the silicone molds and dust the other side of them.

    • Set them aside.

  8. hhEmoyJi4gsWfRXW
    hhEmoyJi4gsWfRXW
    PqmSxKudDPeS2JPj
    OFyrKULaDSVhhShx
    • Remove the 10 mm Phillips #1 screw(s) from the case.

    • The screws would be in the middle and above the keys.

    • Flip the keys rights-side up.

  9. 15JUF5MMukc6pD6i
    15JUF5MMukc6pD6i
    1neZmCHPOPfDkGCS
    Ha2EimDNmJssDHCA
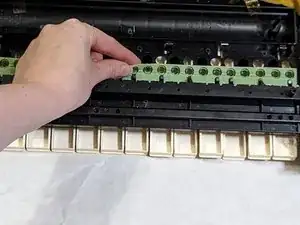
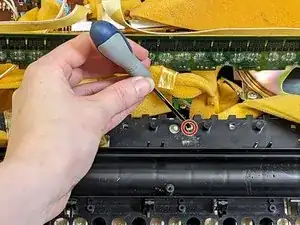
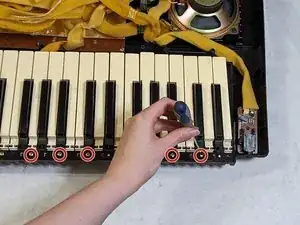
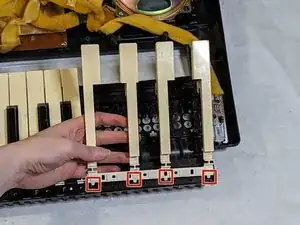
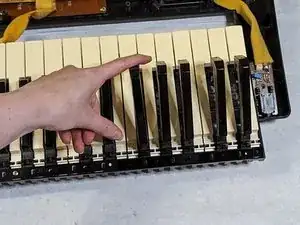
    • Remove the 7 mm Phillips #1 screws from the keys together

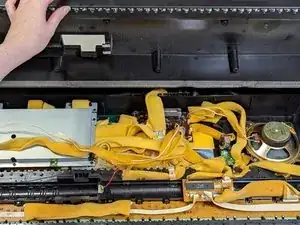
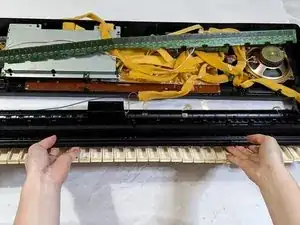
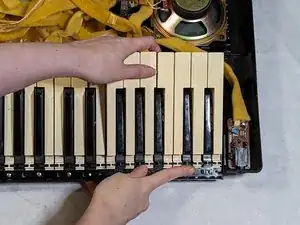
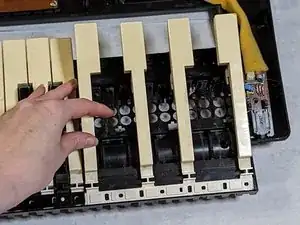
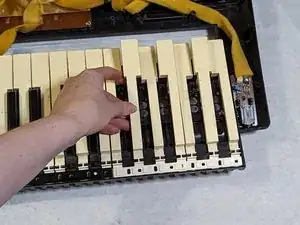
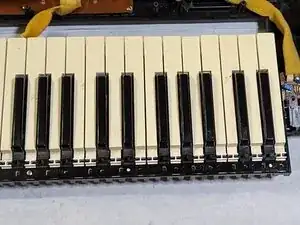
    • Remove the keys in sections using both hands.

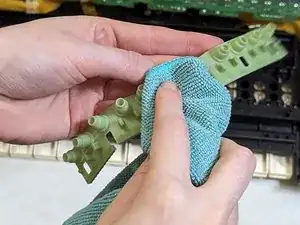
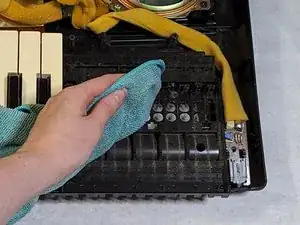
    • Clean the area using a clean cloth and/or compressed air.

  10. UZpDCkNyE5RJPRym
    UZpDCkNyE5RJPRym
    MAQocchLsJv2SHdG
    sNR2AIUHE66LZZWC
    • Using the tabs on the keys, insert them into their respective slots.

  11. gfXb4DdonqD4FrEq
    gfXb4DdonqD4FrEq
    CSDNmAqMgDkpvjGU
    1qpIVe1fv5K3ERMN
    • Place the set of keys back one at a time.

    • The two sets of white keys go on the bottom, and the set of black keys go on top.

Conclusion

To reassemble your device, follow these instructions in reverse order.

Bri

Member since: 28/06/23

247 Reputation

0 comments