Introduction

If your 1990-1993 Honda Accord makes a squeaky noise when turned on and at low speed, it might be because one of the alternator belts isn't tight enough. In this demonstration, we tightened both alternator belts by adjusting the screws that are too loose.

Before starting this guide, leave the car running with the hood open. This will help you locate where the noise is coming from. However, turn off the car for a few minutes before starting the guide. When the car is turned on, the engine heats the car parts under the hood, and working under the hood while the car is still hot might cause burns.

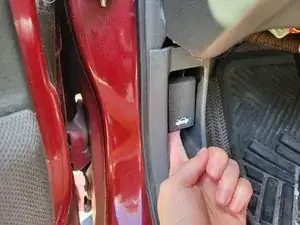
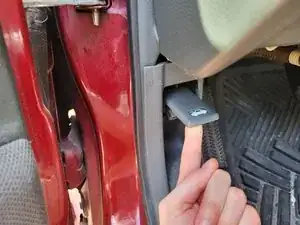
Accessing some of the screws in the tightening component of the repair can be difficult. You can access these screws by lifting the black hose and choosing different extension sizes to find the one that provides the best access.

One challenge you may encounter is the difficulty of accessing the screws. It's advisable to have a comprehensive wrench tool kit at your disposal to experiment with different extensions until you find the one that allows you to access the screws effectively. Be prepared to repeat the entire process if, on the first attempt, the belt wasn't tightened sufficiently.

Before starting the repair, ensure that your car is turned off, in park, and with the emergency brake engaged. This is crucial because the repair involves disconnecting the battery and the brake system. Ignoring these warnings could lead to injury.

  1. 4Zr5I4BnVTc1jLsF
    4Zr5I4BnVTc1jLsF
    1TWa2EZiAdpPVtZL
    • Before you begin, make sure your car is off and in park with the emergency brake engaged.

    • Pull the hood release inside the driver's side door.

  2. xnLvtH2gJu1Qs25Y
    xnLvtH2gJu1Qs25Y
    PCaxKaO1GUFmSfl2
    • Move to the front of the car.

    • Reach under the hood and release the hood latch.

    • Lift the hood.

    That's so dumb dude. We literally know exactly what car it is but you still had to take the badge off? Hahaha this &&^&^$ country and the ad revenue and copy write &&^&^$^ pathetic

    Kirt Thelander -

  3. vYoUeKT4EK5eIojS
    vYoUeKT4EK5eIojS
    vImKR6SaIHHMpZKp
    GLPUHq5XhWNHgdfc
    • Find the prop rod and lift it to prop the hood up securely.

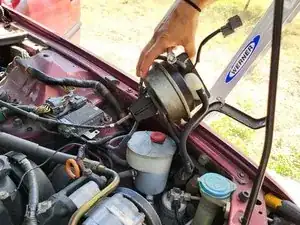
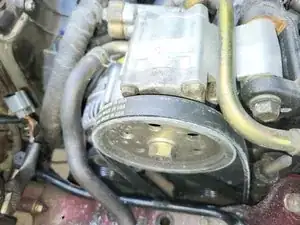
    • Under the hood, it will look like photo 3. Take note of the following components:

    • Battery

    • Alternator

    • Brake System

  4. lKNKMYjRJ1pwkXct
    lKNKMYjRJ1pwkXct
    Qc5GkOyHCKvYQGwj
    • Make sure the car is turned off before disconnecting the battery.

    • Use a socket wrench to loosen the 12 mm bolt on the red battery terminal.

  5. NDu4BJnRNELX5iJI
    NDu4BJnRNELX5iJI
    qG5hgPJNDR55HtBQ
    • Use a socket wrench to loosen the 12 mm bolt on the black battery wire.

  6. kxXrBqkJ5bX5Ygm6
    kxXrBqkJ5bX5Ygm6
    jCq2gGrJe2VMslOS
    UNllQ2tabAymIoaS
    • Disconnect the negative battery terminal.

    • Disconnect the positive battery terminal.

  7. KbSDQpJiPNplMpEW
    KbSDQpJiPNplMpEW
    V6TCwpV3ZqSCHFSj
    ZVOBWcamI5OwRb6T
    • Disconnect the brake system.

  8. KxYmoox5eDrTeCcY
    KxYmoox5eDrTeCcY
    Xg64WZtsZacWMLDA
    b5QUFNCL1mASQKLE
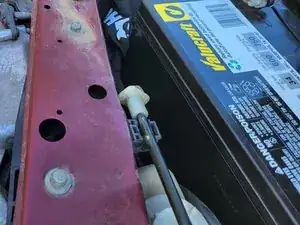
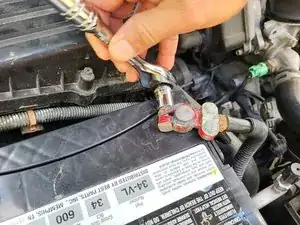
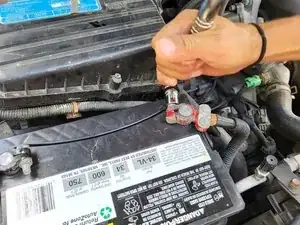
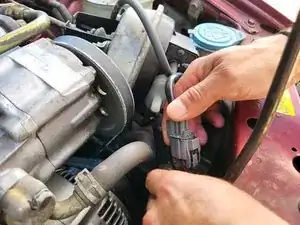
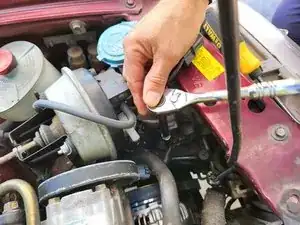
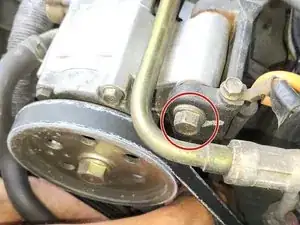
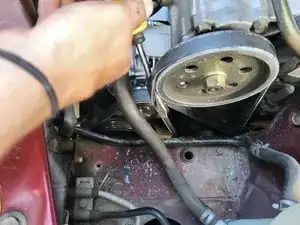
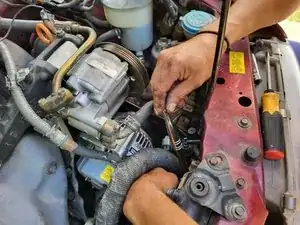
    • Remove the 10mm bolt securing the brake system using the socket wrench with extension and a long socket.

  9. StKvSfZaOrfupjnE
    StKvSfZaOrfupjnE
    RXQGRPsb1sexNQeE
    SoLGSwYkFmElMEap
    • Use the socket wrench with an extension and a long 10 mm socket to remove the 10 mm bolt securing the brake system on the other side.

  10. WIrbhG3yRnKDSFwu
    WIrbhG3yRnKDSFwu
    flijlt2hHqJaT46O
    qG5bY4a2FjqUJpLB
    • Disconnect the black hose.

    • Remove the brake system and set it out of the way.

  11. KFRYUhlen2g5tH4w
    KFRYUhlen2g5tH4w
    wUeBSOxNI5yiRSZn
    DIZHBwhAsOeVjcGp
    • Use a socket wrench to remove the 14 mm bolt above the top belt.

    • In case it's too stiff, use an extension to create more power.

  12. ctFDDNFDkymrnYFD
    ctFDDNFDkymrnYFD
    euMdqFo66Fs3BASD
    oD2WHMURAcUOyngK
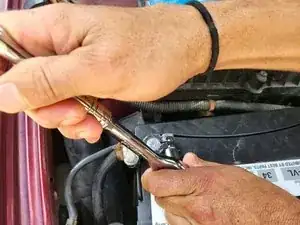
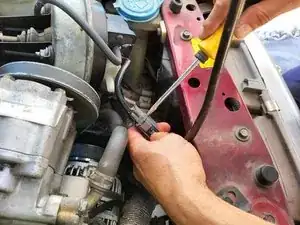
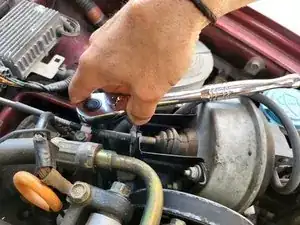
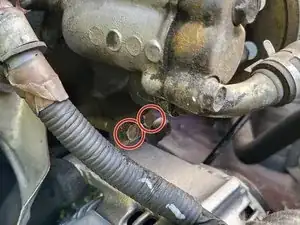
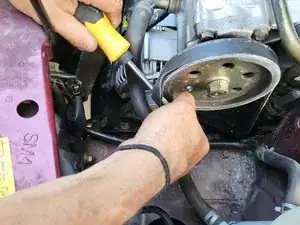
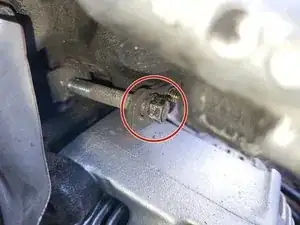
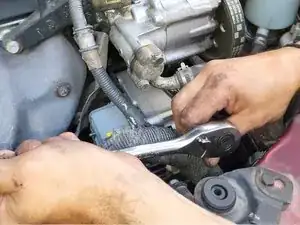
    • Remove the 10 mm bolts found under the top part of the alternator using a socket wrench with an extension.

    • The left screw will lower the alternator if unscrewed and raise it when screwed in. The right screw keeps the alternator in place.

    On this car 90-93 accord that is the tensioner for the power steering pump belt. You will find the alternator adjustment screws under the alternator and they will be flipped so the right screw will be the adjustment screw and the other keeps the alternator in place.

    CheaterBOY254 -

    Keep in mind you have two separate belt each with their own tensioner. But the power steering pump only has the power steering pump and crankshaft connected and the other is crankshaft, a/c, and the alternator

    CheaterBOY254 -

  13. QpqJlT2YrYJeCUGH
    QpqJlT2YrYJeCUGH
    KQDENymINdCEiMgF
    • Lower the alternator by about 3.2 mm.

    • If it's too stiff, use a plastic hammer.

  14. Ot4FVSTrn2cPVOft
    Ot4FVSTrn2cPVOft
    NWi3SDJbt1RXIsQM
    BeUaYEmbogyPCftw
    • Use a screwdriver or other long object to remove the top belt.

  15. HpYo2jlkTELaMIPb
    HpYo2jlkTELaMIPb
    XbNyZEMauLshLUv4
    uGXMvMyO2Lt6Q2gX
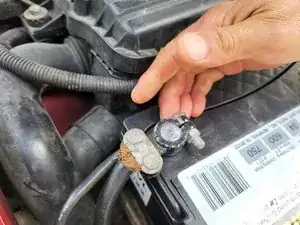
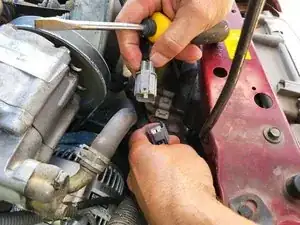
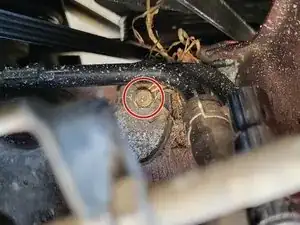
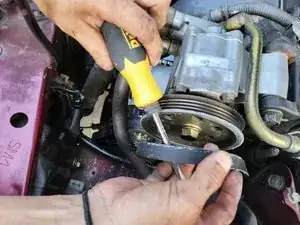
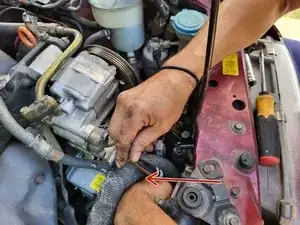
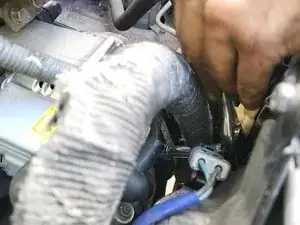
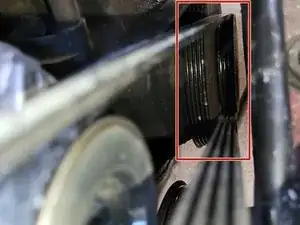
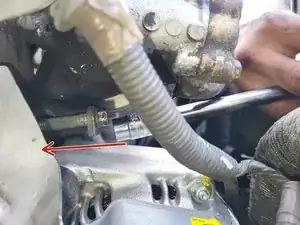
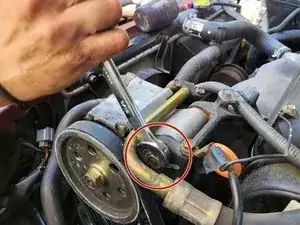
    • Tighten the 10 mm bolts under the bottom part of the alternator hidden by the black hose (where the red arrow points) using the socket wrench.

    • It's especially important to tighten the right screw/bolt.

  16. gObRoLvlq1YGXwjR
    gObRoLvlq1YGXwjR
    XVrGhPQMhtiF5154
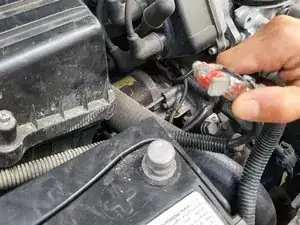
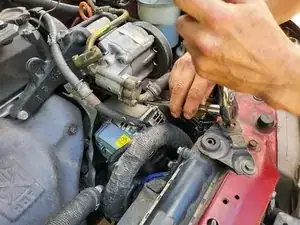
    • Check the tightness of the belt with a finger test. If you can press it down, tighten the belt a little more.

    • Continue tightening the screws and checking the belt until there is no slack in the belt.

  17. Afrv4N1AXpkVbTEG
    Afrv4N1AXpkVbTEG
    1CkMVTlM6vLbJDi6
    • Remove the 10 mm bolts under the top part of the alternator with a socket wrench.

    • This will allow for an easier reinstallation of the top belt.

  18. Dg1xwmGvAsXBOwSj
    Dg1xwmGvAsXBOwSj
    D3KBePpQoUIlSXoS
    lQhtPOKt3bfDaR2X
    • Reinstall the belt around the bottom and top wheel.

  19. LAgWtrlcvg32Xlil
    LAgWtrlcvg32Xlil
    DOZFiUcs2cYs3SEY
    NHQQK6w6cZEDmP2x
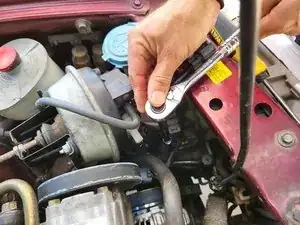
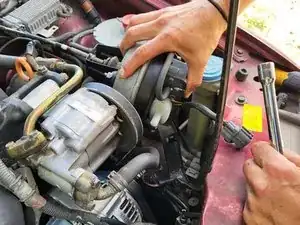
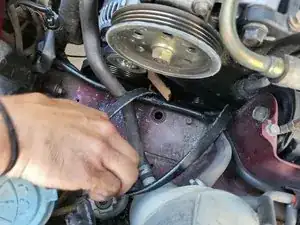
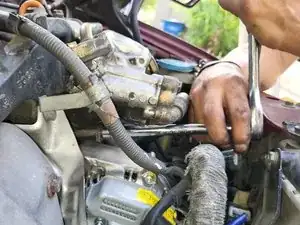
    • Use the socket wrench with the extension to screw the left and right 10 mm bolt until the belt is tight.

    • This step may be confusing because it is hard to know which direction the bolt needs to move. The bolt will move slightly inwards and that will tighten the belt.

  20. obGJZeILifOOJMxt
    obGJZeILifOOJMxt
    6yU1GBfQiBiDbZuX
    • Tighten the top 14 mm bolt with the socket wrench.

Conclusion

To reassemble your device, follow these instructions in reverse order.

Ziva Puh

Member since: 18/09/23

301 Reputation

0 comments