Introduction
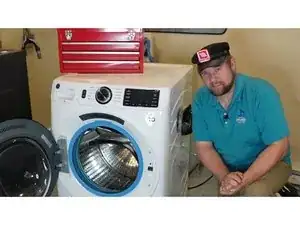
Use this guide if your GE front load washer fails to power on or abruptly shuts off during operation. These instructions show how to disassemble and diagnose the appliance so that you can identify and repair the faulty parts and get your washing machine working again.
Tools
Parts
-
-
Press the power or start button and see if the display responds or if the machine abruptly turns off.
-
Listen for any clicking sounds or relay noises coming from inside the washer.
-
-
-
Keep a Phillips head screwdriver, a multimeter with thin leads, and a 14 mm socket wrench nearby.
-
Obtain a spring expansion tool or similar for the door boot spring and a pair of needle nose pliers if needed.
-
-
-
Pull the dispenser out fully and press the tab on its left side to release and remove it completely.
-
Locate the five screws in the dispenser housing, noting which are fine thread and which are coarse.
-
Use a Phillips head screwdriver to remove all five screws in the housing.
-
-
-
Lift the left side of the user interface by about 15 degrees and slide it forward to unlatch it.
-
Remove the three screws along the top edge that hold the lid and slide the top panel off toward you.
-
-
-
Locate and remove the two metal screws on the board cover and slide off the panel from the top.
-
Find and remove any additional screws or plastic fasteners securing the plastic control board housing.
-
Undo any cable ties or clips holding wire bundles and disconnect the pressure switch hose as needed.
-
-
-
Use a multimeter set to AC voltage on the black and white wires that feed the inverter from the control board.
-
Check for normal voltage output and watch for relay clicks every ten seconds which indicates a potential board fault.
-
Test the line voltage input on the board to confirm 120 VAC is present if the machine does not power up at all.
-
-
-
Seat the replacement control board into the plastic housing and secure it with three screws.
-
Reconnect all wire harnesses following photos or notes and confirm the pressure hose is reattached.
-
Plug in the machine and press start to view a single digit code, then press start repeatedly for the correct model code.
-
Hold the start button for about five seconds to confirm the personality code and reboot the washer.
-
-
-
Unplug the machine and set your multimeter to ohms to test the black and brown wires feeding the pump.
-
Expect around 20 ohms if the drain pump motor windings are healthy and not overloading the board.
-
-
-
Open the washer door and remove the two screws on the door lock cover plate on the right side.
-
Take out the two screws securing the door lock assembly and pull off the door boot seal wire.
-
Remove the three bottom screws under the washer by tilting it back or supporting it against a wall.
-
Take out the nine upper screws holding the front bulkhead and slide the bulkhead up and forward.
-
-
-
Unbolt the 14 mm fasteners holding the lower concrete counterbalance to gain full access underneath.
-
Remove the single screw and cable tie to slide out the inverter board assembly from its housing.
-
Check for wire damage before removing the plastic cover and detaching the four wire harnesses.
-
Replace the pump if the impeller has no strong magnetic resistance or the winding is out of spec.
-
-
-
Line up the weight on its four mounting studs and thread in the bolts with a socket wrench.
-
Verify the weight is seated properly so it does not shift when the washer is operated.
-
-
-
Position the gasket along the front lip of the washer cabinet and ensure its seal is even.
-
Fit the door boot spring around the perimeter and use a suitable spring tool to secure it in place.
-
-
-
Reinstall all remaining screws for the front bulkhead and reinstall the dispenser screws carefully.
-
Slide the top panel back on and secure it with the three screws at the rear of the lid.
-
Reconnect power to confirm the machine no longer shuts off abruptly and is fully operational.
-
With all connections secured and the new or repaired parts installed, your GE washer should power on and operate correctly. Double-check that all wires are routed properly, and be sure to test a small cycle to confirm your repair worked.

