Introduction
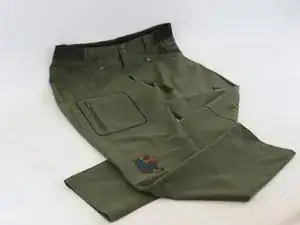
When you're out hiking in wild terrain, it's easy to get your trousers snagged on thorns or fences. A self-adhesive patch is a great alternative to traditional iron-on patches, and can repair the hole quickly and easily either at home or in the field. There are various types of patches to match different types of fabrics; and in this guide we use an elasticated fabric with high stretch, to match the stretch of the hiking trousers.
➡️Before you get started, please check the safety disclaimer at the bottom of the page.
Tools
-
-
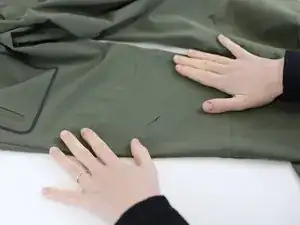
Start by finding a clean and flat place to perform the repair.
-
Ensure the damaged area is clean and free from any loose threads or debris. Gently brush away any particles to create a smooth surface for the patch to adhere to; and cut the damaged thread around the hole.
-
Lay the item on the flat and clean surface.
-
-
-
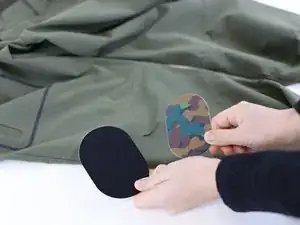
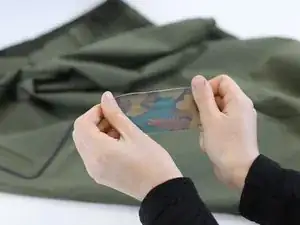
Choose a matching patch for your broken item, considering the size of the repair, the colour, and qualities of the fabric (stretch, toughness, texture, etc.). Consider that the location of the defect will affect this choice, and a hard-wearing material might be required in high-wear/stress zones.
-
Tip: In many cases, an exact colour match will not be possible. Embrace it! Find some creativity with your repair using contrasting colours or printed designs.
-
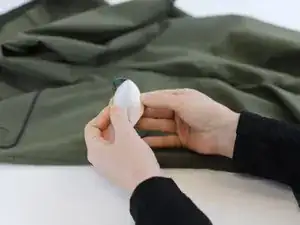
Carefully remove the patch from the backing paper liner. Avoid touching the adhesive surface too much, as this will reduce the durability of the repair. Take care also, that thinner patches may crease or stick themselves more easily.
-
-
-
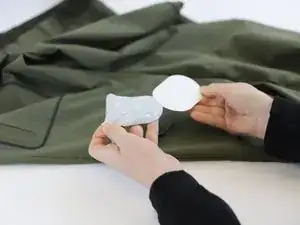
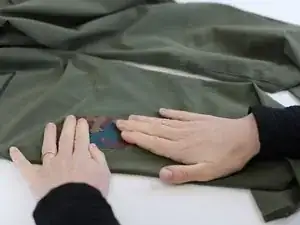
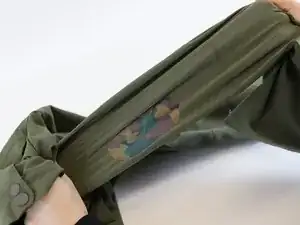
Position the stretchy direction of the patch matching with the stretchy direction of the fabric.
-
Place the top edge of the patch carefully onto the item, and apply gentle pressure.
-
Before proceeding further: check whether the middle of the patch will align with the tear. If it will not, carefully pull up the top edge and reposition. Take care, as each repositioning will reduce the durability of the patch, and ideally repositioning should not be done.
-
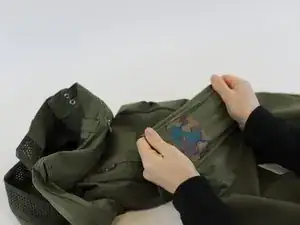
Continue holding the lifted edge, while applying gentle pressure from the direction of the adhered edge. Gently push your finger along the patch towards the bottom edge until the whole patch is secured onto the item.
-
-
-
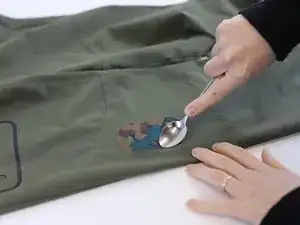
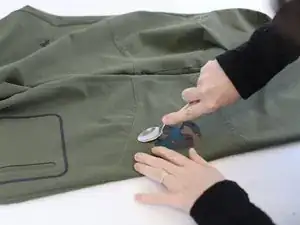
The patch is now only lightly secured; and now it is important to give some additional pressure, to secure it fully.
-
First, use your hands to apply pressure to all parts of the patch. Give special focus to the edges of the patch (as these will fray the quickest from wear and laundering), and the area surrounding the tear.
-
Next, use the backside of a spoon to apply harder pressure, and use a circular motion to press down around the patch for 1-2 minutes.
-
-
-
🛠️🏆👏 Congratulations! The patch has been applied, and you're ready to go!
-
Be aware: Different patches work in different way, but often the garment should be left 2-3 days before being washed.
-
Be prepared: Consider taking additional patches with you during your next trip, for quick on-the-go fixes
-
Extra secure: if the tear or defect was very large, or touching a sensitive part of your body, it might be worthwhile to add a second patch on the inside (other side) of the defect. Simply turn the item inside-out and repeat this guide.
-


In need of another repair? Don't worry! Check out our other guides to find quick solutions for your favourite clothing, footwear and equipment!
----------------------------------------
🚨🛠️🩹 IMPORTANT SAFETY NOTICE:
The repair guides provided on this site are intended to help you repair products on your own. While we have put a lot of care into them, all repair work carries some risk:
- Safety Precautions: When repairing your product, take all necessary precautions to ensure your safety. Use appropriate tools and follow the instructions carefully.
- Product Condition: Once your product has been repaired, it may not meet original compliance guidelines anymore and could potentially have issues.
- Liability: We are not responsible for any damage or injury that may occur during the repair process or as a result of using a repaired product. You, as the repairer, assume all risks and responsibilities associated with the repair.
By using these repair guides, you fully acknowledge and accept the potential risks and responsibilities involved.