Introduction
The IBM Think pad T30 is a type of business laptop that is durable and able to upgrade. Overtime the processor may need to be replaced due to the performance issues, overheating, and the need to upgrade a faster CPU. This guide will show you the safest way to remove and replace the processor. A few things to keep in mind is making sure you have the time and space to work on replacing the processor and the right tools in hand. Be sure, if anything happens to back up important data incase something affects your files. Also, keep an eye on what you do, so you don't lose screws, have a misaligned heatsink, or force the pins to bend or break.
-
-
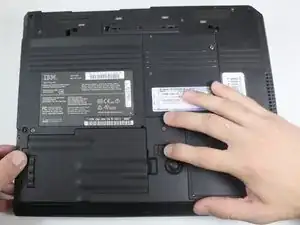
Flip the ThinkPad upside down with the bottom facing you.
-
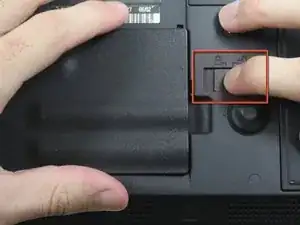
Slide the latch to the right into the unlock position.
-
While holding the latch in the unlock position, lift the battery out with your other hand.
-
-
-
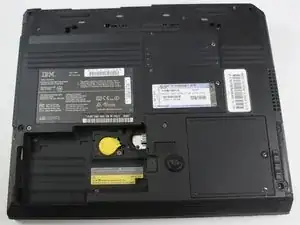
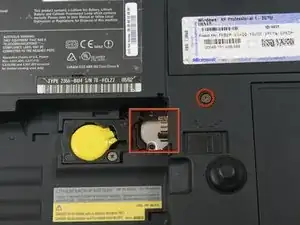
Begin by removing the two black 16 mm Phillips #0 screws. The screws can be identified by the two notches next to each screw. One (marked in red) is near the battery lock and the other (not pictured) is next to the Wi-Fi cover.
-
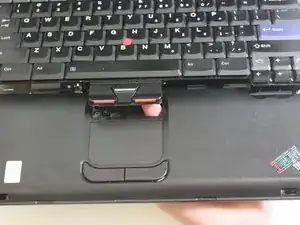
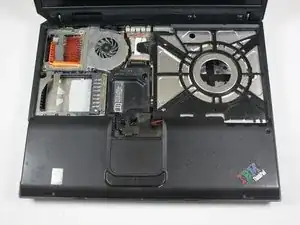
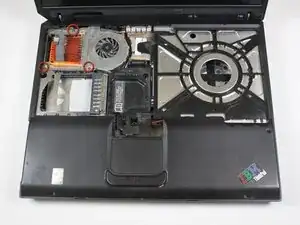
Push up the bottom of the keyboard by poking your finger through the hole to the right of the yellow bios battery. You will feel slight resistance.
-
-
-
Lift the keyboard to expose the ribbon connector and lean it against the computer screen to keep the ribbon intact.
-
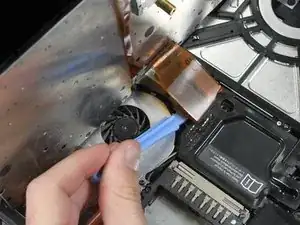
Use the plastic opening tool to gently pry the connector up from the motherboard.
-
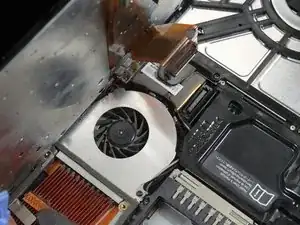
You can now safely remove the keyboard.
-
-
-
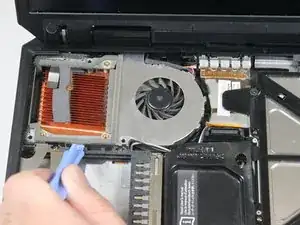
Using the plastic opening tool, gently lift the white connector out of its socket on the motherboard.
-
Follow iFixit's guide for [invalid guide link] for a detailed explanation.
-
-
-
To start off, make sure to power off and disconnect the laptop from any power sources.
-
Afterwards, flip the laptop and slide the battery out from the device.
-
Remove the keyboard by unscrewing all the screws and carefully lift it.
-
-
-
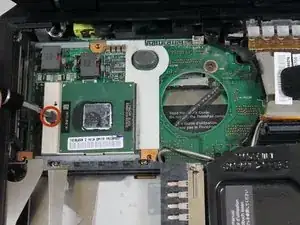
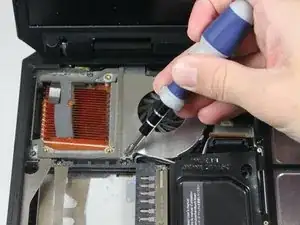
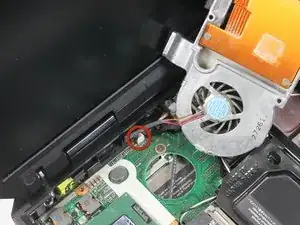
As you remove the CPU locking mechanism, make sure to use a flathead screw to take out the screws.
-
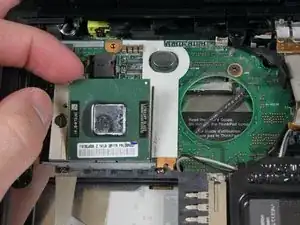
Lift the processor and handle it by the edges, so you avoid static damage.
-
-
-
Finally, install the new processor.
-
Make sure there is a triangle that matches with the marker on the CPU socket.
-
Install all the components back into the laptop and insert the screws tightly.
-
-
-
Double check if the laptop works by rebooting it.
-
Ensure that it doesn't overheat and the performance of the laptop is good to go.
-


To reassemble your device, follow these instructions in reverse order.