Introduction
Parts
-
-
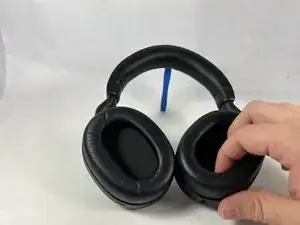
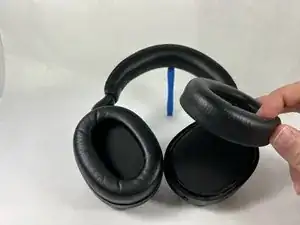
Remove each ear cushion by hooking your fingers along the inside of the ear cushion and pulling up and away from the ear cup.
-
If the cushion does not fully release, move your hand to the opposite side and pull up inn the same manner.
-
-
-
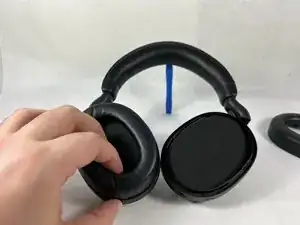
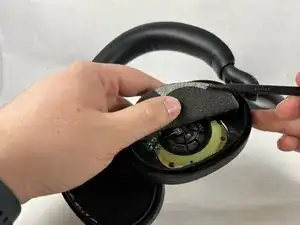
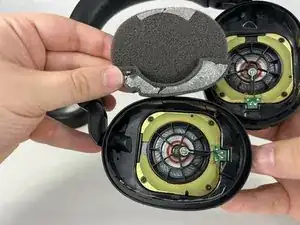
Using the small plastic spudger to assist, begin lifting up and removing the foam inserts with attached backing tape.
-
-
-
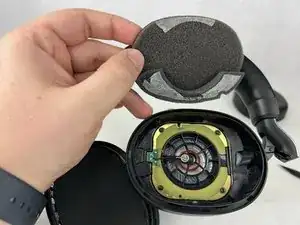
Tilt the headphones over so that the speaker tilts out of the plastic holder.
-
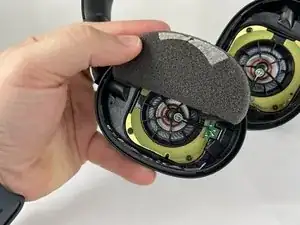
Repeat for both sides.
-
-
-
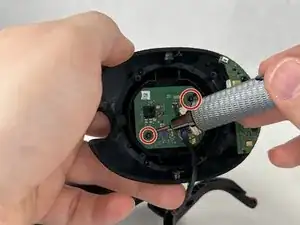
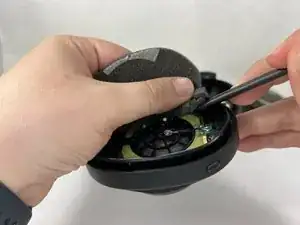
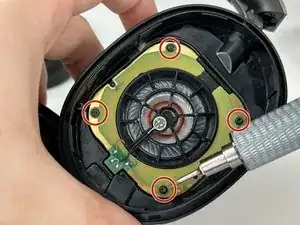
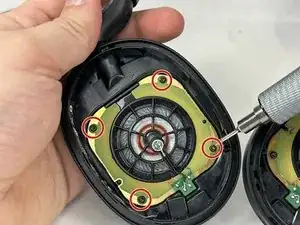
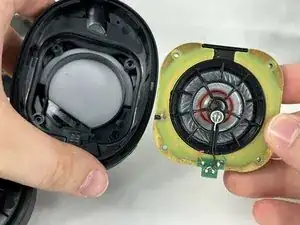
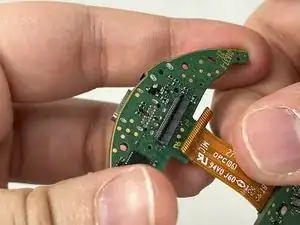
Remove the circuit boards from the headphone enclosure.
-
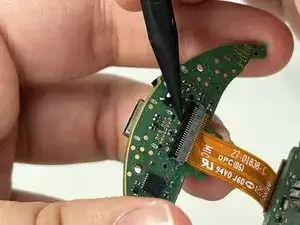
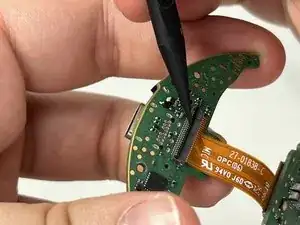
Carefully lift the bar located on the lower circuit board that contains the 24-pin ribbon cable. Remove the cable.
-


Conclusion
If the microphone on your Jabra Elite 85h is not working, replacement could be an appropriate solution.
Hi sir, I think your guide is incomplete. Do you have the opportunity to bring a sequel?
Oğuzhan Sancak -
The battery is under the left earcup.
NOT the earcup into which you plug the USB cable.
Not sure why the demo asks you to disassemble the right earcup...
Jimbo -
These instructions could use some work! There is no need to disassemble both sides as the battery is under the left ear cup only.
kelly1 -
I have just disassembled mine, Jabra Elite 85h, model OTE100. The cushions (as described in this step) can not be removed. If that's the case, The foam in the center has to be removed to access the speaker screws. Undoing the screws will split the headphone in half, releasing the pad together with the speaker. This will uncover the rest of the components
Besides, I agree with the rest of the comments - If you're after the battery there is no need to disassemble the right headphone as the battery resides in the left
bystrzak14 -
This is very easy. I just finished mine. You dont need special tools as a tweeser will pull the wire connection apart. The cushions will come off and are replaceable. Do just the left one. Pull it apart like you mean it. Do have a small piece of thick double-sided tape on hand. The AOLIKES 3.7v 850mAh battery from amazon works but the wire is a bit short to orient it like the original. Just don’t press it in place until the circuit board is screwed in place. All I can say now is that it’s charging.
Lastly, I’ve learned from experience that if you’re using metal screws in plastic, when reassembling turn counter clockwise until you hear a click. Thats when they are aligned properly and you’re less likely to strip the thread.
CJ ? -