Introduction

Many of Jura's Devices have a Valve made of Ceramic, which is to call Multi-way valve. It controls the flow of Hot Water, Steam and - of course - Coffee. If this Valve breaks, the machine is bricked, often with an Error 6. There are multiple ways, this can be caused:

  • (Micro-)crack in the distributor head
  • Calcification, especially of the Ceramic disks/seals
  • Defective microswitches
  • Driver ground down
  • Defective Motor

A repair doesn't always work, but because the replacement is not cheap, it's worth a try. The replacement of the microswitches is relatively easy.

The repair is shown on an Z6 (2018). The valves are very similar on other Models.

  1. DurPkU4EOTUAFIcp
    • There are many sensitive parts on the inside of the Valve. The exact position is important and often the only position that works is the original one. Work slowly and carefully and take many pictures of the original positions, so you can reassemble them again later.

    • Unscrew the two Story T20 Screws from the Flange of the Motor and take it out carefully.

  2. rDMIaIFnUvnL6LyQ
    rDMIaIFnUvnL6LyQ
    24lVWD2opUKvVQV6
    • The distributor's Head is secured by two Torx Screws. If you loosen them, you can take the head off. Notice the two Nuts that get loose too.

    • Motor

    • Flange

    • Distributor head

    • Check the Head for Cracks. You can maybe find replacement parts here.

    • Check the driver for abrasion.

    • Work very carefully from here. If you disassemble the head, look at the exact position of every disk and take pictures of them. If you want to replace the Microswitches, you can hold it together provosionally.

  3. GlJSf2ANXLMGmERK
    GlJSf2ANXLMGmERK
    bbrgeAoe3AkC12Ww
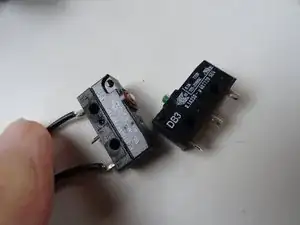
    • The Image shows an old and new switch. They are the most common cause of error of the Valve. It is clearly visible how the shutter button has been ground down by about 1 mm and can't activate.

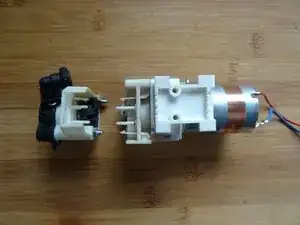
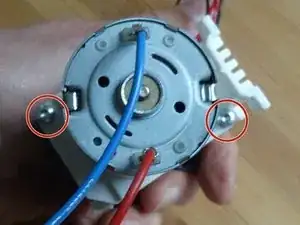
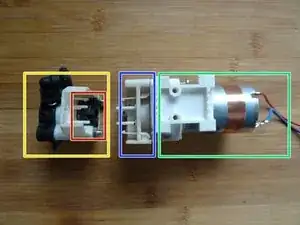
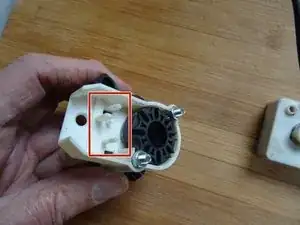
    • One of the microswitches is plugged into the distributor head and one into the motor flange. It is held in place by side catches. Push them to the side and lift out the switches.

    • Notice the exact position of the switches and the colors of the cables they are connected to.

    • Desolder the Switches and resolder the new ones.

    • Good replacements are:Cherry DB3, Cherry DB3 or SAIA XCG3Z1.

Conclusion

To reassemble your device, follow the steps in reverse order.

VauWeh

Member since: 19/10/15

250019 Reputation

0 comments