Introduction

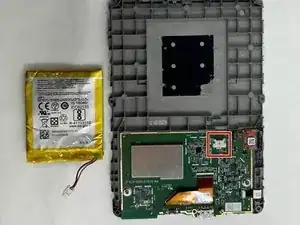
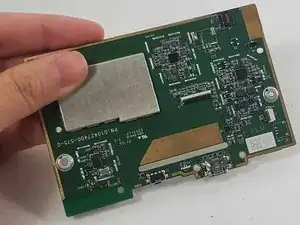
The LED light on the Kindle 10 is a sturdy and efficient piece of technology connected to the motherboard that indicates different statuses: a blinking orange for charging and continuously lit when charged. It is not expected to need replacement for its filament should last over 100 years. There may be issues with the light if the Kindle is functional but the light does not react to actions such as charging or powering off. If its soldering points become disconnected or the filament does burn out, we can replace this light.
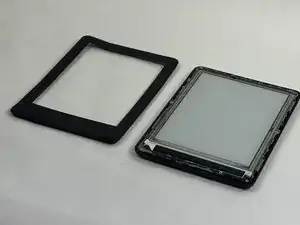
  1. W6EEPkSZGuMdTCvN
    W6EEPkSZGuMdTCvN
    DSMrJ6S5fdULH2sN
    • Gently use a metal spudger to pry, twist, and lift the bezel away from the display.

  2. DuRcOBGEuHtCjxd1
    • Remove the eight 2.6 mm screws using a T5 Torx screwdriver.

  3. O3rITMCZUjEQGerT
    O3rITMCZUjEQGerT
    Y2F3YmaQAEdHgKGw
    • Use the metal spudger to gently lift the screen out of the back frame.

  4. oDGLN5KePUh14rkh
    • Detach the battery connector from the motherboard.

    • The battery pack may be glued on to the gray plastic frame. Take care when prying it out not to rip the battery, since it is made of a lithium polymer which is flammable and deforms easily.

  5. EMpCNPtIXm1JPsGP
    EMpCNPtIXm1JPsGP
    ZcqPplkVLEHodLNp
    va4AQJEAvnlTigFO
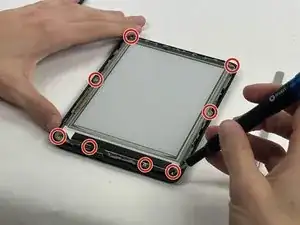
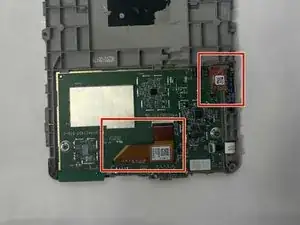
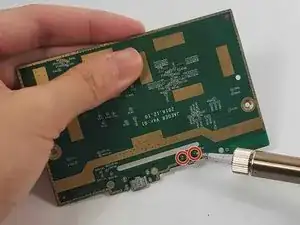
    • Remove the two outer silver screws with a T5 Torx screwdriver.

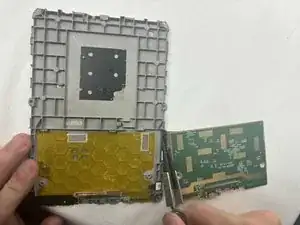
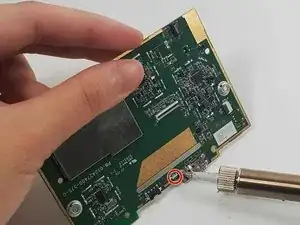
    • Use your fingers to remove the two gold screws in the middle.

  6. KrgisWNCTLqlhQKv
    KrgisWNCTLqlhQKv
    YZFlxJVrTILPZ4GO
    M3ta3obSQZBY5Lpc
    • Disconnect the two orange clear plastic ribbons on the upper right and center.

  7. JTtf6mukVC54fOdO
    JTtf6mukVC54fOdO
    wEI1sgWgjCj5R1fO
    • Pry the motherboard away from the display frame

  8. 1CUssgXjIOBOA3yD
    1CUssgXjIOBOA3yD
    KpKbFbUawwpYpwP2
    ZOO1ujuEGysVXJqq
    • Follow the guide How To Solder to prepare your soldering iron.

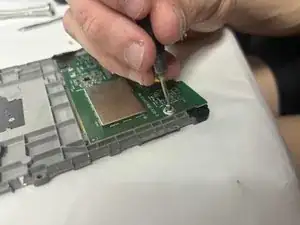
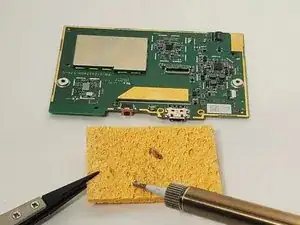
    • Turn on the soldering iron.

    • Clean the tip after the old solder has melted by dragging it across a sponge.

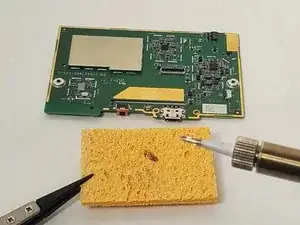
    • Prime the soldering iron by touching its tip with a dab of lead-free wire. Your soldering iron is ready when the solder readily melts.

  9. KBafgGSj2Dxo6FOI
    KBafgGSj2Dxo6FOI
    mQoJJCtiyOcDDKAg
    ySBWN25skAXYtINK
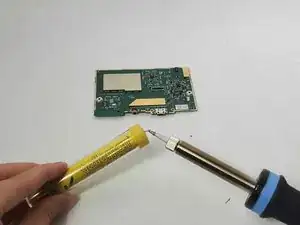
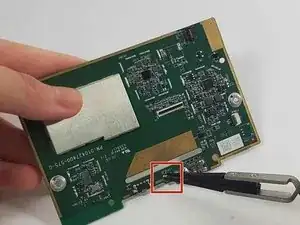
    • Touch the soldering iron's tip to the two joints on the front and back of the LED for 5 seconds, or longer if it is not melted.

    • Use tweezers to pull out the LED once it is loosened.

    • Always use tweezers to handle components near the soldering tip as it will be hot.

  10. hdSVIDUVBJiigK4F
    hdSVIDUVBJiigK4F
    q1ULqpFvqIhOrw64
    eFhVd2cy5iUqpfI6
    • Search for "Through-Hole Soldering" on this How To Solder guide to ensure you replace and solder the LED correctly.

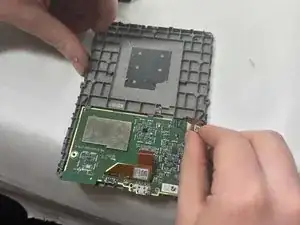
    • Align your new replacement LED in the correct location.

    • Pull the wires on each side of the new LED through the holes in the circuit where the LED was previously.

    • Solder its joints in the back. Be sure the soldering joints create a concave tent shape indicating a strong connection.

    • Use a tool such as tweezers to hold the new LED in place so that your hands are not near the hot soldering iron.

Conclusion

To reassemble your device, follow these instructions in reverse order.

hzheng2

Member since: 21/10/24

521 Reputation

0 comments