Introduction
Replacing a broken keypad on a Kinetec Spectra or Kinetec Essential Knee CPM is fairly easy and straightforward. Once you have acquired the appropriate keypad (listed in the details), then this guide will help you.
Tools
Parts
-
-
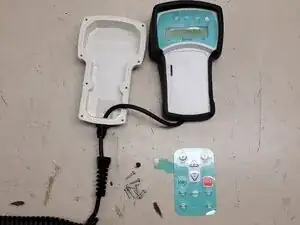
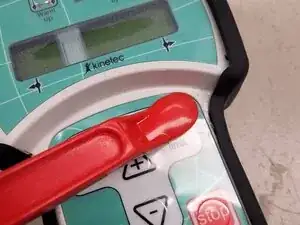
Step 1: Open the hand controller by removing all eight Pozi-drive screws from the rear side (not Phillips, but a Phillips screwdriver will work if you are careful).
-
A. If you are patient enough usually this can be done without disturbing the rubber around the hand controller. Otherwise, you can rip off the entire rubber cover and re-attach later using super glue or E6000 Quick Hold glue. It is recommended to keep the rubber intact.
-
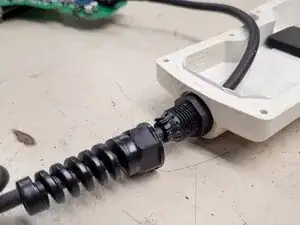
B. Then unscrew the gland at the base of the hand controller to allow the cable to move freely
-
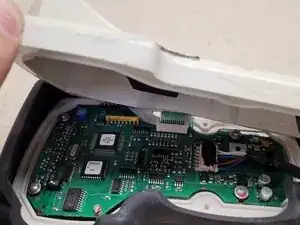
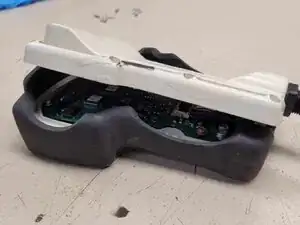
C. Once this has been done, both sections of the hand controller can be separated.
-
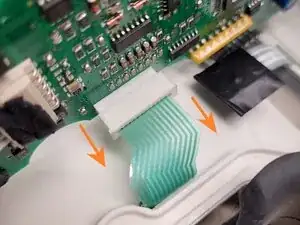
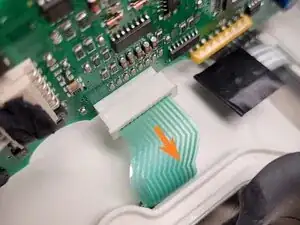
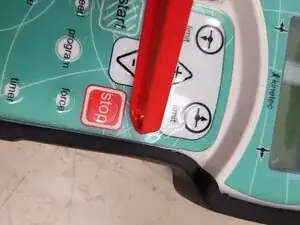
D. Then the old keypad can be removed by first sliding the locking mechanism on the flex cable (see Figure 2 & Figure 3) and then prying off the old keypad from the front.
-
E. Once the old keypad is removed there may be old glue left on the front. This can be carefully scrapped away using something like a plastic spudger tool or a plastic sticker remover.
-
-
-
Once the old keypad is removed there may be old glue left on the front. This can be carefully scrapped away using something like a plastic spudger tool or a plastic sticker remover.
-
Remove the sticky backing of the new keypad and slide the ribbon cable through the cable hole in the front cover.
-
Press around the edges of the keypad and around all the buttons once secured.
-
-
-
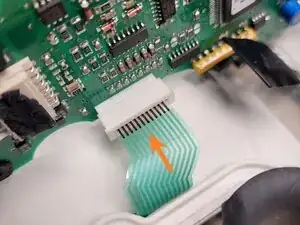
Insert the new keypad ribbon cable back in the receptacle
-
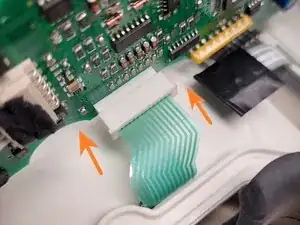
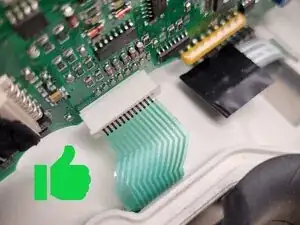
Slide the receptacle lock down
-
If it looks like this, then you are good!
-
-
-
BE VERY CAREFUL NOT TO SMASH THE RIBBON CABLE BETWEEN THE FRONT AND REAR COVERS. It is helpful to angle the front cover while assembling the two case pieces back together and looking between them for any sign of a pinched ribbon cable before replacing the screws in the hand controller.
-
Reassemble the gland on the cable and you are done. Insert Screws.
-
-
-
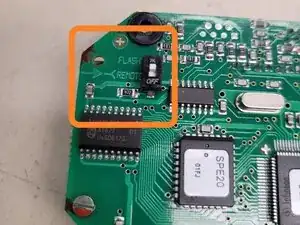
TIP: Make sure you do not accidentally bump or flip this switch. Make sure it is set to ON / FLASH memory instead of REMOTE / OFF . If this switch has been accidentally flipped the hand controller will display SERV. MODE or Service Mode on the LCD screen.
-
Replacement keypads can often be found on eBay for a good price.
-
To reassemble your device, follow these instructions in reverse order.