Introduction

Use this guide to replace the control panel in your LG front load washing machine.

  1. IWjgsUtZOIuShVqa
    IWjgsUtZOIuShVqa
    cmisDLhhQ1ZspJJT
    • Before you begin your repair, perform the following:

    • Turn off the main water supply
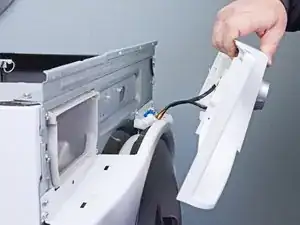
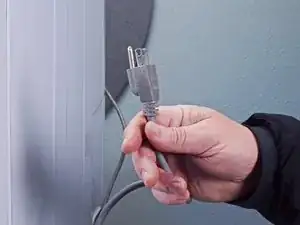
    • Unplug your washer

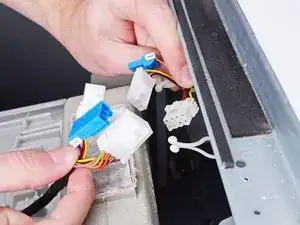
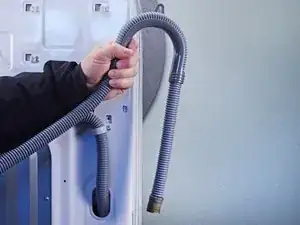
    • Disconnect all water connections at the rear of your washer

    DO NOT USE THESE Instructions 🤦‍♂️. It will take you for ever. Go from the back, lie down on the ground take it I’ll put the new one in done. Or do it with someone you leave it a tad side ways and even easier

    Mechanicbob -

  2. a1CEVEuZVuhsJs3v
    a1CEVEuZVuhsJs3v
    s1Dx6pURHR66tbUG
    WMesicEUoODuO1DI
    • Remove the screw(s) securing the top panel brackets to the back panel.

    • You don't need to remove the screws securing the brackets to the top panel.

  3. MXS5aiRAHxRbjTgD
    MXS5aiRAHxRbjTgD
    BqIF6FiMQVaOIZZQ
    • Slide the top panel towards the rear of the device to disconnect its clips.

  4. vk2XTwmpQAn5SSnW
    vk2XTwmpQAn5SSnW
    mKqTwIkkot2M6aDA
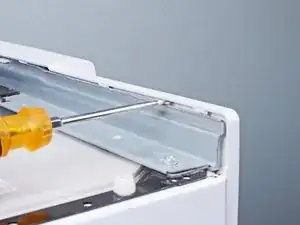
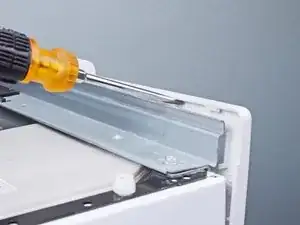
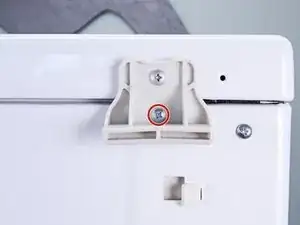
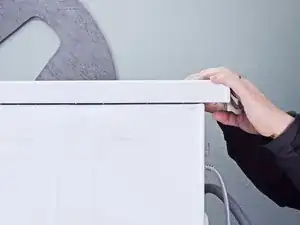
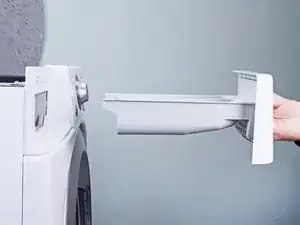
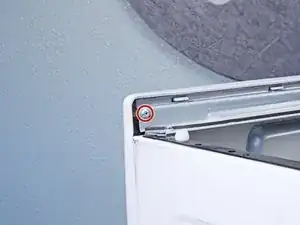
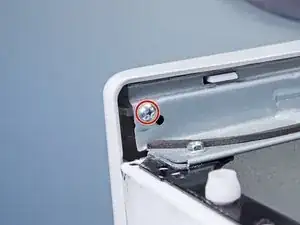
    • Tilt the top panel upward to completely disconnect it from the chassis.

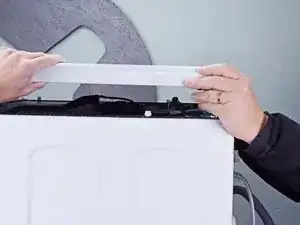
    • Remove the top panel.

  5. 4sgimkxaXD3ejSwK
    4sgimkxaXD3ejSwK
    bkCBDPSK6YgGYTcr
    • Pull the detergent drawer away from the chassis as far as it will go.

  6. P6jShSDIRVTufbKa
    P6jShSDIRVTufbKa
    XRPBgqFyjRWpSKkn
    oCBTknIPcxBXF3VM
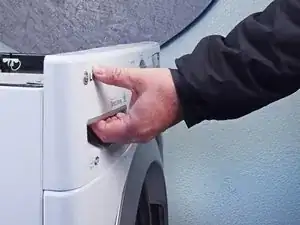
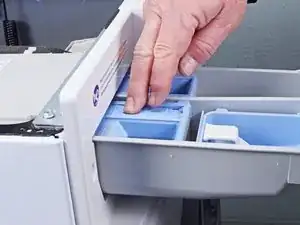
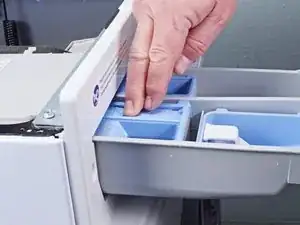
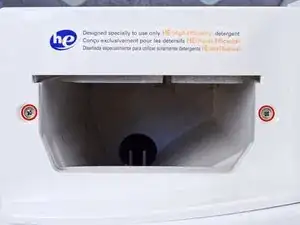
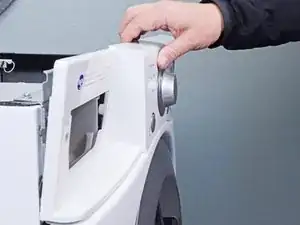
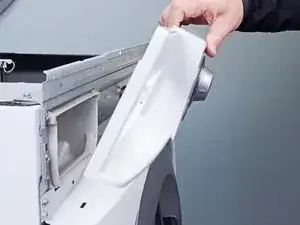
    • Press down on the "Push" button to disengage the clips securing the detergent drawer.

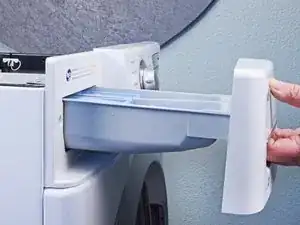
    • Pull the drawer out of its slot on the chassis and remove it.

  7. ZggChMox2CHdQQKT
    ZggChMox2CHdQQKT
    WevyfGPPM3VaJVqy
    6etGaxcS1KQCdwr1
    • Disconnect the connectors attached to the control panel.

    • Always grip cables by their connectors and not the wires themselves.

  8. wyfktcrXysd6MEbF
    wyfktcrXysd6MEbF
    xVcjUMUvZQ1KywIX
    • Remove the screw(s) securing the control panel to the top edge of the chassis.

  9. HtPUiKkN5cVYWnLd
    • Remove the screw(s) securing the detergent dispenser.

  10. NjYZQqTADGvZuhyI
    NjYZQqTADGvZuhyI
    JIrrrvJmMJUppOF5
    GQ3x4wTaWu3iwVOS
    • Use a flathead screwdriver, or a pry tool, to unclip the control panel from the chassis.

  11. sOFWfj6q1QcVriGT
    sOFWfj6q1QcVriGT
    jASuxq6RmJTE5JZB
    Do5pLK3NYMAwl1sB
    • Remove the control panel, making sure to thread any cables through the chassis.

Conclusion

To reassemble your device, follow these instructions in reverse order.

Bill Gilbert

Member since: 30/06/22

37443 Reputation

0 comments