Introduction

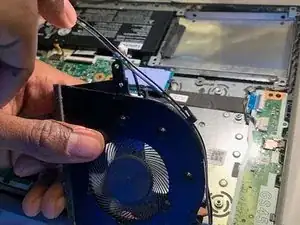
This guide is made to teach you how to repair the fan in the Lenovo IdeaPad 3-1481W000NGUS. In a computer, the fan is used to keep the computer's system from overheating. Overheating can cause slower performance and damage to the computer's hardware.

  1. 2qDBeq6kdiBMpnN1
    2qDBeq6kdiBMpnN1
    KfBVYryYBDp2fOFJ
    hTSmGE1mv5EZBUKC
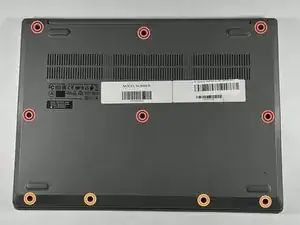
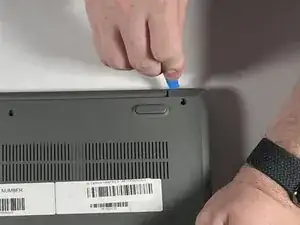
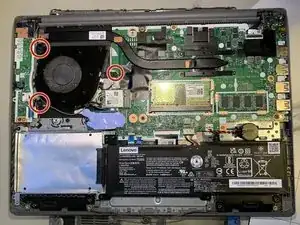
    • Orient the laptop so that the bottom is facing up.

    • Remove the six 7 mm screws using a Phillips #00 screwdriver.

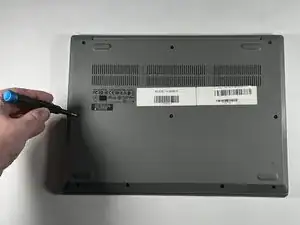
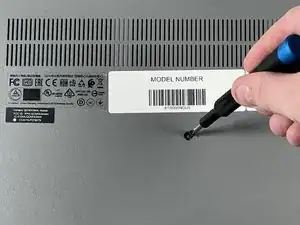
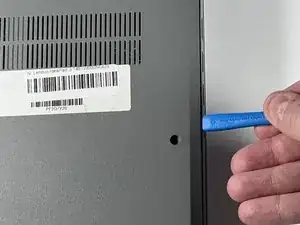
    • Remove the four 4 mm screws using a Phillips #00 screwdriver.

    • Throughout this repair, keep track of each screw and make sure it goes back exactly where it came from.

  2. ollSFvSJLAKZ4oQM
    ollSFvSJLAKZ4oQM
    aBBOHQLNtML4K4ZX
    ZyeDwkQKlyydHDLp
    • Pry up the sides of the back case using the iFixit opening tool. Then, lift to remove.

    • You may hear snapping when removing the panel. This is normal!

  3. uNF6ojCtUOS3iVyZ
    uNF6ojCtUOS3iVyZ
    vtjwbO4OQJDZDHxj
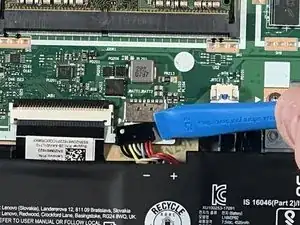
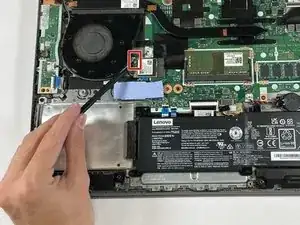
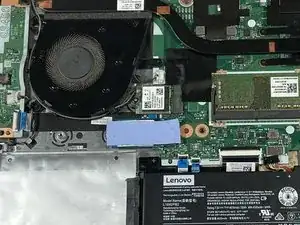
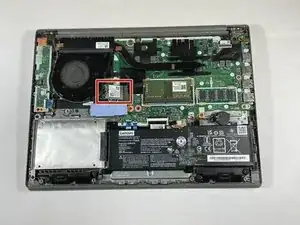
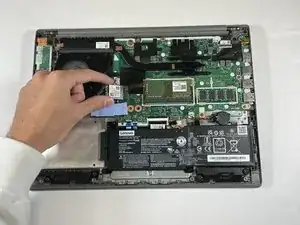
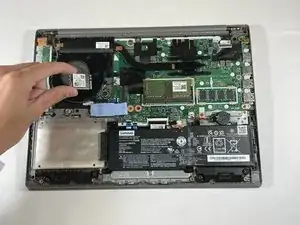
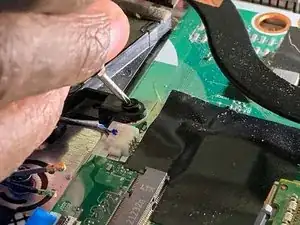
    • Use your fingernail or an opening tool to gently pull out and disconnect the battery pack cable.

    • Do not pull on the cables.

  4. NJwIEsxKNb1ZkioW
    NJwIEsxKNb1ZkioW
    DjtSHagAvHDCOy5s
    • Use the spudger to remove each cable from the Wi-Fi card, one cable at a time.

    • The cables do not need much force to be removed.

  5. bdeHmt13wmHfZhbj
    bdeHmt13wmHfZhbj
    EKsRZfRM1kqafheb
    ZUArLLeX4gHWgveB
    • Remove the single 2 mm screw using a Phillips #00 screwdriver.

    • Try not to press to hard down on the computer to avoid damage.

  6. CqEt1BkUJQGPWyxf
    CqEt1BkUJQGPWyxf
    sDhxFYsCXmiXaodG
    xCZRtMjmqZipHWPK
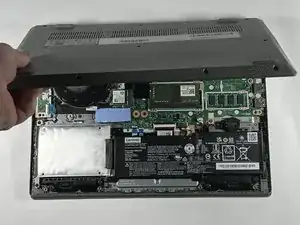
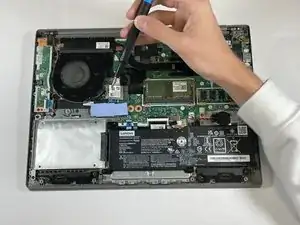
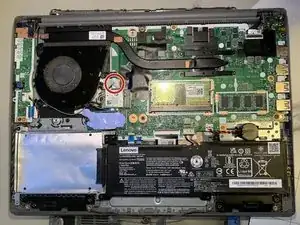
    • Pull the card away from the housing capsule on the right side of the Wi-Fi card to remove it from the laptop.

    • Make sure no cables are still connected or wrapped around the Wi-Fi card when removing.

  7. gvykeJW1wUUeBjgv
    gvykeJW1wUUeBjgv
    EtK53C14JGYfMQdM
    • Use your fingernails to gently "walk" the fan connector out of its motherboard socket.

    • Be gentle while unplugging the connector. Using too much force may damage the computer.

  8. ljqZ5K3VfUAT6VIl
    ljqZ5K3VfUAT6VIl
    Pq5CEciKWSWHsboC
    • Remove the three 5.5 mm screws that secure the fan with the Phillips #0 screwdriver.

  9. BKDngcblEnmBGSrl
    • Unwrap the wires from around the outside of the fan.

    • Remove the fan.

Conclusion

To reassemble your device, follow the above steps in reverse order.
Take your e-waste to an R2 or e-Stewards certified recycler.
Repair didn’t go as planned? Try some basic troubleshooting or ask our Answers community for help.

David Richey

Member since: 19/09/24

97 Reputation

0 comments