
Introduction
The charging port is one of the most frequently used and worn-out components of your device. If your Lenovo IdeaPad Flex 3 Chromebook (11M735) stops charging due to a damaged port, this guide will walk you through the replacement process, ensuring your device stays powered and functional.
Before starting, ensure your device is powered off and unplugged to prevent electrical hazards. You’ll need a small Phillips-head screwdriver, plastic prying tools, and a steady hand to handle delicate internal components. Be mindful that opening your device may void its warranty, and some screws are hidden or require careful reassembly. This guide will also help you identify key motherboard connections to avoid accidental damage.
-
-
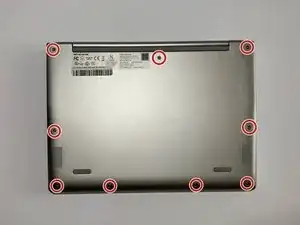
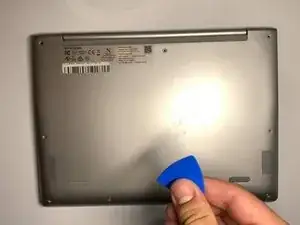
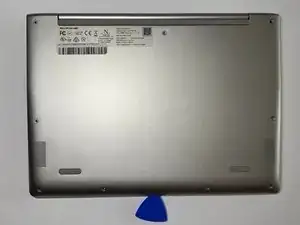
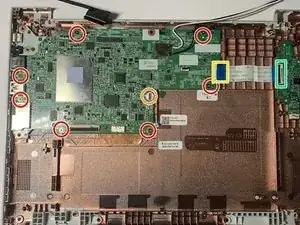
Start with your PH00 screwdriver and remove all of the 7x(M2x4.5mm) indicated screws. These screws keep the screen in place. Once removed, take the screen off.
-
The marked cord needs to be disconnected too, this is the screen cord to the motherboard.
-
-
-
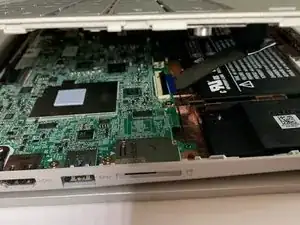
There are 9 sets of screws (M2x4) that secure the motherboard in place, which need to be removed. One screw is hidden under a small Lenovo sticker, marked in orange. Removing the sticker will reveal that the motherboard has been repaired.
-
The two rectangles represent cords that connect the main motherboard to the side motherboards. For our purpose, disconnect the cord marked in blue.
-
-
-
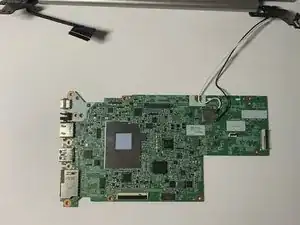
After completing the last step, you can now easily remove the motherboard.
-
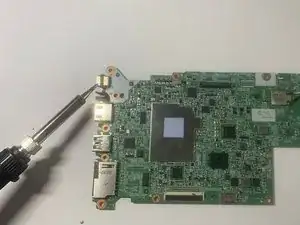
Plug in your soldering iron and set it to approximately 350°F.
-
Flip the motherboard over and carefully desolder the small holes using the tip of your heated soldering iron. This will melt the solder, allowing you to remove the USB-C port.
-
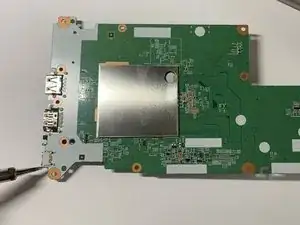
Position the new USB 3.1 Type-C 16-pin female connector in place, then reheat the solder to secure it to the motherboard.
-
-
-
Plug the battery back into the motherboard. Carefully snap the back cover into place. Reinstall all screws to secure the cover. Plug in your charger and check if the Chromebook powers on and charges properly. If everything works, you're done!
-

To reassemble your device, follow the instruction.