Introduction
This guide shows you how to replace the I/O board on your Lenovo Legion Y520-15IKBN. If your Lenovo Legion Y520-15IKBN is experiencing issues with its I/O Board, such as malfunctioning USB ports or audio jacks, this guide will walk you through the process of replacing the I/O Board. The I/O Board, also known as the Input/Output Board, is a crucial component responsible for managing various external connections on your laptop, ensuring seamless interaction with peripherals such as USB drives, headphones, and external displays. If you're encountering problems with these ports, replacing the I/O Board can often resolve these issues and restore full functionality to your device.
Before you begin this repair, turn off your laptop and unplug it from the charging adapter. It is also a idea to remove or disconnect the battery from the motherboard to reduce the chance of damage to your device. Additionally, take anti-static precautions such as using an anti-static wristband and mat to prevent damage to electronic components.
-
-
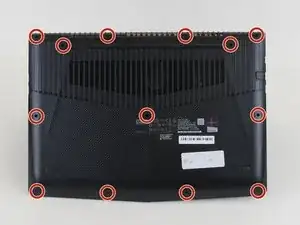
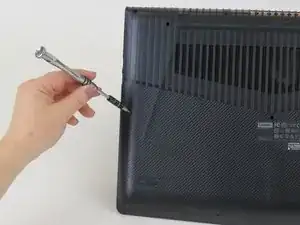
Remove the thirteen 6.5 mm screws from the bottom of the laptop using a Phillips #00 screwdriver.
-
-
-
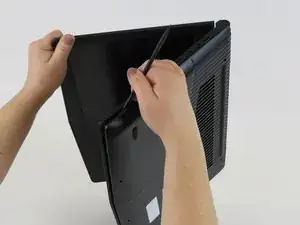
Flip the laptop on its side and use a spudger or a credit card to pry the bottom covering off. To get a better grip you may want to open the laptop slightly.
-
The bottom piece will make popping noises as it is pulled from the laptop.
-
-
-
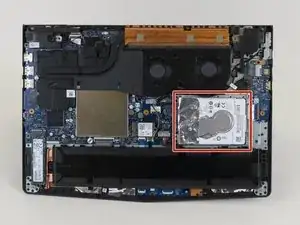
The hard drive is a white square located on the right side of your device.
-
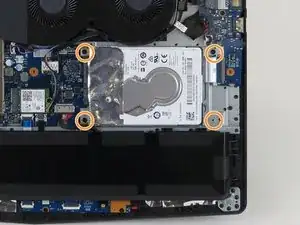
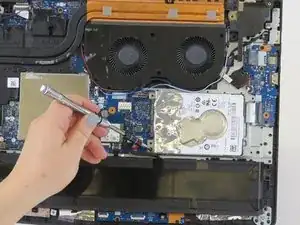
Use a Phillips #00 screwdriver to remove four 4.0 mm screws holding the hard drive in place.
-
-
-
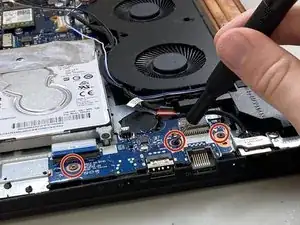
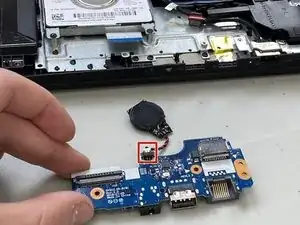
Use the point of a spudger to push on alternating sides of the CMOS connector to "walk" it out of its socket.
-
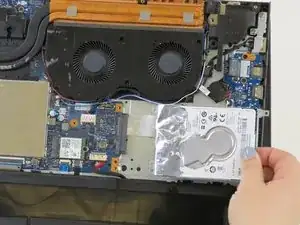
Slide the I/O board out from edge of the laptop to remove it.
-

To reassemble your device, follow these instructions in reverse order. Take your e-waste to an R2 or e-Stewards certified recycler.