Introduction
To ensure optimal laptop performance, a fully functional battery should power the device. If your laptop is struggling to maintain a charge, rapidly depletes its battery, or fails to charge entirely, it may indicate a declining battery health that requires attention. In such cases, a battery replacement might be necessary to restore reliable power.
Before following this guide, consider visiting the troubleshooting page for additional insights. Battery problems can sometimes result from issues with the charger or charging port, rather than the battery itself. By ruling out these factors, you can ensure that battery replacement is the most appropriate solution..
Note:
- Before beginning this guide, make sure to power off your laptop completely and disconnect from any external power source.
- Some parts are small and can be easily lost, so place them in a safe place.
- Damaged batteries can cause fires or other dangerous issues if not properly disposed of. If the battery appears swollen, follow proper procedure to keep yourself safe.
-
-
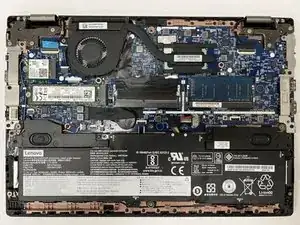
Power off your laptop and disconnect the charger and any peripheries before beginning disassembly.
-
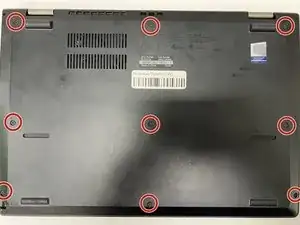
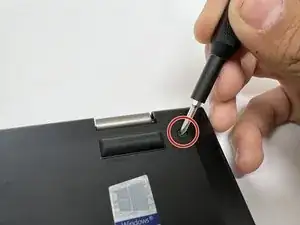
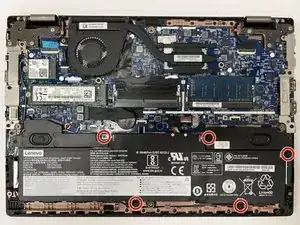
Unscrew the nine 5 mm Phillips #00 screws that secure the lower case.
-
-
-
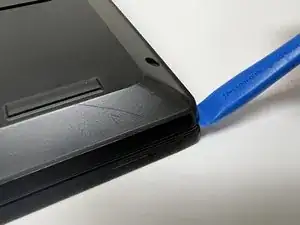
Insert an opening tool in the gap between the lower case and the chassis.
-
Pry around the entire perimeter of the lower case until it fully releases.
-
Lift the lower case up and off.
-
-
-
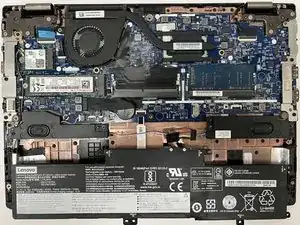
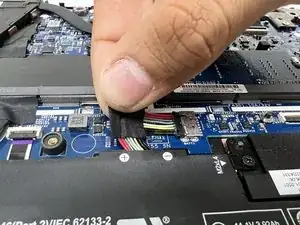
Use your fingernails or two opening tools to gently "walk" the battery connector directly out of its socket.
-


To reassemble your device, follow the above steps in reverse order.
For optimal performance, after completing this guide, calibrate your newly installed battery.
Take your e-waste to an R2 or e-Stewards certified recycler.