Introduction
Need to bring your Lenovo ThinkPad T495s back to life? This repair is essential if your laptop won’t boot, overheats, or has suffered hardware damage like spills or impact. Replacing the motherboard resolves issues like power failures, broken ports, or major system malfunctions.
No advanced skills like soldering are needed, but basic tech knowledge and careful handling of components are key. Uniquely, this repair requires precise attention to detail, including reapplying thermal paste for optimal cooling.
This guide will walk you through replacing the motherboard in the Lenovo ThinkPad T495s (Model 20QJ/20QK), ensuring your laptop regains optimal functionality. The T495s is also referred to as the AMD variant of the ThinkPad T490, offering robust performance for professionals and students alike.
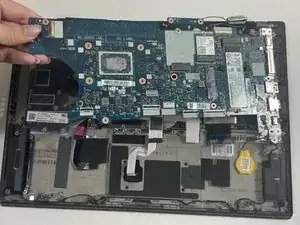
The motherboard is the heart of your laptop, connecting all hardware components, including the CPU, RAM, and storage. It facilitates communication between these parts, ensuring your device operates smoothly.
Tips and warnings before you begin:
- Always disconnect the battery and ensure the device is powered off to avoid electrical hazards.
- If your battery is swollen, handle it with care and follow proper disposal guidelines to prevent fires.
- Use ESD-safe tools to protect sensitive components from electrostatic discharge.
- Back up your data before starting, as you will need to reconnect all storage devices during this process.
- Properly dispose of any damaged parts, following local e-waste regulations.
Follow this guide to quickly restore your laptop back to its performance and functionality!
-
-
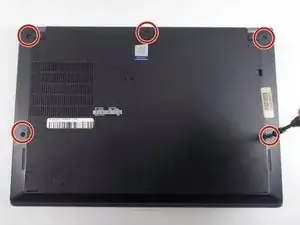
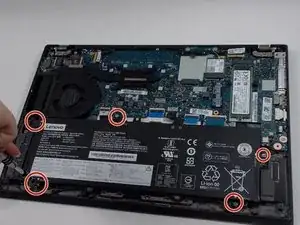
Remove the five 4.5 mm screws with a Phillips #1 screwdriver.
-
There are plastic tabs at the bottom of the battery, so pull it slightly forward with your hands, toward the motherboard, before lifting straight up.
-
-
-
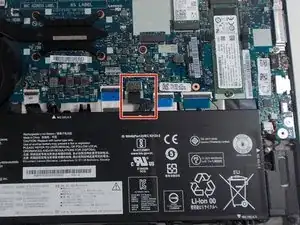
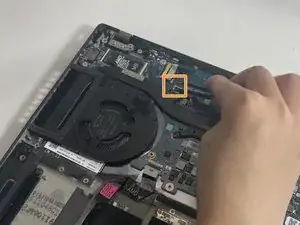
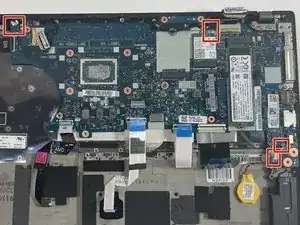
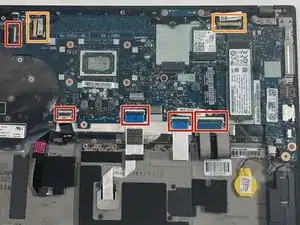
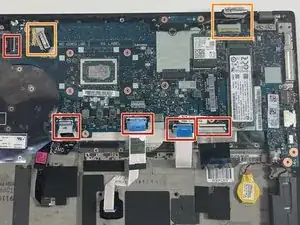
Use the iFixit Opening Tool to flip up the small locking flaps on the five ZIF ribbon cable connections attached to the motherboard. The ribbon cables easily release from their sockets with almost no force.
-
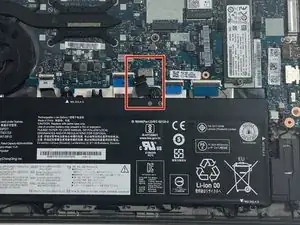
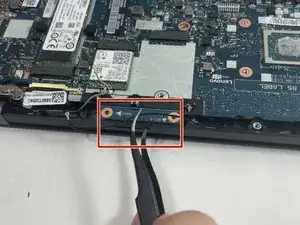
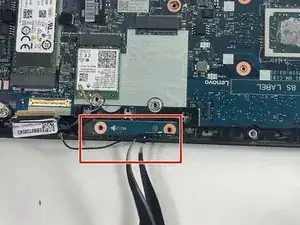
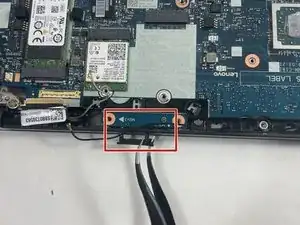
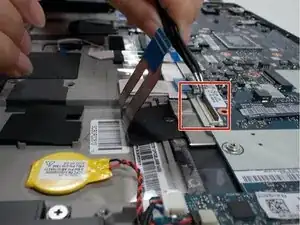
To disconnect the two display cable connectors, gently push the tip of a spudger under the clip. Then, swing the clip over to the other side of the socket, so that it lays flat against the cable.
-
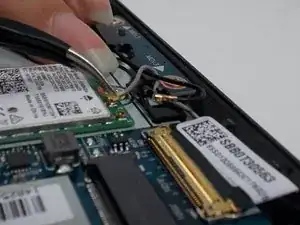
Holding the clip and cable together, gently pull in the direction of the cable to remove the connector from its socket.
-
-
-
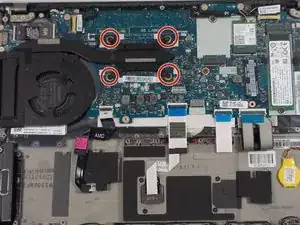
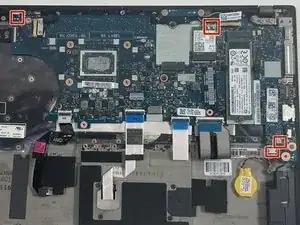
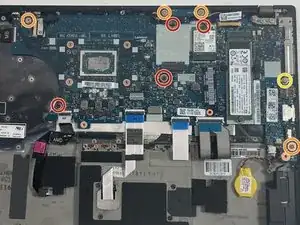
Use a Phillips #1 screwdriver to remove the four 2.2 mm screws.
-
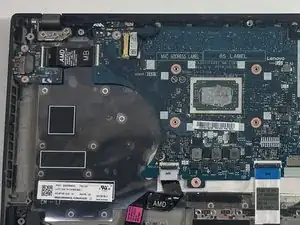
Use a Phillips #1 screwdriver to remove the four 3.0 mm screws.
-
Use a Phillips #1 screwdriver to remove one 4.5 mm screw.
-


To reassemble your device, follow these instructions in reverse order.