Introduction

This simple guide will help you replace the display from your Lenovo T530.

  1. 2PrjuIlkIpDCKFeI
    2PrjuIlkIpDCKFeI
    NmufGfTBGGZQT1Tb
    • Ensure that the laptop is disconnected from the wall charger, and that the laptop is entirely powered off before following any of the steps below.

    • Flip your laptop upside down, so that the keyboard is facing down.

  2. taReXrsbNj14l1iu
    taReXrsbNj14l1iu
    GoFyZALGIY3b6k1d
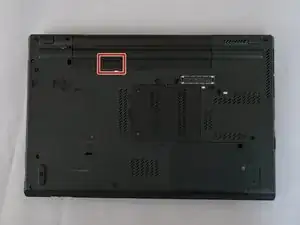
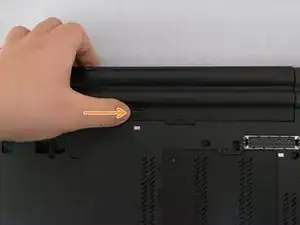
    • Locate the latch located on the battery near the top of the laptop.

    • Using your finger, slide the latch to the right-most (Unlocked) position.

    • None of this should require an exhuberant amount of force.

  3. OYXXXGYitNL2LT4B
    OYXXXGYitNL2LT4B
    HPEmEPkAkT63R51G
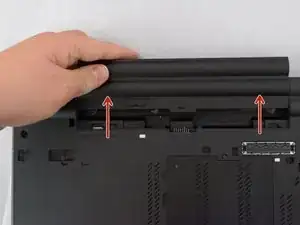
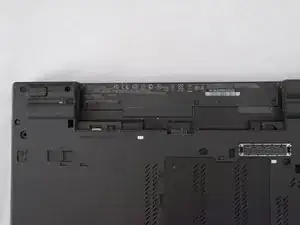
    • You can now pull the battery away from the laptop. When pulling the battery out, ensure to pull it out straight.

  4. SdF63KxIFHKdFfc2
    SdF63KxIFHKdFfc2
    3K3hHRSabOAZZhww
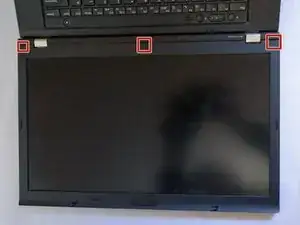
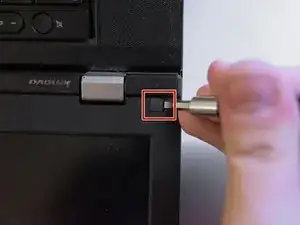
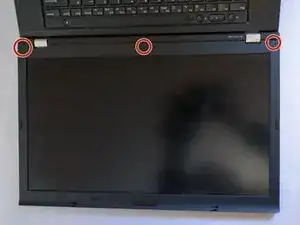
    • Using a prying tool, such as a guitar pick, flathead screwdriver or your fingernail, peel the three covers highligted in red off.

    • Failure to both disconnect the laptop from any power sources and removing the external battery will result in the backlight fuse burning, which is difficult to remove.

  5. AUJJhMDIMiR6MLfU
    AUJJhMDIMiR6MLfU
    HMoD3abl1HPYWkNF
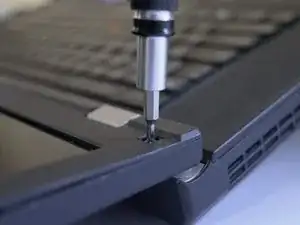
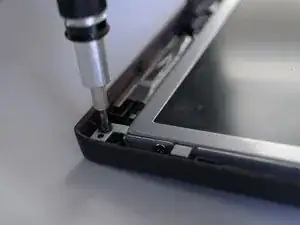
    • Using a Phillips #00, take out the three screws highligted in red that were under the screw covers.

  6. F3cy3ICQoJQxTIBY
    F3cy3ICQoJQxTIBY
    HUH4oINvYSRSIdDX
    eYhJj4D2BiftP4MR
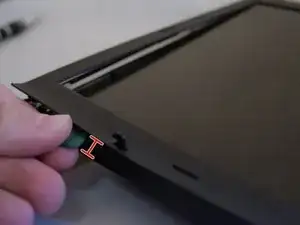
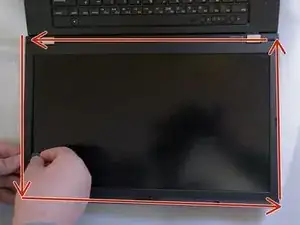
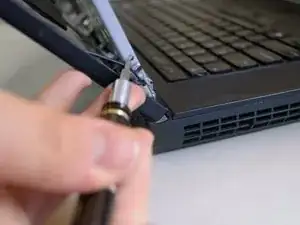
    • Using a guitar pick, flathead screwdriver, or your fingernail, stick your tool of choice in the gap between the bezel and the housing of the display.

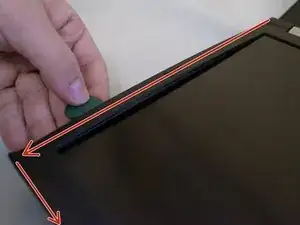
    • Pry the gap open all around the bezel.

  7. HfMBudbfDVUbAE2Q
    HfMBudbfDVUbAE2Q
    TWMKwDDTmgZDADsv
    • Using your tool of choice, pry the bezel up and away from the display.

    • Be careful as you do not want to damage the clips.

  8. kutnYmMH33iMnoXT
    kutnYmMH33iMnoXT
    wdTrnBbIubkcCHqg
    • Using a Phillips #00, remove the two screws highlighted in red.

    • Pay extreme attention to not puncture, cut or disconnect any of the cables.

  9. AoZ6cUiFXQy1QuPc
    AoZ6cUiFXQy1QuPc
    vPC6pSHtGMVTRJyw
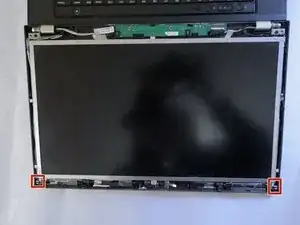
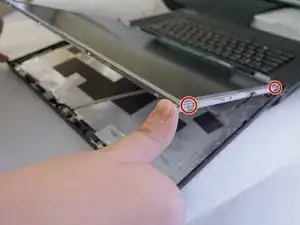
    • Remove the four screws using a Phillips #00, there are two pairs of the two highlighted screws.

    • Once two of the four screws are removed, hold the bottom side of the screen with your hand, as the screen could fall down due to it being unsecured.

  10. 5VRQMTjiFs5VbBmT
    5VRQMTjiFs5VbBmT
    lOC6oFWaoEAcUh22
    LRGWpb1hSiZ4Xxe6
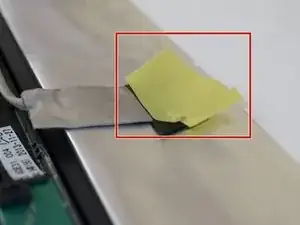
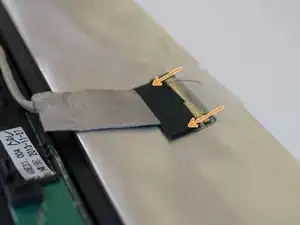
    • Remove any tape that is covering the ribbon connector, which is located at the bottom of the panel.

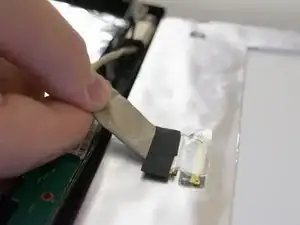
    • Using your finger, gentlly disconnect the ribon cable.

    • You should not need to apply very much force to disconnect the ribbon cable.

Conclusion

To reassemble your device, follow these instructions in reverse order.

Albert Stoynov

Member since: 12/09/23

1257 Reputation

0 comments