Introduction
This guide will show you how to replace the touchpad of your Lenovo ThinkPad X390 Yoga.
-
-
Safety Procedures:
-
Shutdown and Disable Power Supply: 1. Disconnect adapter. 2. Press F1 key to enter BIOS setup powering up Laptop. 3. Go to Configuration menu. 4. Select Power and press Enter. 5. Highlight Disable Built-in Battery and press Enter. 6. Confirm by selecting "Yes" and pressing Enter. 7. System will power down, and disabled battery.
-
Electrostatic Discharge (ESD) Safety: 1. Ground yourself to prevent static damage by wearing an ESD wrist strap or touching a grounded metal surface.
-
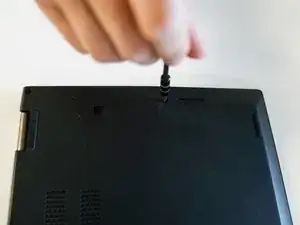
Remove the SIM Card Tray 1. Insert a straightened paperclip into the hole on the SIM card tray. 2. Gently push to eject and remove the tray.
-
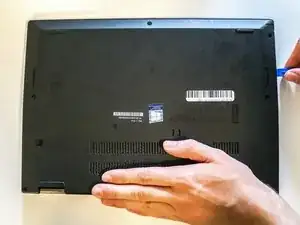
Use a Phillips #1 screwdriver to unscrew the captive screws from the back of the device. The screws should not be removed from the back panel, so don't try to force them out.
-
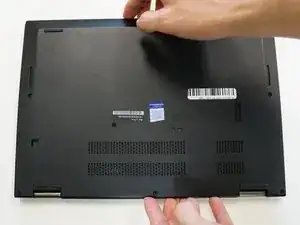
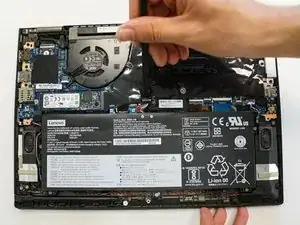
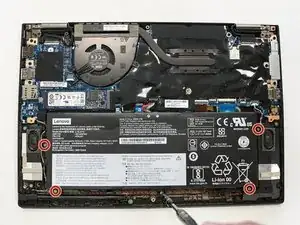
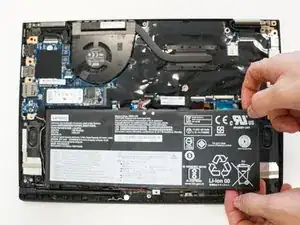
Disassemble the Laptop: Remove the Bottom Cover and Battery: 1. Loosen five captive screws on bottom of laptop. 2. Use a non-metallic pry tool to carefully loosen clips along the rear cover. 3. Lift and remove bottom cover. 4. Disconnect internal battery cable from system board. 5. Remove five screws securing the battery and lift it out of system.
-
-
-
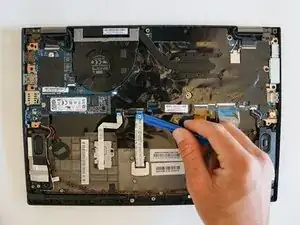
Use the iFixit opening tool to remove the back case by entering the tip of the tool into the seam and prying up.
-
Disconnect Screen Cables: 1. Disconnect the LED camera cable and remove it from its guide. 2. Remove the antenna cables from their guides. 3. Disconnect the LCD cable and remove it from its guide. 4. Remove the Antenna Cables from the guide which is next to LCD cable. 5. Remove three screws from each hinge.
-

To reassemble your device, follow these instructions in reverse order.