
Introduction
If your Lenovo ThinkPad Helix is suffering from extreme problems, such as hardware failure or being completely unresponsive, replacing the motherboard will get your device up and running like new again. This step-by-step guide will walk you carefully through the process.
Replacing the motherboard at first seems daunting, but once guided through with the right tools and safety, the process is doable and rewarding. Doing this repair yourself not only saves money on professional services but also equips you with some pretty useful technical skills.
Condensed Safety Tips for Successful Repair:
- Power Off: Completely shut down and unplug your laptop.
- Static-Free Environment: Work on a clean, static-free surface and use an anti-static wrist strap.
- Handle with Care: Avoid rough handling; touch components only by their edges.
- Organize Parts: Use a container or magnetic mat to keep screws and small parts secure.
- Avoid Forcing Parts: If stuck, double-check for hidden screws or clips.
- Ensure Ventilation: Work in a well-ventilated space to prevent overheating.
-
-
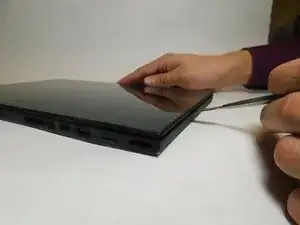
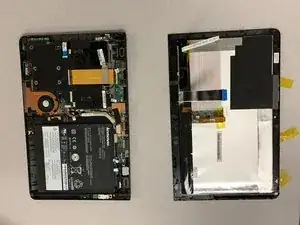
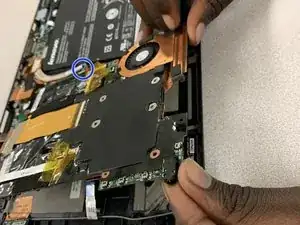
Using a plastic opening tool or opening pick, gently pry the screen off.
-
Once you're able to lift a little bit of the screen away from the tablet, work your way around until screen is separated from tablet. Stop for step two.
-
-
-
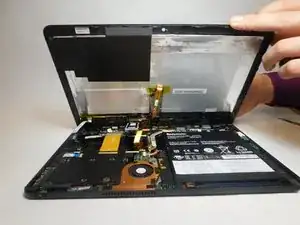
Lift the screen up slowly.
-
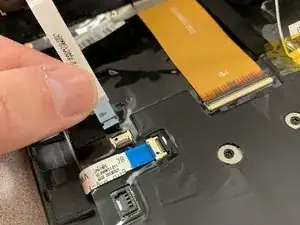
Open the clips of the ZIF connectors and gently grab the cable to pull it out.
-

To reassemble your device, follow these instructions in reverse order.