Introduction

Impact damage, closing the laptop with excessive force, and scratches on the camera lens can cause the camera to break or develop bad image quality. This guide shows how to replace the camera within the Lenovo V14-IIL laptop. Be sure to remove small parts carefully.

Before using this guide, make sure to review the Lenovo V14-IIL troubleshooting page to review if there may be a solution that does not require component replacement.

Make sure to power off your laptop completely and disconnect from any external power source before beginning the process.

  1. gEttLQmVxgcFVQNl
    gEttLQmVxgcFVQNl
    ChAHCmSN6ZK1PRlk
    • Make sure the laptop is powered off and unplug all cables before beginning any repair.

    • Flip your laptop over and place on a flat surface so you can access the screws on the base cover.

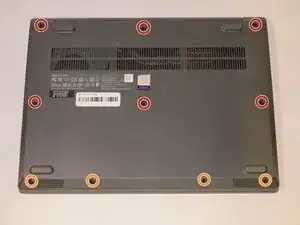
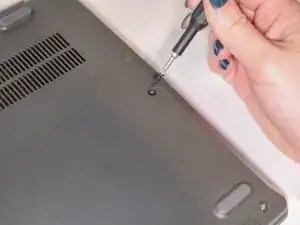
    • Remove the six 7 mm screws from the back panel of the laptop using a Phillips #0 screwdriver.

    • Remove the four 4 mm screws from the bottom edge of the laptop using a Phillips #0 screwdriver.

  2. BE3BdyMabPDNScRf
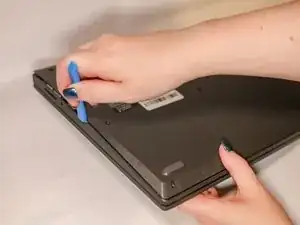
    • Use an iFixit opening tool to pry apart the case by sliding it along each side of the laptop.

    • You may need to move the tool to different locations to fully release the back cover.

  3. 2OpKYWWtPND6DJbv
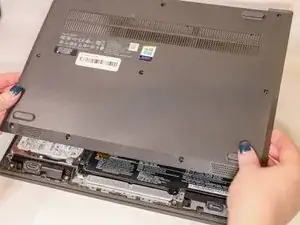
    • Lift away the back panel and set it aside.

  4. kfPgblE21dp1JaaH
    kfPgblE21dp1JaaH
    rxMeLUJoS2T3mgC6
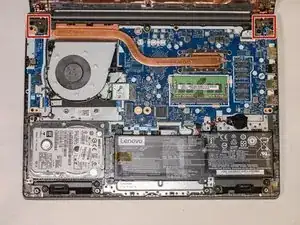
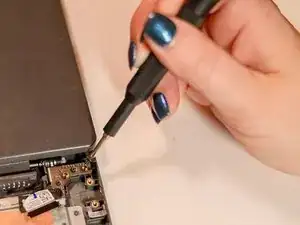
    • Using a Phillips #0 screwdriver, remove the four 5 mm screws from the hinges of the laptop.

  5. sjpkvGKZaMXZGv2T
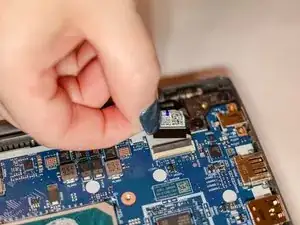
    • Lift up the latch and gently pull the display cable free.

  6. D6PvqTLXHRYReSmI
    D6PvqTLXHRYReSmI
    sM3XxYlGRE2u1MEF
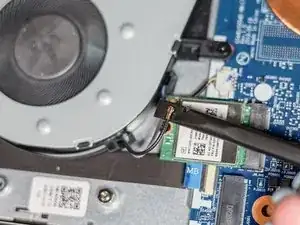
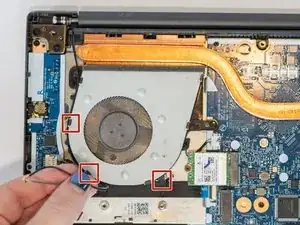
    • Using the spudger, disconnect the two wireless LAN cables (black and gray) from the wireless LAN card.

    • Remove the LAN cables from the three brackets on the fan.

  7. ubZvXuBhbVmTgiPt
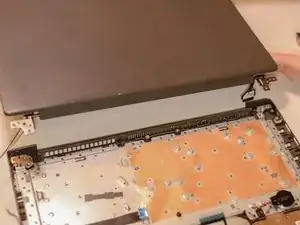
    • Ensure that all cables and hinges are detached.

    • Lift the display assembly away from the base.

  8. 2WqKvRdSTkF2ZGaW
    2WqKvRdSTkF2ZGaW
    RIayX4dpZMEALrRO
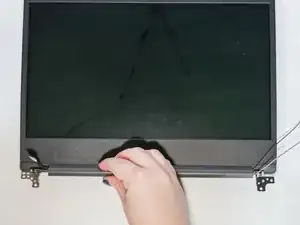
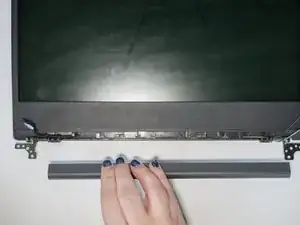
    • Slide the cable hinge cover to the right.

    • Pull the part away from the screen.

  9. lugfytVnZnVkWjQr
    lugfytVnZnVkWjQr
    4hvks1bXASJVGyeC
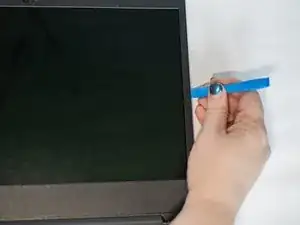
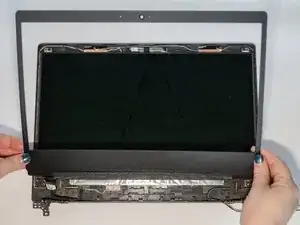
    • Use the iFixit opening tool to separate the bezel panel.

    • Slide the opening tool all the way around to loosen the bezels on all sides.

    • You may need to use the tool to gently loosen the adhesive tape.

    • Lift away the bezel panel.

  10. RgJDG3swe6i24Bsp
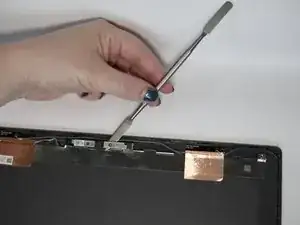
    • Gently pull out the stretch adhesive tape.

    • Make sure to pull from hinges to the top of the LCD panel.

    • You may need to use the metal spudger to help loosen the adhesive.

  11. Xjna4BIdoxbFbqTY
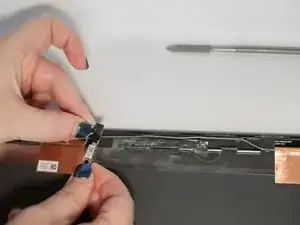
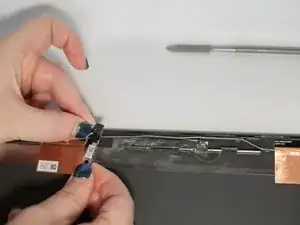
    • Disconnect the wire from the back of the integrated camera and lift the camera away.

Conclusion

To reassemble your device, follow these instructions in reverse order.
Sydney Askins

Member since: 16/01/24

378 Reputation

0 comments