Introduction

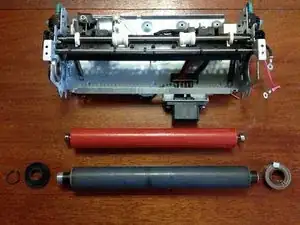
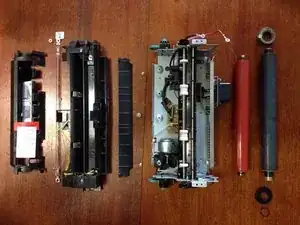
Replace the upper heated roller and lower pressure roller within the fuser unit for Lexmark printer models T630 T640 T642 T644 T650 T652 T654 X651 X652 X654 X656 X658.

This guide starts after the fuser unit has been removed from the printer.

    • A damaged pressure roller leads to paper jams.

    • A damaged non-stick coating on the heated roller causes dark marks and double images. Toner that sticks to the non stick coating on the heated roller makes an after-image or marks 94mm (3.7 inches) below the original dark print.

  1. NKcMYmeQCwJIvuiE
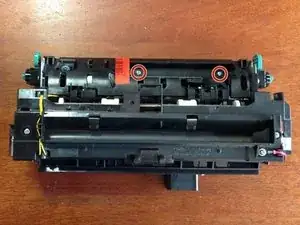
    • Remove these two 6mm Philips #2 screws then remove the front cover

  2. wiyXO5sIwKpeoHne
    wiyXO5sIwKpeoHne
    CUtGCKXQau1aHaJX
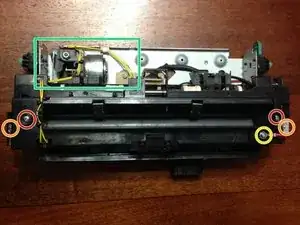
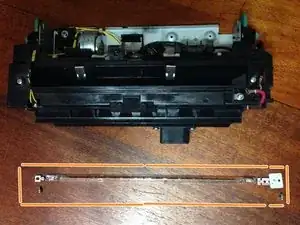
    • Remove these two 6mm #2 screws from the two ends of the heating element and carefully withdraw the glass heating element.

    • The glass heating element is shown in the second picture.

    • Remove these two 6mm #2 screws attaching the top cover.

    • Remove this screw attaching the red power cable.

    • Unplug the pair of yellow wires and unhook them from the hooks tucking them in place.

    • The top cover can now be removed.

  3. HN1JYGOqlJPAQM1M
    HN1JYGOqlJPAQM1M
    4CqCkIZE4ELTlZIb
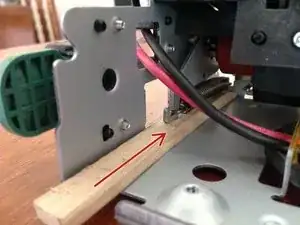
    • Insert a wedge under each of the two spring support arms to lift the two springs.

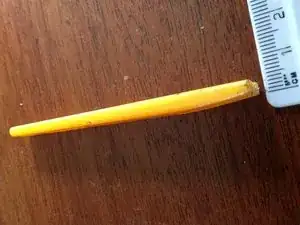
    • The wedges should remain in place while the fuser unit is being stored. Otherwise the pressure from top roller will make a permanent indentation in the soft pressure roller.

    • The second picture shows a suitable wedge. This example was made from a toothbrush handle.

    Bonjour Le tutoriel est super mais savez vous pourquoi il fait des câles ?

    David

    David Co -

    I think David Co is asking why the wedges are needed. The strong springs pull the two rollers together hard. The wedges lift the springs which separates the two rollers. This serves two purposes:

    a) It would not be possible to remove the rollers while they were still under pressure from the springs.

    b) When the fuser is in storage the wedges prevent the springs making a flat spot where the two rollers are pulled together.

    You could unhook the springs instead of making wedges.

    When the fuser is in the printer, the printer wakes up and rotates all its rollers every few minutes which prevents flat spots forming.

    David42 -

    Thank for reply David.

    I understand your answer.

    The issue is the next one, after changing the orange roll (which has the lamp inside) the printer indicate an error. (I tried on 2 fusers)

    And In my opinion it is link to the position of something but I don't know what.

    It stops the calibration process (and I get 122.01 and 122.08 error code on lexmark)

    Have a nice day

    David Co -

    David Co

    I cannot suggest why you would get an error code 122.01 or 122.08. That error code is not listed in the service manual.

    I do not understand why you say the lamp goes inside the orange roller. On all the Lexmark T650 fusers I have seen, the roller with the heater lamp inside is grey or dark blue. This sits above the solid orange pressure roller. It would be impossible to put a lamp inside the solid orange pressure roller. On the pictures in the guide, the heater lamp goes inside the grey roller.

    David42 -

    It is not for the same models of printer, it is a C780 lexmark.

    But I suppose that the process is the same, except that I get an error code :)

    Thanks to try ^^

    David Co -

    The Lexmark C780 fuser is different from the fuser I described in this guide. I have never dismantled one or seen a guide.

    The C780 service manual offers a very large range of error causes: Error code 122.01 indicates that the fuser heated up too quickly or not quickly enough. Error code 122.01 may also indicate a problem in the fuser assembly with the hot roll bearings, hot roll thermistor, LVPS, or the system board. ... If error code 122.08 displays, the printer has detected a problem in the fuser hot roll lamp circuity, fuser hot roll thermistor, system board, or LVPS fuser control circuits.

    I would start by checking the heated lamp is not open circuit. There might also be a safety device near the hot roller that melts to break the circuit if the fuser overheats. I once found such a device had failed open circuit. Beyond those two suggestions the printer is too far outside my experience for me to help you further.

    David42 -

  4. vJ5n12ZcBgT5dmE4
    vJ5n12ZcBgT5dmE4
    LnhQLnQ2WRstL3eB
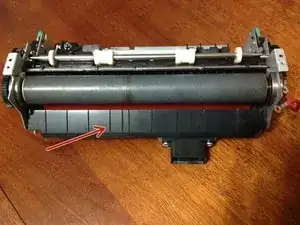
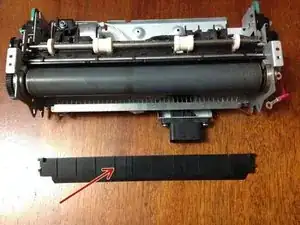
    • gently bend this paper guide to remove it.

  5. ZCUZVEvlAKrbVZUg
    ZCUZVEvlAKrbVZUg
    C4qeEinv6HsDY5kR
    NdVJLyZHStAZWHEo
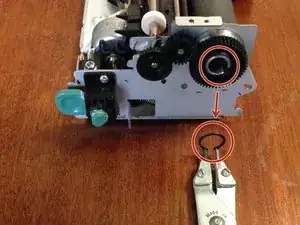
    • Use circlip pliers to remove the circlip attaching the cogwheel to the top roller.

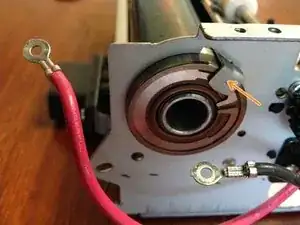
    • Slide this metal catch upwards to release the bearing from its holder. Remove the bearing.

    • The top roller can now be removed.

    • The red pressure roller is now visible with its bearings resting in the holder at each end.

  6. VCXrnBVVgFEsEoAU
    VCXrnBVVgFEsEoAU
    UkokvZmoFifcaQRP
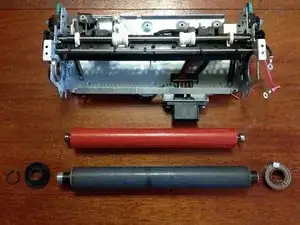
    • The pressure roller can now be lifted out.

Conclusion

To reassemble your device, follow these instructions in reverse order.
David42

Member since: 11/02/18

1468 Reputation

0 comments