Introduction
Use this guide to remove or replace the antenna bar in a Late 2020 MacBook Air (M1).
-
-
If your MacBook is running Big Sur v11.1 or later, disabling Auto Boot may not work. You can proceed normally, but make sure to disconnect the battery as soon as you're inside.
-
Use a P5 driver to remove the following screws:
-
Two 7.9 mm screws
-
Two 7.3 mm screws
-
Six 2.6 mm screws
-
-
-
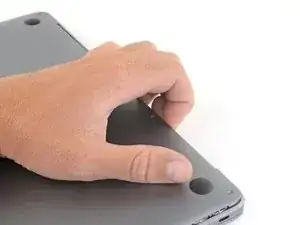
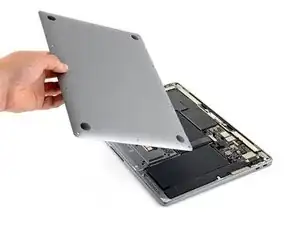
Wedge your fingers between the display and the lower case and pull upward to pop off the lower case.
-
Remove the lower case.
-
Set it in place and press firmly to engage the two hidden clips underneath. You should feel and hear them snap into place.
-
-
-
Use the flat end of a spudger to pry up and unlatch the metal locking arm on the battery connector.
-
Lift straight up on the metal locking arm to pull the battery connector out of its socket on the logic board.
-
If necessary, push the rear, wire side of the connector into place first, then rock the front of the connector into place.
-
-
-
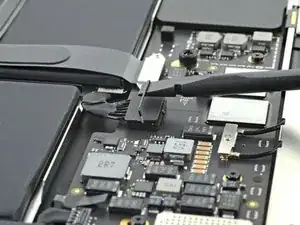
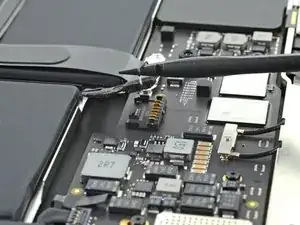
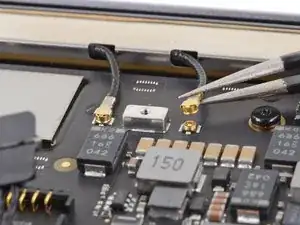
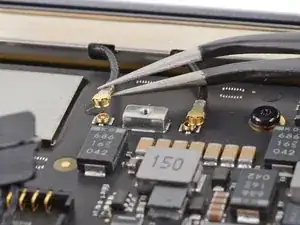
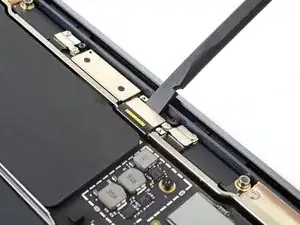
Use a pair of tweezers to grip the antenna connector close to its base.
-
Pull straight up to disconnect the cable.
-
Repeat for the second antenna cable.
-
-
-
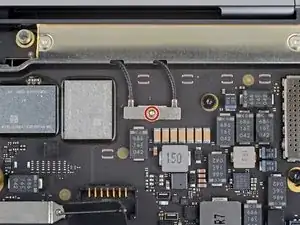
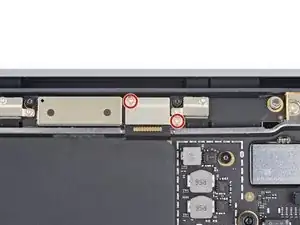
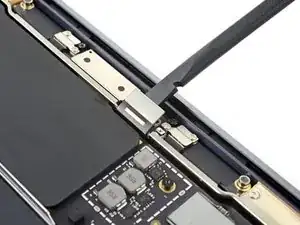
Use a T3 Torx driver to remove the two 1.5 mm screws securing the display cable connector cover.
-
-
-
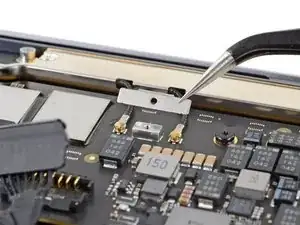
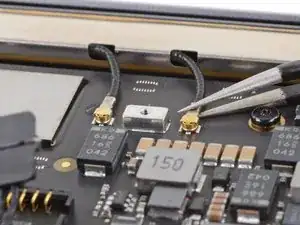
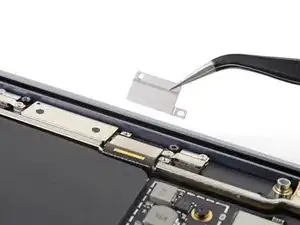
Use the flat end of a spudger to pry the display cable connector straight off of the antenna board to disconnect it.
-
-
-
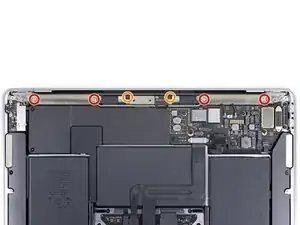
Use a T5 Torx driver to remove the six screws securing the antenna bar:
-
Four 7.4 mm silver screws
-
Two 4.7 mm black screws
-
-
-
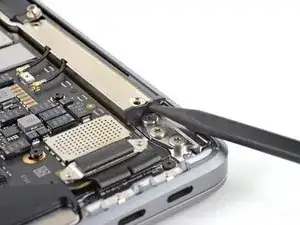
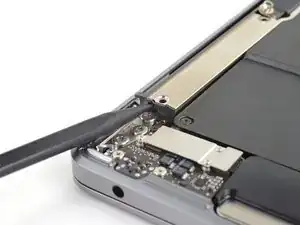
Insert the pointed end of a spudger into the gap between the antenna bar and display hinge.
-
Pivot the spudger against the hinge to pry up the end of the antenna bar.
-
Repeat for the other end of the antenna bar.
-
-
-
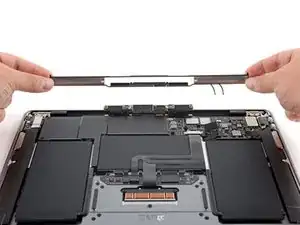
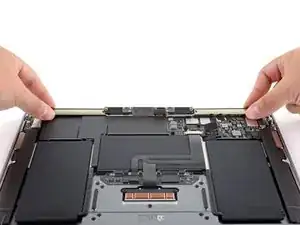
Use your fingers to pry the antenna bar straight up and away from the case.
-
Thread the antenna board through the opening in the middle of the antenna bar.
-
Remove the antenna bar.
-


Compare your new replacement part to the original part—you may need to transfer remaining components or remove adhesive backings from the new part before installing.
To reassemble your device, follow the above steps in reverse order.
Once you've completed your repair, your laptop may not power back on until connected to power.
Take your e-waste to an R2 or e-Stewards certified recycler.
Repair didn’t go as planned? Check out our Answers community for troubleshooting help.

ESD safe mat, plugged into ground, with a wrist strap, also grounded, are the best best to protect the logic board.
Robin Ray -
Re-Assembly Tip: Before putting the screws back in, snap the lower case on and test to make sure the MacBook powers up. When I first re-assembled, I became very nervous I did something wrong because it would not power on. It turns out I just needed to plug the laptop into a power source for it to power up (despite having a good charge before disassembly). It was the perfect way to test the new USB-C ports!
Austin -
Big points to this one, especially for mentioning needing to plug the laptop in. The bottom case needs to be screwed in and laptop needs to be plugged in before it will boot.
Bayden Yazalina -
Wiha 4PL driver for these screws.
Greg Worrel -
Printing out all the images from this Ifixit guide prior to starting and using duct tape help me keep track of screws.
raju midjdeya -
This Guide has a high chance of not working if an aftermarket display is used as MAC serialization was introduced post ~2023. Likely you will need an original MAC screen replacement and to serialize the display for it to work.
Tron Computers -