Introduction

Use this guide to replace the trackpad in your MacBook Air 15" 2024.

You may need to replace the trackpad if it's behaving erratically, unresponsive to touch inputs, or the cursor movement is inconsistent.

  1. VHSwxVAfVpRANEEM
    VHSwxVAfVpRANEEM
    RdBOkhEeNyU2yrQh
    f3YY51OXlJcifhAq
    • Allow your MacBook's battery to drain below 25% before starting this repair—a charged battery may catch fire if damaged.

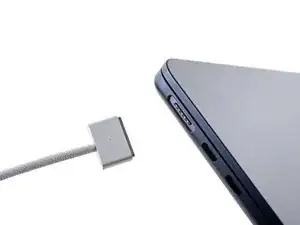
    • Unplug all cables and fully power off your MacBook.

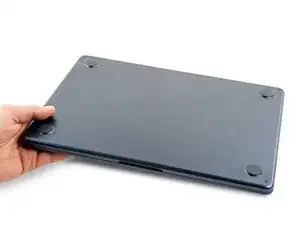
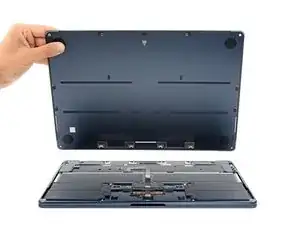
    • Close the display and lay your MacBook upside down. Keep your laptop closed until you've physically disconnected the battery.

  2. VLe1AqG1xhVfa22F
    VLe1AqG1xhVfa22F
    MSqb2Idxp2QYIk6B
    • Throughout this repair, keep track of each screw and make sure it goes back exactly where it came from.

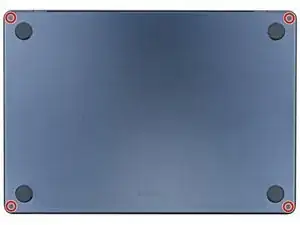
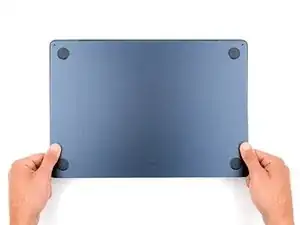
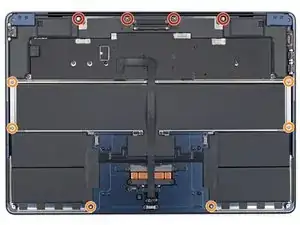
    • Use a P5 pentalobe screwdriver to remove the four 6.4 mm‑long screws securing the lower case.

  3. OLHZMoIOgBUBInCQ
    OLHZMoIOgBUBInCQ
    oW1DXmHu2xTSOAUg
    npMpHdfBbNnIjgXL
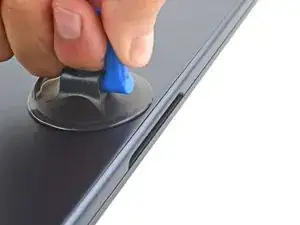
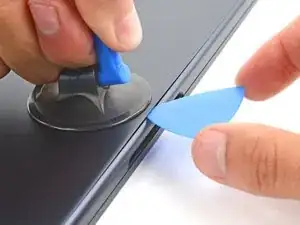
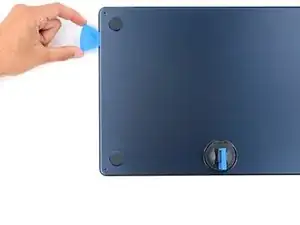
    • Apply a suction handle to the center of the lower case's front edge.

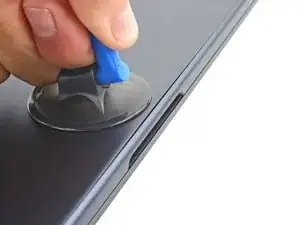
    • Pull up on the suction handle to create a gap between the lower case and the frame.

    • Insert an opening pick into the gap.

  4. icfXdnPCDqSNIpIL
    icfXdnPCDqSNIpIL
    sXYsTZUJmWdPIOBO
    FsveCnI6mB4o6vdZ
    • During the next two steps you'll feel and hear six snapping clips release. If a clip doesn't release, insert your opening pick farther and try again.

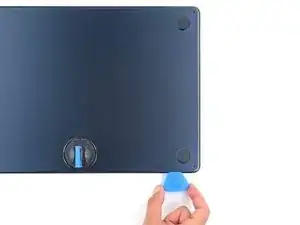
    • Slide the pick to the bottom right corner to release the first clip.

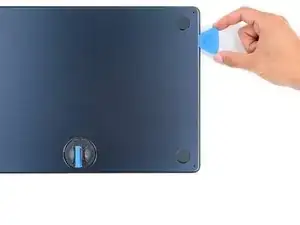
    • Slide the pick around the corner and up the right edge to release the next two clips.

    It is possible to break these off of the lid if you do not understand how they lock. They lock by pressing the lid straight down onto the body, not from the side. If I did it again I would find the clip, and just twist the tool to pull the two halves directly away from each other.

    Geoff Baker -

  5. aOleJq3qgpdhKrNc
    aOleJq3qgpdhKrNc
    ljfTrGXwPbBtFYvF
    3JqJtEyXMAB4RNYM
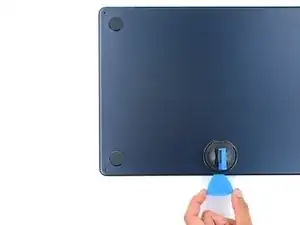
    • Insert the opening pick in the original gap created with the suction handle.

    • Slide the opening pick to the bottom left corner and up the left edge to release the three remaining snapping clips.

  6. yUmINYLGDWUvLWTY
    yUmINYLGDWUvLWTY
    HoTdfbFiP5TOXsTJ
    DN2rEokJGdNDZsQk
    • Four sliding tabs along the back edge of the MacBook firmly secure the lower case. Separating these tabs requires a lot of force—consider using gloves to protect your hands from the sharp edges of the lower case.

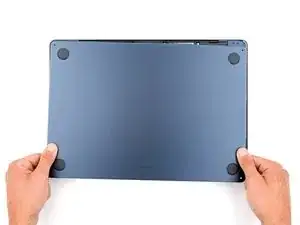
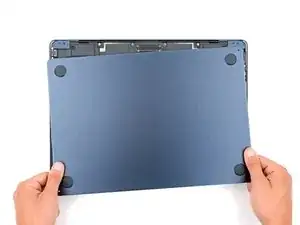
    • Keep the lower case flat to the frame and firmly slide it straight away from the back edge, one corner at a time, to disengage the sliding tabs.

    • Don't pull up until the cover is completely separated.

  7. UNtWUTpBg4ocEXT4
    UNtWUTpBg4ocEXT4
    44XcoVjlMduNTrDf
    BATrXQ5vhaJNbZqC
    • Remove the lower case.

    • During reassembly:

    • Set the lower case in place and align the sliding tabs with the screw heads they slide over. Press down and slide the lower case toward the back edge to engage the tabs—it'll stop sliding as the tabs engage.

    • When one side is engaged, it may push the other out of alignment. Check both sides as you push, there should be no gap along the back edge.

    • Once the lower case is flush with the frame, press down firmly along the perimeter to engage the six snapping clips.

    • You'll hear and feel a distinct click as each clip snaps into place.

  8. P2xxSwq3pQFSde6I
    P2xxSwq3pQFSde6I
    2aJ3AgWMLtqjwJrs
    dRRIdlQLRyRbLycf
    • Use blunt nose tweezers or your fingers to remove the piece of tape covering the battery connector cover.

    • During reassembly, use the leftover adhesive to secure the tape to the cover.

  9. ytD4SCgCAxXVt24f
    ytD4SCgCAxXVt24f
    cejWTHjtXGxlUdlk
    ZBvCsV2PVr1eRnd1
    • Use a 3IP Torx Plus screwdriver to remove the two 1.5 mm‑long screws securing the battery connector cover.

    • Remove the cover.

  10. mBoddjL4FMGvHdAK
    mBoddjL4FMGvHdAK
    SxTDekgXBIIXKMgD
    • Use an opening pick to pry up and disconnect the battery connector.

    • To reconnect a press connector, align it over the socket and gently press down on one side until it clicks into place, then press down on the other side. It might take a few tries to align the connector.

  11. sauZMAYWojBrwBjW
    sauZMAYWojBrwBjW
    tMpetYevVNjXJgYV
    • A small piece of black tape hides two trackpad cable cover screws.

    • Use tweezers or your fingers to remove the tape from the trackpad cable.

    • During reassembly, use the leftover adhesive to secure the tape to the cover.

  12. OHehkGT4BcGACkcQ
    OHehkGT4BcGACkcQ
    TMMcQtaRDpB2wGXv
    • Light adhesive secures the trackpad cable to its metal cover.

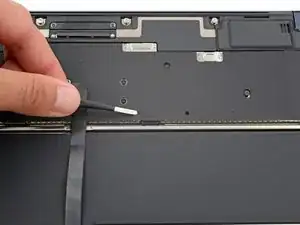
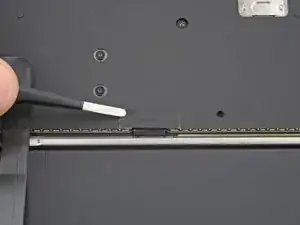
    • Pull the trackpad cable away from its cover to separate the adhesive securing it.

    • During reassembly:

    • Use the leftover adhesive to secure the trackpad cable to the cover. If the cable doesn't stick, use double-sided tape to secure it.

    • If you have a replacement trackpad cable with adhesive pre-installed, remove the liner and press the cable into place.

  13. vYusBNNFXAcsMFmT
    vYusBNNFXAcsMFmT
    gCqE5BhBYQFRcuNb
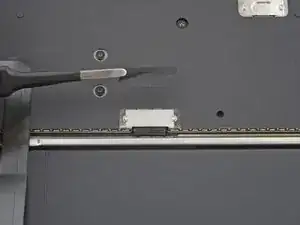
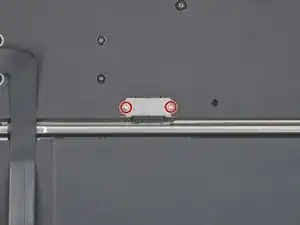
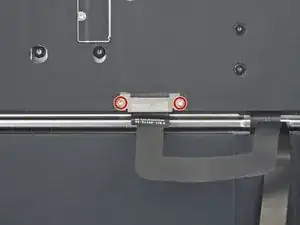
    • Use a 3IP Torx Plus screwdriver to remove the two 1.5 mm‑long screws securing the trackpad cable cover.
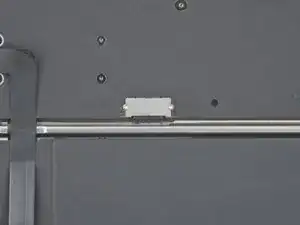
    • Remove the cover.

  14. QB5xLmoPmoirWDOQ
    QB5xLmoPmoirWDOQ
    OWWJTLBHXEqsGFPS
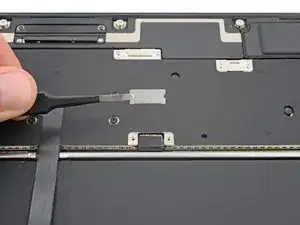
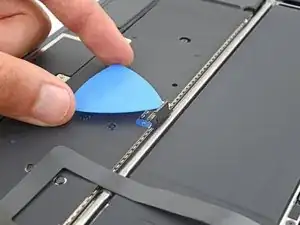
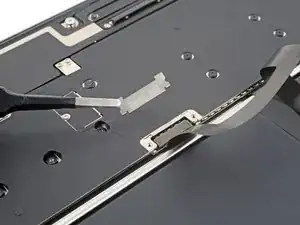
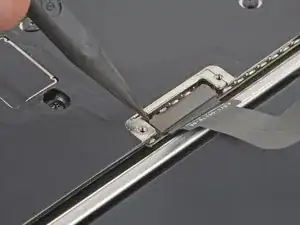
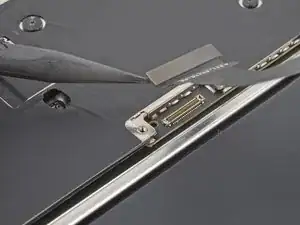
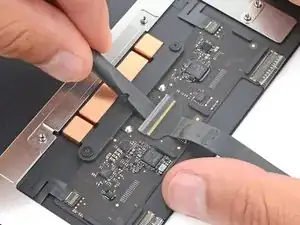
    • Use the point of a spudger to pry up and disconnect the trackpad cable press connector from the logic board.

  15. 3NPXt5WQOV5KBFGH
    • Two small strips of adhesive secure the trackpad cable to the frame.

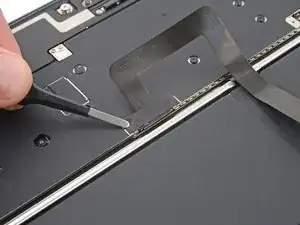
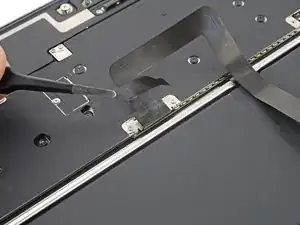
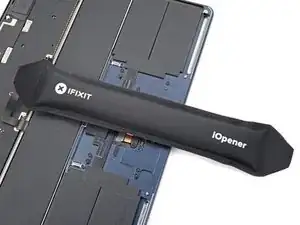
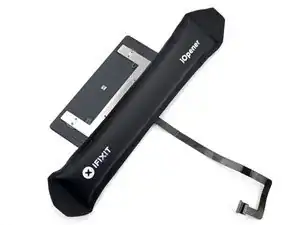
    • Heat an iOpener and apply it to the trackpad cable for two minutes to soften the adhesive securing it to the frame.

    • You can also use a hair dryer—but extreme heat can damage the battery, so proceed with care.

  16. nxE51Fl2P1raMw6G
    nxE51Fl2P1raMw6G
    BtoWbXgjVpaupUgC
    CYtTESvGjvwIyXLP
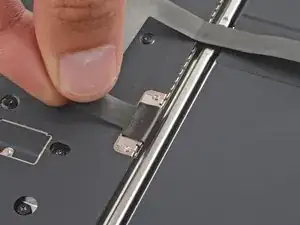
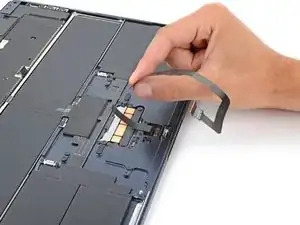
    • Pull the trackpad cable toward the bottom of the MacBook to separate it from the frame.

    • During reassembly:

    • Use the leftover adhesive to secure the trackpad cable to the cover. If the cable doesn't stick, use double-sided tape to secure it.

    • If you have a replacement trackpad cable with adhesive pre-installed, remove the liners and press the cable into place.

  17. CDAZGq6KTK6QvMMm
    CDAZGq6KTK6QvMMm
    LAKjvdG5Yst12Uqp
    • Use a 5IP Torx Plus screwdriver to remove the ten 4 mm‑long screws securing the trackpad.

  18. lEbyBIooHFyrpum5
    lEbyBIooHFyrpum5
    hUmwjEfxMrXkHiUY
    ODT3vxlueGmYriDi
    • Be careful not to lose the four washers resting on the trackpad's screw posts. Without them, your trackpad won't fit properly.

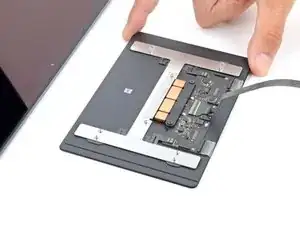
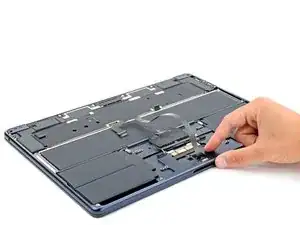
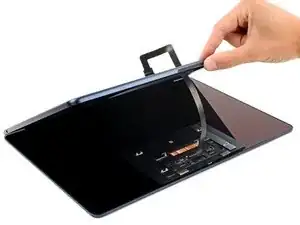
    • Slowly open your MacBook—the trackpad will stay on the display.

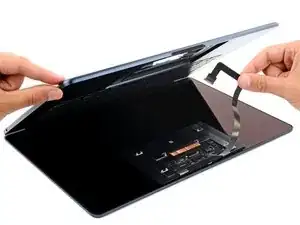
    • Guide the trackpad cable through its slot in the frame.

  19. 12iDK1jHvPouTGF1
    12iDK1jHvPouTGF1
    YWNNHTjbsco6HEPQ
    kdaJD1nL2PJMtxFG
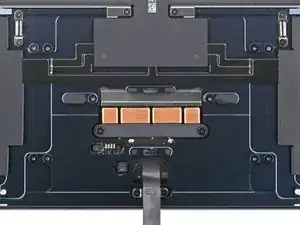
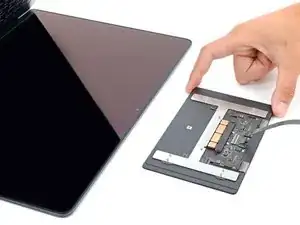
    • Remove the trackpad from the display.

    • Reassembly note:

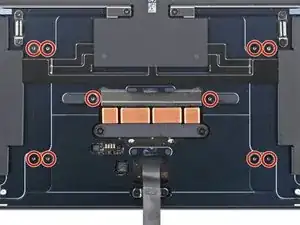
    • Before installing your new trackpad, make sure all four washers are in place.

  20. GlFV4COZJawlMngI
    GlFV4COZJawlMngI
    gU6BLbL2bWVsR6oU
    • Before installing your trackpad, make sure it has a cable installed. If your new trackpad doesn't come with a cable, follow the next three steps to remove and transfer the old cable.

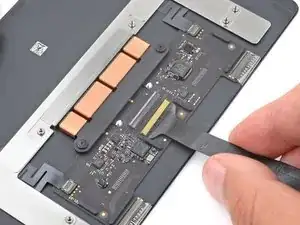
    • Use the tip of a spudger or a clean fingernail to flip up the hinged locking flap on the trackpad cable ZIF connector.

    • During reassembly:

    • Secure the cable by flipping the locking flap down.

    • If your trackpad cable comes with adhesive, remove the plastic liner and press the cable into place on the trackpad.

    • If the cable doesn't have adhesive, use a strip of double-sided tape to secure it to the trackpad.

  21. mEYBIVy4yYOxVMYG
    • Strong adhesive secures the trackpad cable to the trackpad, just below the cable's connector.

    • Heat an iOpener and apply it to the bottom edge of the trackpad for two minutes to soften the adhesive.

    • Alternatively, you can use a hair dryer to heat the cable.

  22. uFewjgbJP1bfneWj
    uFewjgbJP1bfneWj
    LtJZUfmLluX2HmoA
    iFQPv6AFOArBFYoA
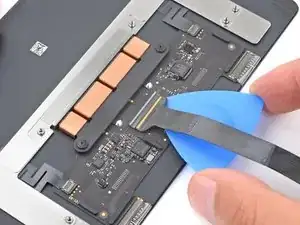
    • Slide an opening pick back and forth under the trackpad cable to separate it from the trackpad.

    • Pull the trackpad cable out of its socket and remove it.

    • During reassembly, make sure the locking flap is flipped up before inserting the trackpad cable into its socket.

Conclusion

To reassemble your device, follow these instructions in reverse order.

Take your e-waste to an R2 or e-Stewards certified recycler.

Repair didn’t go as planned? Try some basic troubleshooting, or ask our Answers community for help.

Spencer Day

Member since: 14/09/22

95592 Reputation

0 comments