Introduction
This guide will show you how to replace the SuperDrive from your laptop (requires a SATA SuperDrive).
-
-
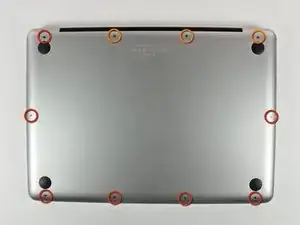
Remove the following 10 screws securing the lower case to the MacBook Pro 13" Unibody:
-
Seven 3 mm Phillips screws.
-
Three 13.5 mm Phillips screws.
-
-
-
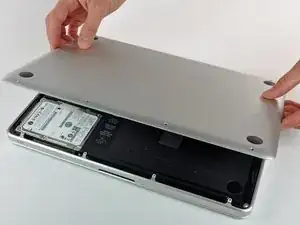
Slightly lift the lower case and push it toward the rear of the computer to free the mounting tabs.
-
-
-
Use the flat end of a spudger to lift the battery connector up out of its socket on the logic board.
-
-
-
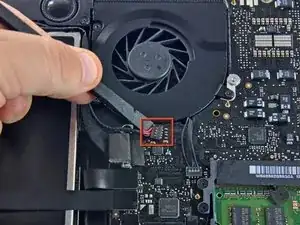
Using the flat end of a spudger, gently pry the right speaker/subwoofer cable connector straight up off the logic board. Be careful not to lift the socket. Pull the connector toward the optical drive.
-
-
-
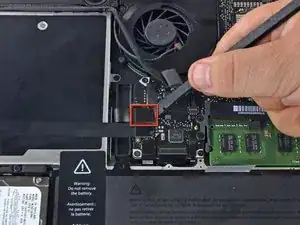
Pull the camera cable connector toward the optical drive to disconnect it from the logic board.
-
-
-
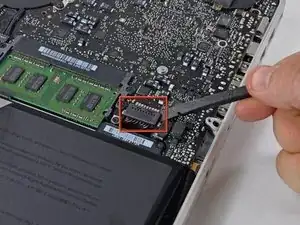
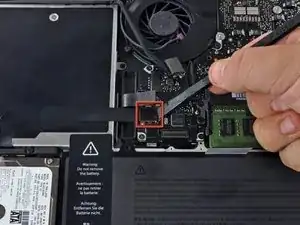
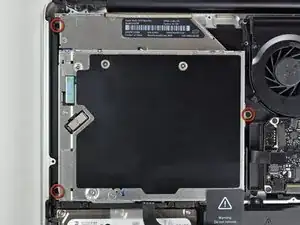
Use the flat end of a spudger to pry the optical drive connector straight up off the logic board.
-
-
-
Use the flat end of a spudger to pry the hard drive connector straight up off the logic board.
-
-
-
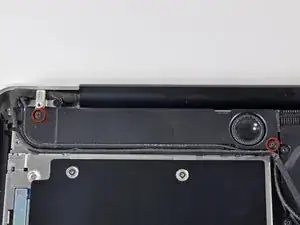
Remove the two Phillips screws securing the subwoofer to the upper case. The right one is 5 mm and the left 3.9 mm.
-
-
-
Remove the two 8.4 mm Phillips screws securing the camera cable bracket to the upper case.
-
Lift the camera cable bracket out of the upper case.
-
-
-
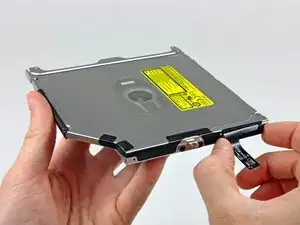
Remove the three 2.5 mm Phillips screws securing the optical drive to the upper case.
-
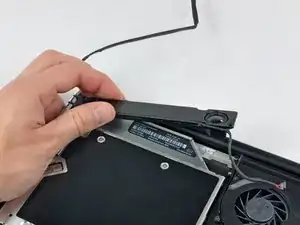
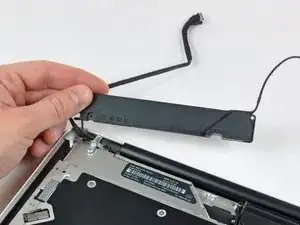
Lift the optical drive from its right edge and pull it out of the computer.
-
-
-
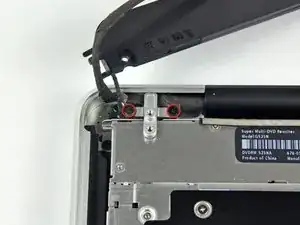
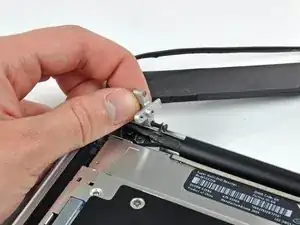
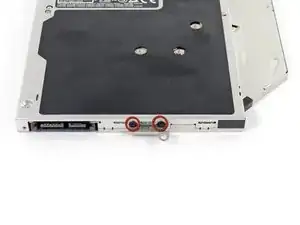
Remove the two black Phillips #0 screws securing the small metal mounting bracket. Transfer this bracket to your new optical drive or hard drive enclosure.
-


To reassemble your device, follow these instructions in reverse order.

2 comments
iFixit rocks! Got a stuck CD out of my wife's superdrive this way. Many thanks!!!
I just took mine apart and found a piece of tape in it. Smh. Works perfect now.
Compare the short screws carefully before reinstalling them. The shouldered screws go in the holes on the front edge.
David Kilbridge -
Before I started removing any screws I took a piece of paper and drew the bottom of the laptop and put a piece of double-sided tape in the spot where each screw goes. That way when I took out the screws, I could put them on the tape so I knew exactly which screw went in which spot. I did the same thing for dismantling the inside on another sheet of paper, then a third sheet for the screen after getting the front glass off.
mastover -
I use a similar technique: I print out the iFixit manual for the job, and Scotch-tape down the screws/brackets/cables I remove at each step next to the component descriptions. That way, when I'm reassembling, the bits are taped right next to the photo of where they came from.
adlerpe -
That's exactly what I do for all my repairs! It's the best way to keep track of all of the parts ' original location and to make sure that you don't miss any parts during reassembly.
joyitsjennie -
Great idea and one I use often
Thomas Overstreet -
Excellent idea! Thanks for sharing it here.
Laura Sharkey -
I used a 00 that fit but the screws were very tight so I used a tiny paintbrush with some wd40 on it and put it around the edges of the screws. Worked like a charm
valentinedhdh -
I use a magnetic mat and place the screws in order on that :)
Cary B -
How to tell all screws apart?
Spudgeboy -