Introduction
Replacing the main speaker of the Marshall Kilburn II needs careful handling. Marshall Kilburn II portable Bluetooth speaker is well-known for its robust sound and classic design.
However, over time the main speaker components may degrade, reducing the sound quality. Depending on usage the speaker could accumulate dust, if the speaker is dropped too many times it could loosen some component in the main speakers, which could cause damages. Replacing this part of the speaker can restore the speaker's original performance.
Use this guide to help you replace the main speaker on your Marshall Kilburn II. This procedure entails carefully opening the unit and installing the new speaker. With a Phillip #1 screwdriver and a bit of patience you can extend the life of your Marshall Kilburn II.
-
-
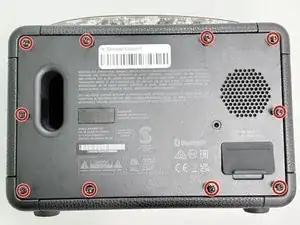
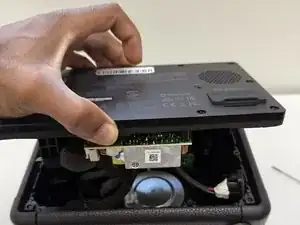
Flip the front of the Marshall Kilburn II on a flat surface so the back is facing you.
-
Use a Phillips #1 screwdriver to remove all ten 4 mm screws.
-
-
-
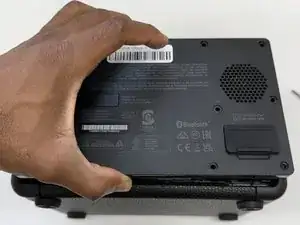
Slightly lift up the back cover of the speaker just enough to be able to see the inside compartment of the speaker.
-
-
-
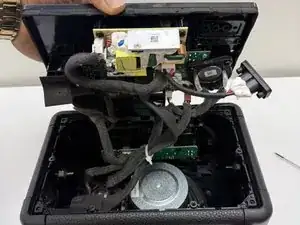
Locate the battery, which is attached on the inside bottom left corner. Refer to image 1.
-
Identify the black cable that connects from the battery to the back cover of the speaker.
-
-
-
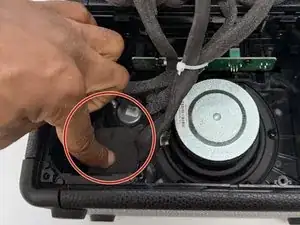
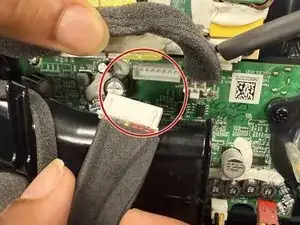
Grip the white battery connector and pull it directly out of its socket.
-
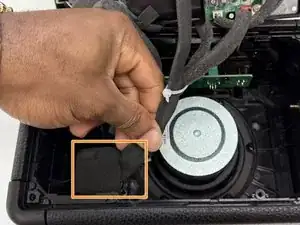
Remove the battery by pulling the battery up out of its housing.
-
-
-
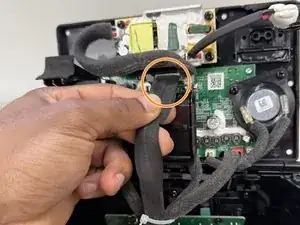
Firmly press on the tab on the speake connector and pull up to disconnect it.
-
Disconnect the two speaker connectors.
-
-
-
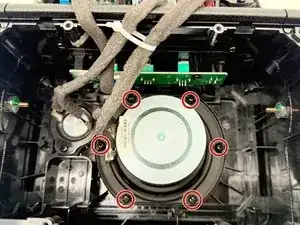
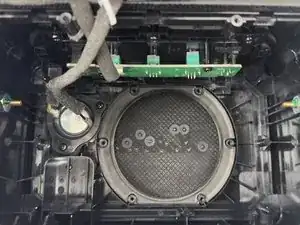
Use a Phillips #1 screwdriver to remove all six 4 mm screws securing the main speaker.
-
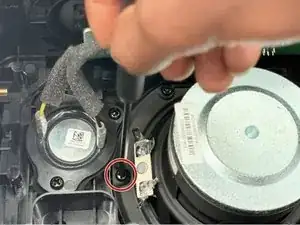
Remove the main speaker.
-


To reassemble your device, follow the above steps in reverse order.
Take your e-waste to an R2 or e-Stewards certified recycler.