Introduction
-
-
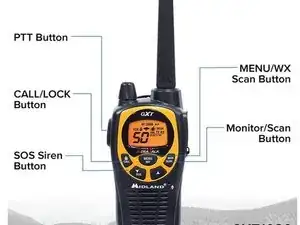
follow the instructions in the user manual
-
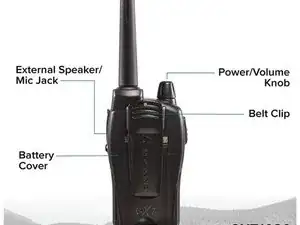
-remove belt clip (there is a small catch lever on the belt clip where it contacts clip mount point) *push outboard on the catch, to allow the clip to slide up and off
-
-pull battery compart cover latch down and let it swing on it's hinge
-
-lift bottom of batt. compartment cover up, and pull cover off radio
-
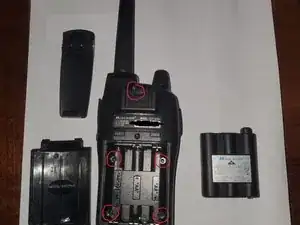
-pull Midland battery out (or AAA batteries if that's what you are using)
-
-there are 5 screws to remove
-
-
-
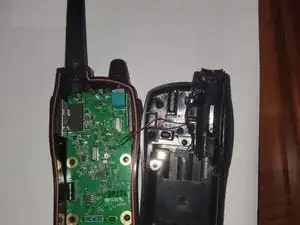
split the cases by gently pulling apart
-
be careful of the 2 small extrusions that help to make the seal for the antenna
-
the batt. compartment latch and it's metal hinge pin are sandwiched in between 2 molded extrustions that form the hinge mount pount (between the 2 cases)
-
catch the latch and latch pin as you split the cases
-
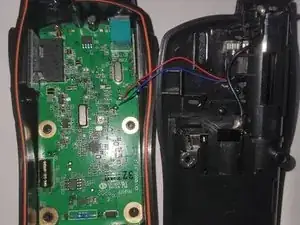
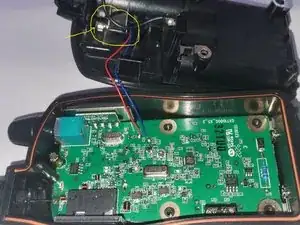
BE CAREFUL - there is a pair of wires going to what looks like a small motor and some kind of spinning item
-
-
-
This is as far as I've gotten, as I want to research some more, and wait until I get a closer look at the radio in my workshop
-
- where are better antenna and other components sourced?
-
-how does one account for the water resistant seals when further dissassembling (seals around the On-Off/Volume knob, PTT switch and headphone/mic connectors)
-
-what is the spinning item/motor for? tone generation? some kind of EM field? (motor marked with yellow circle in 2nd pic)
-
To reassemble your device, follow these instructions in reverse order.
See the other Midland portable GMRS guide here for some insight/context