
Introduction
This guide will take you through the steps of replacing the water bag in your Miele G 1274 SCVi Eco.
Tools
Parts
-
-
In any case, first disconnect the power plug. Water and electricity do not mix - danger to life!
-
-
-
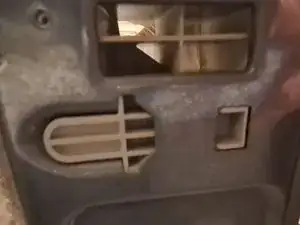
You should remove the dish racks from the machine. The bottom two can simply be pulled out. The cutlery tray can only be removed by releasing the clip as shown in the photo.
-
-
-
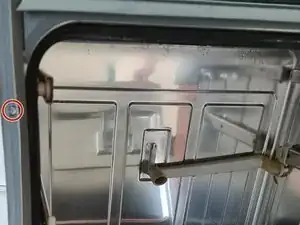
At the beginning the left side panel has to be removed. When the machine is open you can see 2 plastic covers on the left rubber seal (if they have not been lost). Remove these.
-
Unscrew the two screws that have become visible underneath. Only the upper screw is shown in the photo, there is another screw below.
-
-
-
There is another screw on the back, at the lower end of the left side panel. Remove these too.
-
-
-
After the 3 screws have been removed, the side panel is only connected to the machine via a lug. The nose sits at the top end, at the back of the machine. Press the nose together, preferably with combination pliers or long-nosed pliers, then pull off the side panel.
-
-
-
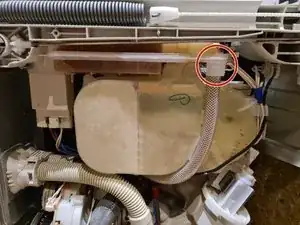
The water pocket is now exposed, remove the marked insulation. Simply peel off, it is only lightly glued to the surface.
-
-
-
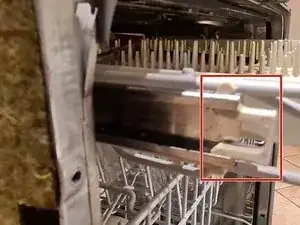
Unscrew the water inlet bracket. This is done from the inside of the machine. As with a normal screw, the part is loosened counterclockwise. It can be very tight, possibly loosen it carefully (!) with a pipe wrench.
-
There is also a rubber seal behind the ring. The spare part has a new seal, please replace the old seal with the new one when the machine is reassembled.
-
-
-
Next, the bottom plate of the machine must be removed. To do this, the machine must be laid on its side so that the open side is on top and the bottom side is to the side. This step must be carried out by 2 people.
-
Please note that the feet will not be damaged if the machine is tipped on its side.
-
Please also note that water can leak out if the machine is laid on its side.
-
-
-
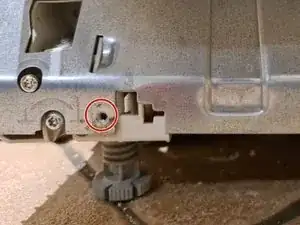
On the front right and left one more screw has to be removed. The photo shows the left side, analogous to the right side. In the photo the screw has already been removed, you still have a screw there. Also please be careful not to use the screw to adjust the height of the feet.
-
-
-
In the next steps, the gray plastic frame has to be loosened. Please follow the steps below.
-
-
-
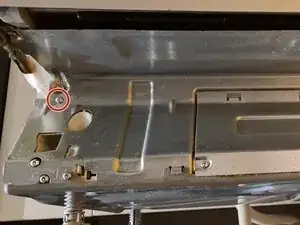
Remove the marked screw. There are 2 screws right next to each other, please make sure that you remove the correct screw.
-
-
-
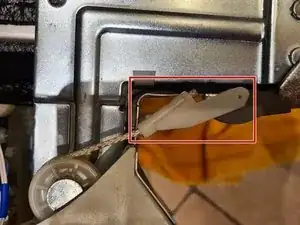
Unhook the white hook from the gray eyelet. It may be easier if a second person pulls the large spring on the left (not on the picture) a little longer.
-
-
-
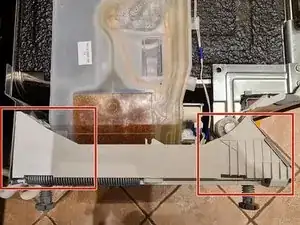
The plastic frame is now only slightly inserted at the back of the machine and can be easily detached. It is sufficient that this frame is loosened, it is not necessary that the frame is completely removed.
-
If the frame is to be removed completely, 2 more plugs must be removed.
-
-
-
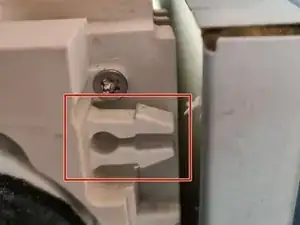
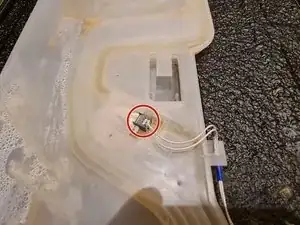
3 plugs have to be removed, all plugs are secured with a small nose that has to be lifted carefully to pull the plug out of the holder.
-
Also loosen the long cable with the gray plug and the clips of the water bag. The cable itself remains on the machine when the water bag is removed.
-
-
-
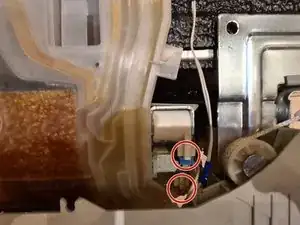
The relay plugged onto the water bag. It can simply be pulled off to the right. To do this, press the small tab on the right. The cables remain attached to the relay.
-
-
-
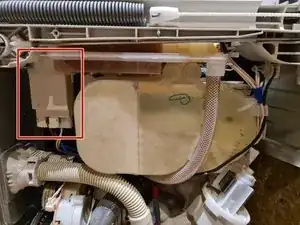
In this step, a hose must be removed, which can again result in dripping water. A little water may come out of the hose, and quite a bit out of the water bag. It is best to cover the machine underneath with a towel to avoid water getting on the electrics.
-
The transparent fabric hose is attached with a hose clamp, which is best removed with combination pliers or pointed pliers and then pull off the hose.
-
-
-
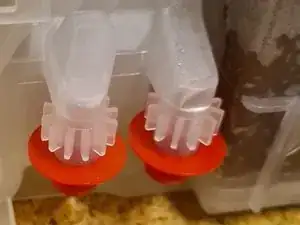
You will find a total of 4 such red caps on the spare part. Remove them all. A little water could again drip out.
-
The two connections in the picture are plugged into the machine's salt container. After removing the hose in the previous step, the water bag can be pulled off. If the machine were to stand upright, you would have to pull the bag upwards.
-
Carefully pull off the bag, there is another tube that still needs to be removed, you don't have too much clearance
-
Two rubber seals are enclosed with spare part 2 for the two connections. When assembling the dishwasher again, please replace the old rubber seals with the new ones.
-
-
-
Also, pull off the previously mentioned black rubber hose, which is only plugged in, though possibly very tightly. (Unfortunately no photo available)
-


Work the steps in reverse order to reassemble your device.
8 comments
Hi There,
I have a leak around one of the fittings which connects into the bag to which has two cables connected.
Will the replacement already have these fittings as I'm nort certain that a replacement bag would solve the leak unless the fittings were integral with it.
Many Thanks David.
Not sure what fitting exactly you are asking about. Can you post a picture?
kapott -
All sorted now .
Many thanks.