Introduction

This guide disassembles the capture button, so the device can be checked for a broken spring or for debris blocking its movement.

  1. 4UkpgEgGYK6KWRZe
    4UkpgEgGYK6KWRZe
    BXyi2T5yKDhWIlNn
    i5vcFhkG6yvMIiRj
    • Locate and remove the silver screws on each side of the camera.

    • Use the Phillips #00 Screwdriver to unscrew all 2.0mm (4 instances) and 4.0mm (2 instances) screws.

    #000 bit seems to work better. There are seven screws in total (2 on either end and 3 on bottom).

    Doug Ewing -

  2. VQ5WTK5UOTLBajxC
    VQ5WTK5UOTLBajxC
    K2uZZmetQ6ZTiP3Q
    LoWdMMKZlOS1iByZ
    • Then, carefully pry apart the front and back outer casing away from the internal components.

    • Be aware of the ribbon wire that will disconnect when the casing is detached.

    Lens cover can be accessed without removing rear housing. I was able to lift off the front to access the lens cover mechanism while leaving the rear in place.

    Doug Ewing -

  3. 51QDpmIx2LW2BUoS
    • Choosing the front half of the casing, locate the capture button on the top.

    • Using tweezers, apply pressure to the two black hooks (circled in red) while holding the button down from the outside of the case.

  4. Nm2SMGDmfgVyUycQ
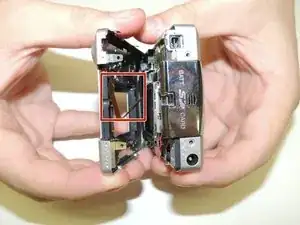
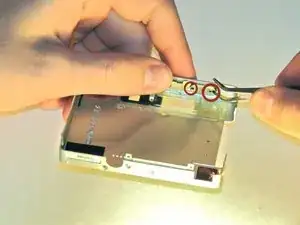
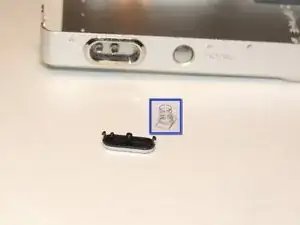
    • The button will spring free. The capture device consists of the plastic button and a small metal spring.

    • The button can be reassembled by using the tweezers to place the spring rectangle-side down on the button and snapping the button back into place.

Conclusion

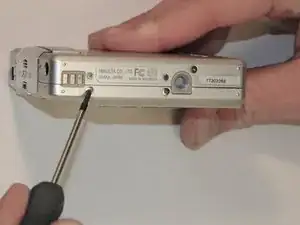
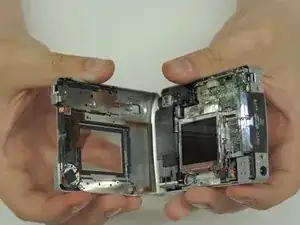
Reassemble the casing by reversing steps 1 and 2.
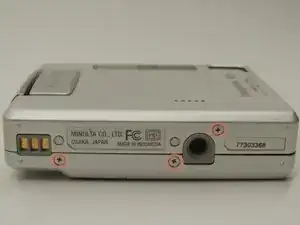
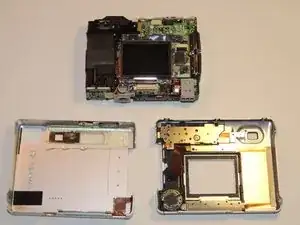
Megan Milam

Member since: 11/03/13

56 Reputation

0 comments