Introduction
How to Replace Nikon Coolpix S51c LCD Screen (liquid crystal display)
The following guide is for a screen repair on a Nikon Coolpix S51c LCD. If your screen is damaged, cracked, or dirty, this repair guide can help! The guide will walk you through various steps to insert a new screen onto your camera.
Before starting, make sure that the new screen is compatible with your current model. If the screen is not compatible, you will have to purchase a new one.
Step 3 requires you to detach the side panel of your camera with a spudger.
To avoid risk of injury, do not touch the insides of the camera if it has had any damage. Also, for your safety, turn off the camera completely and disconnect it from any power sources. STOP the repair if there are any unusual occurrences like if the product starts to produce smoke.
-
-
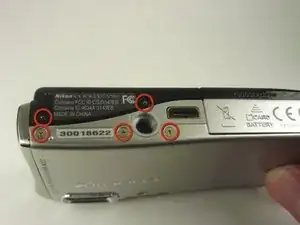
First, use a Phillips #00 screwdriver to remove all five screws that are located at the bottom of the camera.
-
-
-
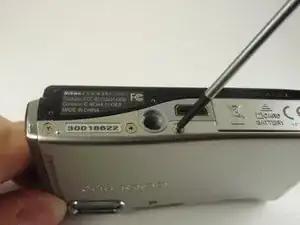
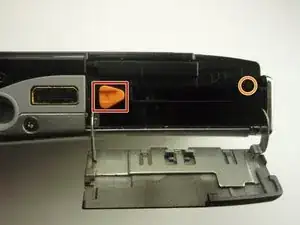
Next, slide the battery door open in the direction of the arrow to reveal a hidden screw on the opposite side of the orange lever.
-
Remove this screw using the Phillips #00 screwdriver.
-
-
-
Rotate the camera to find the side panel with the lanyard attachment.
-
Detach the side panel by the lifting bottom corner slightly with the spudger.
-
-
-
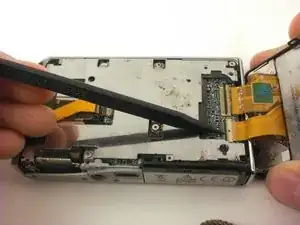
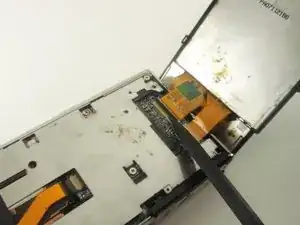
With the back cover lifted, lift the black flap that connects the ribbon to the motherboard with the spudger.
-
Carefully remove the back cover.
-
-
-
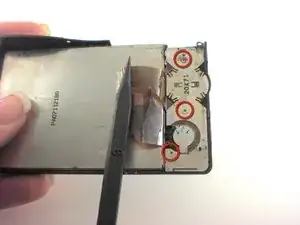
On back of LCD screen, locate the three screws underneath the ribbon.
-
Remove each screw using your screwdriver.
-
-
-
Take out the rectangular component on the side where the screws were.
-
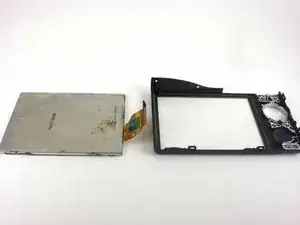
Carefully, pry apart the screen from the back casing using the spudger.
-


To reassemble your device, follow these instructions in reverse order.