Introduction
In the Ninja Foodi SP101 / FT102A, the cooling fan is a key part to ensure the units' control electronics returns to room temperature after use. Before starting this guide, ensure that the Foodi is disconnected from power and completely cooled off.
-
-
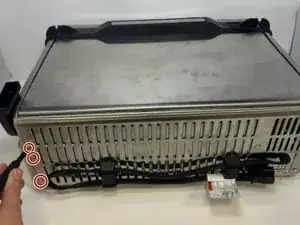
Flip the device upside down and open the bottom panel.
-
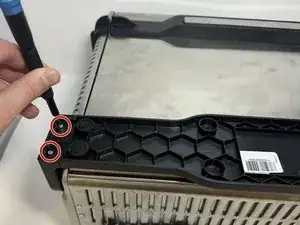
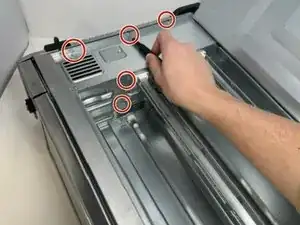
Remove the 3 x philips #1 screws along the top edge of the interior using a screwdriver. The Bottom 2 do not have to be removed.
-
-
-
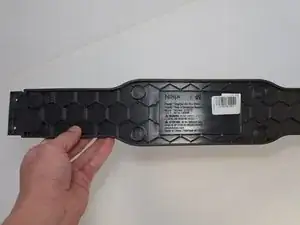
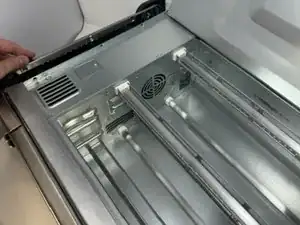
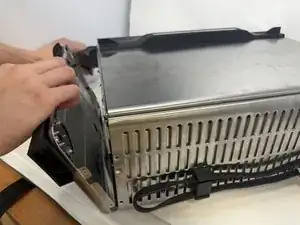
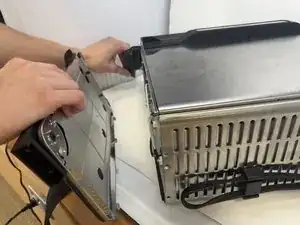
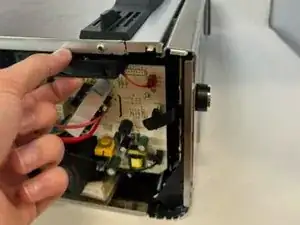
Remove the control side panel. To remove it, push forward towards then front control panel to release the tabs out of the main body. Fold away the side panel when the tabs have visually released from their slots in the main body.
-
-
-
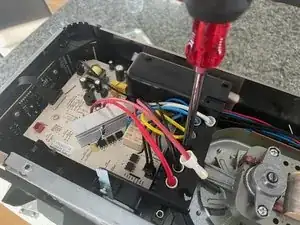
Remove the screw from the electronics assembly plastic frame as shown. Don't drop the screw upon removal!
-
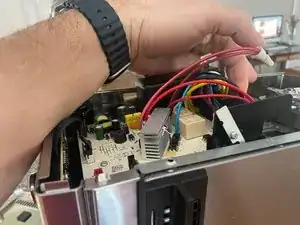
Lift the assembly slightly such that the screw to the metal tab that holds the fan in place can be accessed. Remove it with a Philips screw driver. Do not drop it. Use help holding up the assembly if so needed. Do not bend the tab.
-
-
-
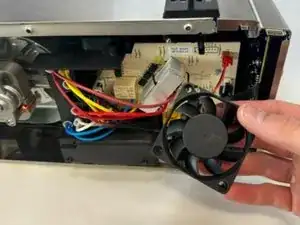
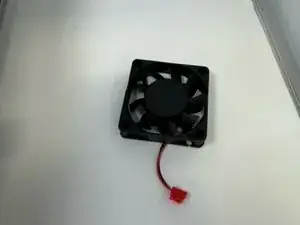
Remove the black cooling fan by sliding it out. There are retaining tabs on the sides that need to be lifted to release the fan.
-
-
-
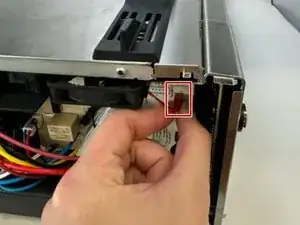
Remove the red cable that attaches the cooling fan to the motherboard. Squeeze the tab on the red connector and pull slightly at the same time to release it.
-
-
-
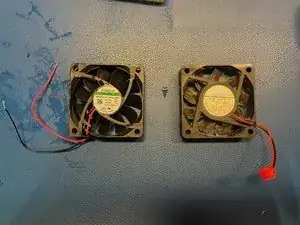
Remove the cooling fan and replace it with a new fan of equal size and type: 60 x 60 x 15 mm, 12V DC. Carefully compare for fitment.
-
Solder the wires together and apply appropriate insulation. Red to red (+), black to black (-) Shrink wrap works well.
-
If needed and possible, ensure that the fan blows in the same direction, out of the over box through the little fan slots. Check this when the unit is turned back on.
-
A good replacement candidate of the fan can be bought from www.digikey.com. Part number 259-1802-ND. It is a Sunon fan of higher quality than the Hongfei HD-6015L12R fan that is replaced. This fan is confirmed to blow air into the same direction as the old fan.
-
Insert the new Sunon fan with the label facing into the control electronics compartment. The wires need to exit the fan housing on the top when inserted. Dress the wires to ensure that they do not touch the (hot) metal housing or heatsink. Use tie wraps if needed.
-
-
-
Reassemble oven in the reverse order as in the first steps.
-
Test the oven for good functionality. The fan will come on after a few minutes of (pre-)heating so wait until that occur. Ensure the fan air is blowing out of the unit.
-


To reassemble your device, follow these instructions in reverse order.

3 comments
Where did you source the fan?
Can you provide the model # of the fan you replaced with ; and for Steve Hemphill did you pull the fan out yet ? what was the old fan make/model, maybe Amazon has one.
Joseph V -
This is a 60x60x15mm 12 volt fan. I purchased one on Amazon, it doesn't really matter which one as long as it's the correct measurements. The white plastic 2 pin connector should work in the stock board, but you can swap the connector from the old fan onto the new one easily by depressing the two locking tabs on the electrical pins. Make sure the orientation is correct, this is an intake fan and should be pulling air into the case. If the fan is installed backwards, the unit will overheat.