Introduction

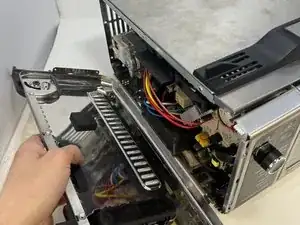
On the Ninja Foodi SP101, the side panels are important for ventilation and protection of the unit. Underneath the side panels are all the electronics and heating units, so removal of the panels are essential for any repair.

  1. UxblIxJeMQe3ypv1
    UxblIxJeMQe3ypv1
    Zf3TFjTmJtK3lLDy
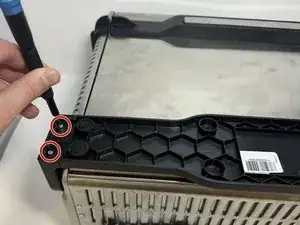
    • Use a TR10 screwdriver to remove the four 11mm screws holding the black lever bar in place.

  2. IwYS5sBJgP3SMLR1
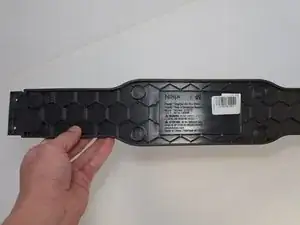
    • Remove the black lever bar.

  3. ofy1pbhhVRNHqS6i
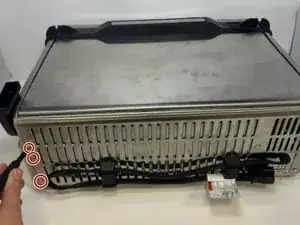
    • Use a Phillips #1 screwdriver to remove the three 8mm screws on each side of the back panel.

  4. 6wNQesiRa2kTQ3J4
    6wNQesiRa2kTQ3J4
    r3CJCX1yDa13W6dD
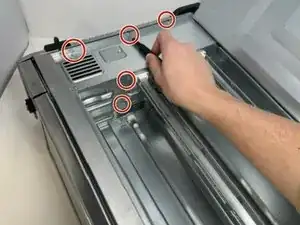
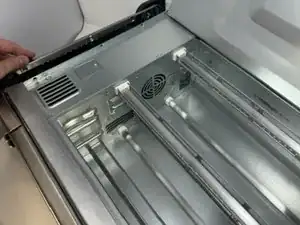
    • Flip the device upside down and open the bottom panel.

    • Remove the 3 x philips #1 screws along the top edge of the interior using a screwdriver. The Bottom 2 do not have to be removed.

  5. frPxJEWA6pBYuSXG
    frPxJEWA6pBYuSXG
    1gEXfH3lct1wOcWL
    iUR2DB4ecmbJXiVj
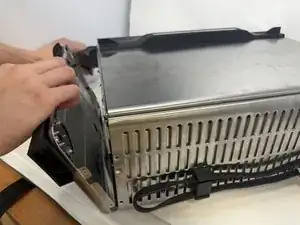
    • Remove the control side panel. To remove it, push forward towards then front control panel to release the tabs out of the main body. Fold away the side panel when the tabs have visually released from their slots in the main body.

  6. PwWbluNUFQLQLdOK
    PwWbluNUFQLQLdOK
    spOUbMnrwmmQPoph
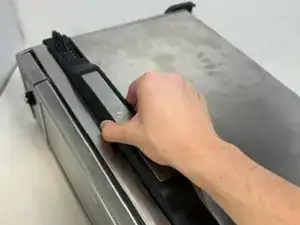
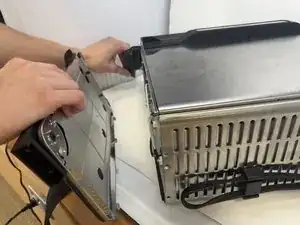
    • Lift the handle and pull the side panel out.

    • Remove the handle side panel.

    There's a Torx screw inside the oven you need to remove as well...

    Richard Klingler -

Conclusion

To reassemble your device, follow these instructions in reverse order.
Griffin Peterson

Member since: 30/01/24

592 Reputation

0 comments