Introduction

Sometimes when remotes stop working, the problem could be from old batteries left in the remote that leaked battery acid and caused corrosion to appear. This guide will help you take apart and clean the corroded areas in a Nintendo Wii remote. As this deals with batteries that leaked, safety precautions should be in place, like gloves and proper disposal of the batteries.

It is important to note that while this guide helps clean corrosion, batteries are not the only cause of faulty remotes, since water damage can also cause corrosion on the motherboard.

  1. XfYCS4dsNtsrBnqF
    XfYCS4dsNtsrBnqF
    CDDSrDdMaOH3Zl1M
    x1XuBKfntVElJHQf
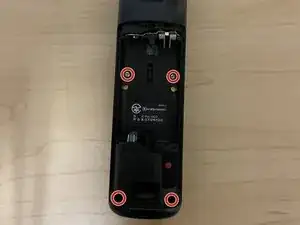
    • Remove the battery cover and the batteries.

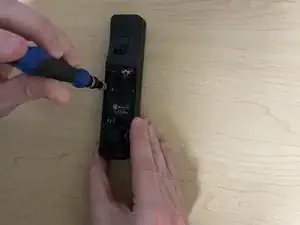
    • Remove the four tri-point Y1 screws holding the remote together.

  2. AIVfohmCqpnbQIyX
    AIVfohmCqpnbQIyX
    T2Y3P3iyhQauGTyx
    c1w3fqRFLtJevoZC
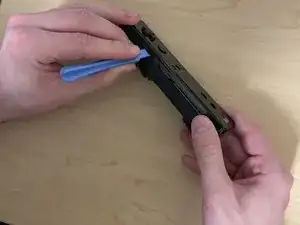
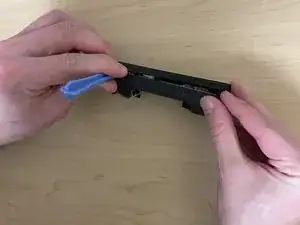
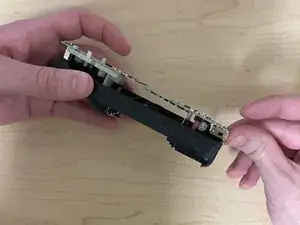
    • Using an opening tool, apply pressure to the tabs located near the "A" button.

    • The tabs can break, but the remote will still work even if they do break.

    • Remove the faceplate.

    Tabs are not near the "A" Button. They're closer to the front, and are located just past the horizontal part of the 4-way directional pad.

    jgsenecal -

    The tabs will definitely 100% break :(

    shadowimmage -

  3. u3q3F126dQOyfHUb
    u3q3F126dQOyfHUb
    6U6SvDxW3vTlPE1Z
    2GEf6BcWNTZKJRWn
    • To remove the motherboard, press up on the "B" button, and then the connector at the bottom.

  4. HEN3NKHlbfojUjpq
    HEN3NKHlbfojUjpq
    L3YOA3Cin63qBCx2
    6uLfslBte3AXcuSl
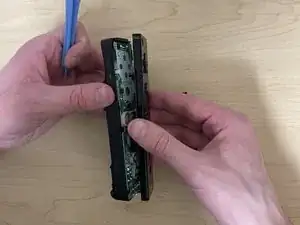
    • Unclip the tabs to remove the plastic piece.

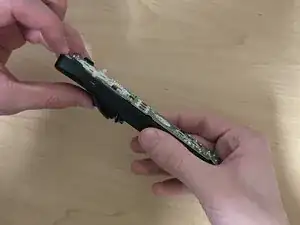
    • On the back, move the vibration motor out of the way to completely remove the plastic piece.

  5. SKTgVNH31Fu4PE3y
    SKTgVNH31Fu4PE3y
    3f3ToUWV3MEvBtWI
    Lm4pBkUbpDKBVMWe
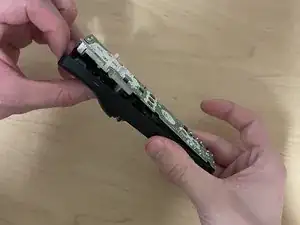
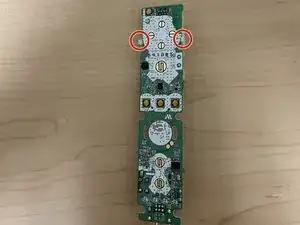
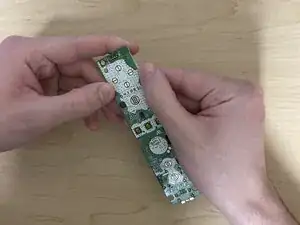
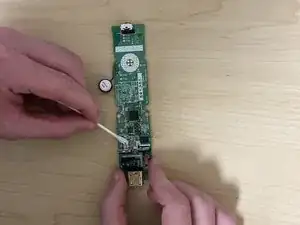
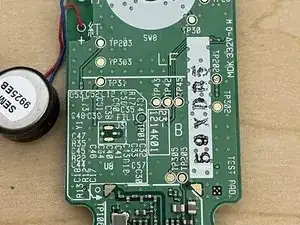
    • Find any corrosion on the motherboard.

    • Corrosion on the motherboard will have a blueish color and may appear in multiple places.

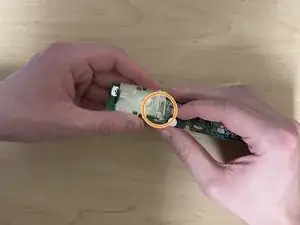
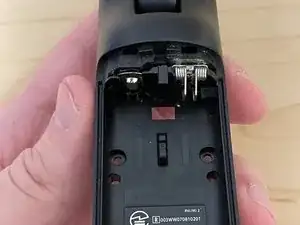
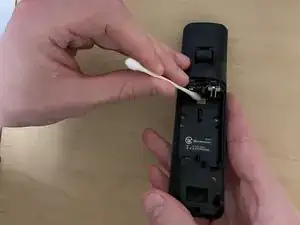
    • Check the battery terminals for corrosion.

    • If batteries leaked in the remote, there will be corrosion on the terminals.

  6. jeYlDQTGPRZu4nYh
    jeYlDQTGPRZu4nYh
    mEaACDueTFxIFAOn
    4DGV3ORNywypvK6F
    • Clean the corroded areas with isopropyl alcohol and a toothbrush.

    • Q-tips can be used instead of a toothbrush.

    • Cleaning won't make look it perfect, but the remote will work again.

  7. b51SiDTGEtnSw16R
    b51SiDTGEtnSw16R
    CdqJwSMxRpNkbNkT
    • Clean the terminals with isopropyl alcohol and a toothbrush or Q-tips.

    • It is difficult to remove this piece, so clean it as good as you can. Using more isopropyl alcohol helps here.

    you can easily remove the piece when the wiimote is deconstructed. The metal piece is attached to the B button side of the wii mote (battery part). when flipped over you can see inside the back (battery) part of the wiimote in the middle of that metal piece there is a hole where a metal nub sticks out from that metale plate, that's what keeps it stuck there. You need to use a long, flat and slim part to push that nub inside and out from that little plastic socket. To help get that metal nub outside of that plastic socket/hole you can pull on the front side of the wii mote (battery part) that plastic rectangle in the middle where the nub is hidden to help get the nub further out from that socket. Once the metal nub is out you can then just pull the metal plate out. (Pliers recommended) also I used cleaning vinegar after brushing that battery leak crust instead of isopropyl worked also like a charm.

    Mind you I used vinegar on the metal part where the battery is placed luckily the battery leak didn't affect the motherboard. I wouldn't know if vinegar would work on the motherboard, I don't think that would be recommended to use vinegar with that.

    Tuinh Nguyen -

    There is a "slick" method to remove the combined battery terminal, which is pushing the plate through the slot, as shown in this video (timestamped):

    https://youtu.be/6U0nfYUxhPE?t=175

    There is also a "rough" method, as shown in this video (timestamped):

    https://youtu.be/aXL-fw7B_Bg?t=43

    I've used the former method, but I haven't used the latter.

    Tai Lam -

Conclusion

To reassemble your device, follow these instructions in reverse order.

Stefan Kula

Member since: 21/03/21

667 Reputation

5 comments

Would 99% Isopropyl Alcohol also be okay to use as cleaner?

Mirela -

Of course, I use this for cleaning every type of motherboard, the difference between 99% and 70% is that the solution contains less water, so the liquid evaporate in less time :)

ReDeath_ -

https://amzn.in/d/2XzswFN

Is this okay for use on motherboard??

Also can it damage the plastic or foam pieces if accidentally spilled?

I am new to repairing stuff like this so help will be appreciated

Aeron Brar -

You linked to 99.9% isopropyl alcohol. Alcohol shouldn't damage the hard plastic or the motherboard, as long as you don't drench the whole motherboard in alcohol.

Also, if you're talking about the small pieces that help the battery cover stay on (the 2 that are diagonally positioned from each other), then you might not have to worry if those small inserts are actually not made of foam in Wii remotes. However, in 1 Wii remote that I worked on, those pieces were made of foam. However, cleaning them should be fine as long as you don't rub away on those pieces too roughly.

Tai Lam -

To prevent corrosion in the future after removing corrosion from affected Wii remotes, I would recommend using rechargeable AA batteries: so, nickel metal hydride (NIMH) instead of alkaline.

This is because there NIMH batteries will not leak when used properly under the same typical conditions that alkaline batteries do. NIMH batteries are slightly heavier compared to alkaline batteries, but I think the trade-off is worth it. I have done this battery type conversion for another item that constantly faces risks from leaking/corroding alkaline batteries: using the TI-84 Plus or TI-89 Titanium graphing calculators.

Source: this video from YouTube comparing alkaline and NIMH batteries.

Tai Lam -