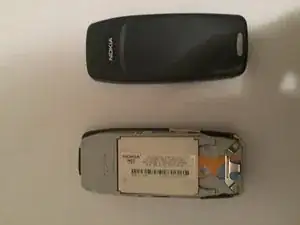
Introduction
This guide will help you fix your LCD on a Nokia 3310 or 3390.
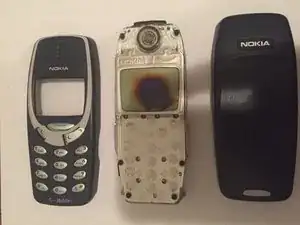
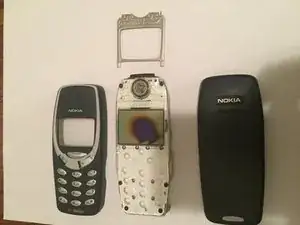
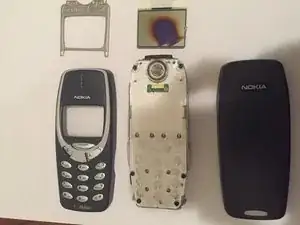

To reassemble your device, follow these instructions in reverse order.
4 comments
One thing the nokia 3310 is supposed to be the one phone that cannot be broken how did you even break the screen
Max -
how?????????
Lee Hunt -
if you look at the screeen, you will notice that it isnt cracked or broken or anything like that. it is very evident that the author OR user has deliberately kept the screen near a lighter or flame and fire-damaged it. The reasons for this are extremely self-explanatory. Their parents(if they are a minor) do not permit them to buy a new phone until their current one gives up, and considering this restriction i can assume that their parents themselves bought the 3310 for their child in a strategic move, strategic because, THE 3310 SIMPLY NEVER GIVES UP! Now, they(the author) are fed up of playing snake on the Nokia, and want to play something else. So they tried to destroy the 3310, and came to the point of burning the screen. There is one more reason i can think of. The author must've been budget conscious and they must've thought, "until this thing gives up I AINT BUYING A NEW PHONE!" and they regretted their life choices after this. I hope this helps you in your quest to understand how the screen broke! 😜
ronik103 -
Ez a jelenség lehet hogy nem emberi hiba lehet hanem emberi felelőtlenség mert sokáig volt a napon a uv sugárzás kikezdi a képernyő mögötti foliát ami így leválik olyasmi mint a embereknél a hámlás ha sokat vannak a napon vagyis egyszóval környezeti ártalomnak lett kitéve! 😉👍