Introduction

Users will be able to replace the cooling pipe of their blender using this guide.

  1. ABGfVDwrWocLrUh4
    • Remove the cup from the blender base.

  2. bgQrxaBP3RiZOrK5
    bgQrxaBP3RiZOrK5
    hTGCrCCXc1FKKIrI
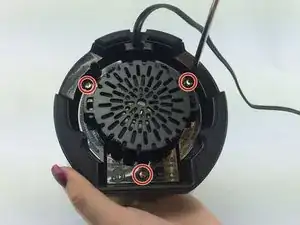
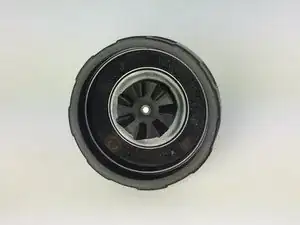
    • Turn the blender over and unscrew the three 14 mm screws holding the slotted base in place. These are Torx Security bits (TR9) on some units.

    The three screws holding the slotted base in place on some units are Torx Security bits (TR9) not phillips. The tool is listed above (T9 Torx Screwdriver is actually a TR9 Torx Security Screwdriver . It’s the right tool.

    Dennis Carr -

    So when you remove the bottom plate and completely remove the motor, does the new motor come with the electrical cord already attached, and if so, how do you get the bottom plate off and on with the motor on one side of the cord and the plug on the other. Or does it come without the cord and you need to do some soldering?

    Craig Velardi -

  3. IZFcgxjN3xKTUVOX
    IZFcgxjN3xKTUVOX
    EAWSldAQ2pXWUEDe
    OIvFY1jKPowOdIWl
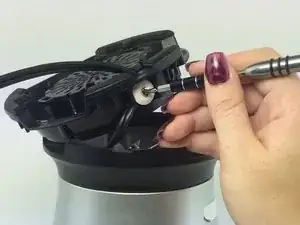
    • Using a the standard Phillips head screwdriver bit, remove the slotted black plastic covering and then unscrew the one 11mm screw holding the power cord in place.

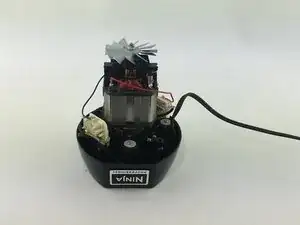
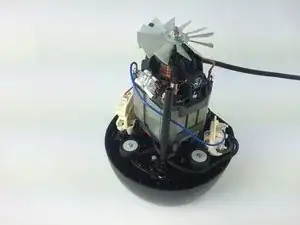
    • Unscrew the four 14 mm screws that are in the deep slots. This will release the motor from the base.

  4. OimnwTGiEcZpUZWd
    OimnwTGiEcZpUZWd
    GVyHAdtP1WyNb4rr
    xsQbAbkkDYxOluMi
    • CAUTION: the silver blade attached to the motor is very sharp. Use a towel or thick cloth to protect your hands for the next step.

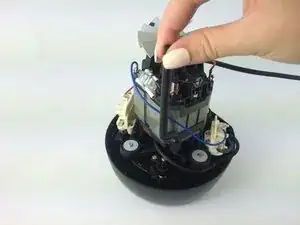
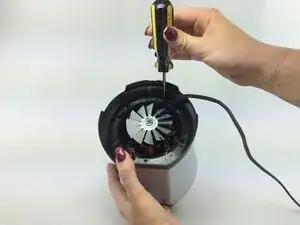
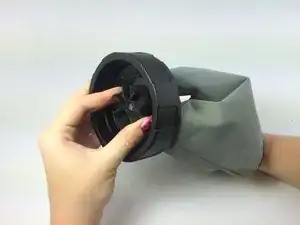
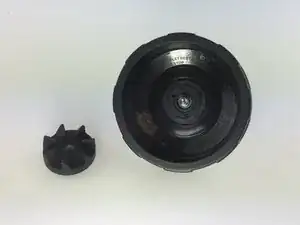
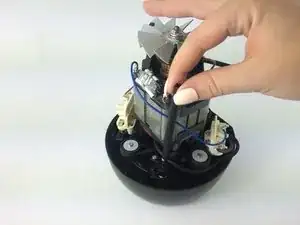
    • Using a towel, hold the silver fan still. Twist the small black rubber wheel that is attached to the top of the blender base to the right. This will remove the wheel for replacement.

    The aluminum fan at the far end of the motor from the power transfer end is, as described, a simple stamped metal part that was not processed to remove the sharp edges and protecting the hand holding the blades is a very good precaution. The blades are also easily distorted. An alternative is to hold the nut that holds the fan blade on instead of the blades. It can be held with a wrench, socket wrench, or nut driver, without injuring the hand or the fan blade. The fan retaining nut is M5 and it takes a 7mm wrench but it can also be held with a 5/16” wrench. Best practice would thread an M5 nut onto the shaft as a jam nut prevent the fan nut from breaking free before the power transfer plate, but if the factory applied thread lock works as well for others as it did for me, a jam nut is not necessary.

    Oliver Street -

  5. PVNpclbNyPVSWyEU
    PVNpclbNyPVSWyEU
    3bpk1ixeAQB3J62Z
    HnyEWJYOFwB2roSY
    • Remove the cooling pipe from the top inside of the blender base and replace it.

Conclusion

To reassemble your device, follow these instructions in reverse order.

Morgan Blauth

Member since: 24/02/16

801 Reputation

0 comments