Introduction

Follow this guide to replace a broken or faulty fan in your PlayStation 5 Pro.

If your fan isn't spinning, is spinning very slowly, or is making very loud noises, you may need to replace it.

You can also use this guide to clean out a dusty or dirty fan.

Before purchasing a replacement fan, it's a good idea to remove your current fan and clean off any dust, dirt, hair, or grime that may have accumulated—it's possible this alone is the problem. If the fan still shows signs of being faulty after cleaning, then consider purchasing a replacement.

  1. wHVpAPalMtKCWbdb
    wHVpAPalMtKCWbdb
    MSKoyDTWRhTwUdVo
    PQeie6NiddUFrABX
    • Before starting your repair:

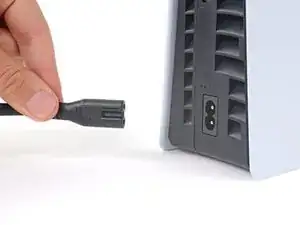
    • Shut down your PlayStation and unplug all cables and accessories.

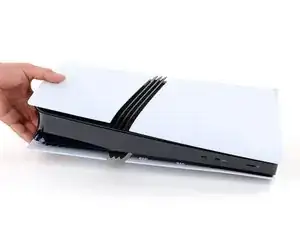
    • Remove any stands supporting your console and lay it down so the right side is facing up.

  2. trVIT1VQZTUW4FIS
    trVIT1VQZTUW4FIS
    kdiKx1yNtfNFQU2L
    rZkktWRSgVIWFKUv
    • The cover is secured with hooks along the back edge and clips along the front edge.

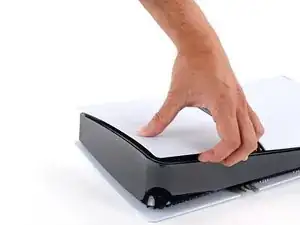
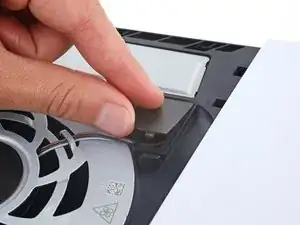
    • Firmly pull up the front edge of the smaller, upper cover to release the clips.
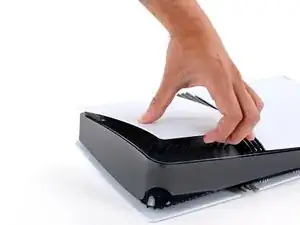
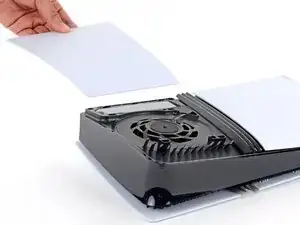
    • You'll hear distinct "pops" as the clips disengage.

    • Remove the cover.

    • To reinstall the cover, place the hooks into their cutouts along the rear edge and firmly press the front edge of the cover into place to re‑engage the two clips.

  3. DciAC3uQxmsb4VDF
    DciAC3uQxmsb4VDF
    jbLUQXXaWWR2AnPo
    nyRajcgqlQiDBQhm
    • Use your fingers to remove the plastic cover hiding the fan cables connector.

    • The cover is secured with light adhesive.

    • During reassembly, press the piece of plastic back into place to secure it with the leftover adhesive. If it isn't sticking, use strips of double-sided tape to secure it.

  4. CLOTdBkGv5BPYBn6
    CLOTdBkGv5BPYBn6
    4GAVXdLZMPKVWHMi
    • Gently pull the fan cables out from under their plastic clip on the frame.

  5. vm3JESWdgjyFDyQ2
    vm3JESWdgjyFDyQ2
    5KlRmtmBw362temG
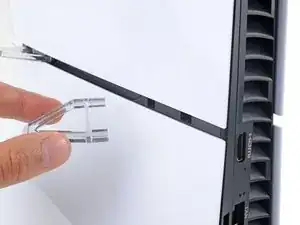
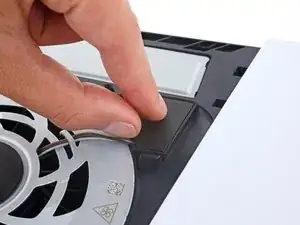
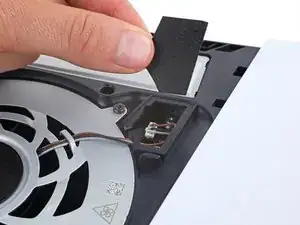
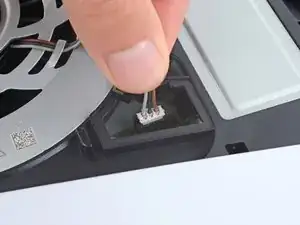
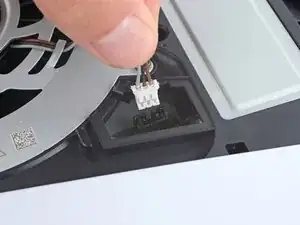
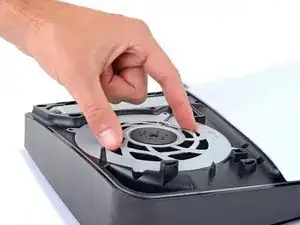
    • Firmly grip the fan cables' white connector head and pull it straight up and out of its socket.

    • If you're having trouble, grip the cables just above the connector head and gently pull.

    • During reassembly, align the connector over its socket and push down on the edges with a clean fingernail or the flat end of a spudger until it slides fully into its socket.

  6. lTvIR6Z5VHFDrMuS
    lTvIR6Z5VHFDrMuS
    uixgeB1ttMjAUZGl
    • Throughout this repair, keep track of each screw and make sure it goes back exactly where it came from.

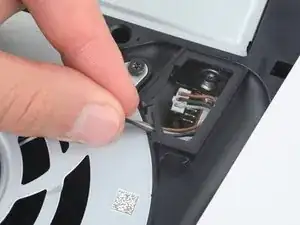
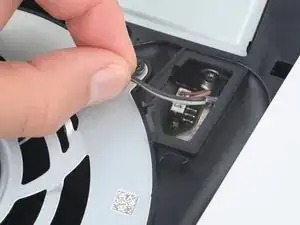
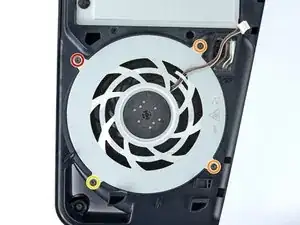
    • Use a T8 Torx Security screwdriver to remove the four screws securing the fan:

    • One 31.7 mm‑long screw

    • Two 21.5 mm‑long screws

    • One 11.5 mm‑long screw

  7. 2NZbCmLBfR3oCfKX
    2NZbCmLBfR3oCfKX
    v1NnZsAYOhVVAl3J
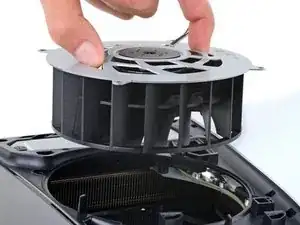
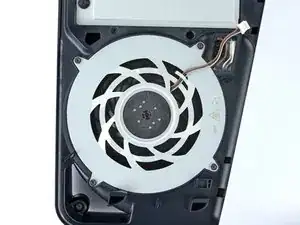
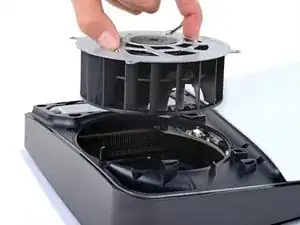
    • Use your fingers to grab the fan by its vents and lift it straight up to remove it.

    • If you're using this guide to clean your fan, use compressed air and a clean cloth to remove any dust or dirt.

    • During reassembly, insert the fan so its cables are near their connector.

Conclusion

To reassemble your device, follow these instructions in reverse order.

Take your e-waste to an R2 or e-Stewards certified recycler.

Repair didn’t go as planned? Try some basic troubleshooting, or ask our Answers community for help.

Spencer Day

Member since: 14/09/22

95592 Reputation

0 comments