Introduction

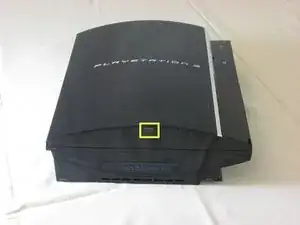
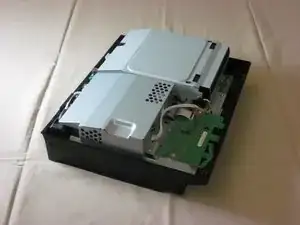
This guide provides the necessary steps to remove the entire motherboard enclosure from the Playstation 3.

  1. rRVTEQvQSS5Ze1Rn
    rRVTEQvQSS5Ze1Rn
    qTHOsnNlmBUOWhAD
    • Remove the rubber screw cover near the hard drive cover with a spudger.

  2. jWkgTH6jmueQ2UjL
    • Remove the screw holding the top cover in place with a Torx T10 screwdriver.

  3. LJVdBODLxElDdjJt
    LJVdBODLxElDdjJt
    fT2KSo6Koxg1O4tk
    • Slide the top cover down about half an inch.

    • Lift the cover off of the PS3.

  4. MK4IGe6IynEYoUju
    MK4IGe6IynEYoUju
    MLLXH46mEHgnCndi
    • Remove the seven screws in the top cover with a Phillips #2 screwdriver.

    • One of the screws is shorter than the others. The short screw is marked in yellow.

    There is two additional small screws that need to be removed similar than the yellow one.

    Enrique Basulto -

  5. NEP2c1OvPEUPganR
    NEP2c1OvPEUPganR
    nN4ebyTIWAZNZDyh
    JVcgo4sKFKXtUYVr
    • You can now lift off the top cover.

  6. xFAAZsJwoPjd2QAO
    xFAAZsJwoPjd2QAO
    LcsRROYcIAIvHUrs
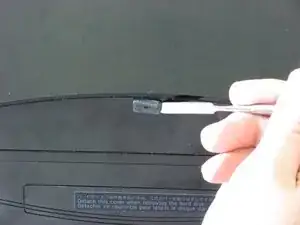
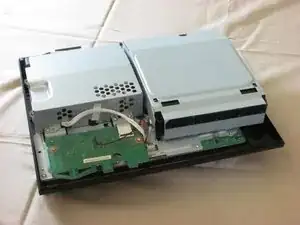
    • Unplug the white wires connected to the wireless board. There are two sets of wires: one set in the front, one in the back.

    • Push down the tab on the connector to disconnect the wires.

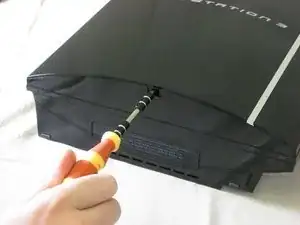
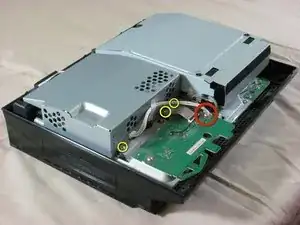
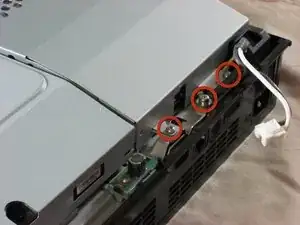
    • Remove the two screws on the front of the power supply.

  7. X2J42oVW4RtLDZh6
    • Remove the screws on the back of the power supply with a Phillips #2 screwdriver.

  8. APNin4GMSXGr1AfJ
    APNin4GMSXGr1AfJ
    eGsWX6DlaDde2PMr
    • Remove the power supply by lifting it straight up.

  9. YUoWM5oHgRQWGpZu
    YUoWM5oHgRQWGpZu
    L64VwFmBufUAFYft
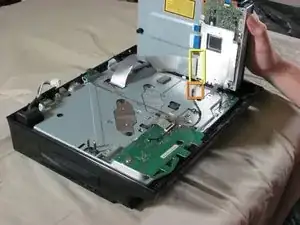
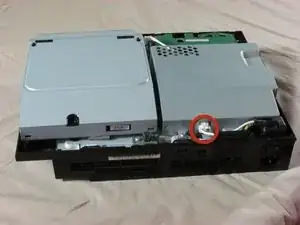
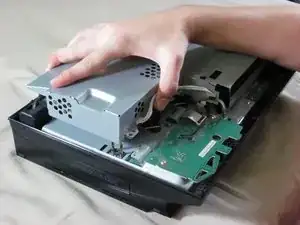
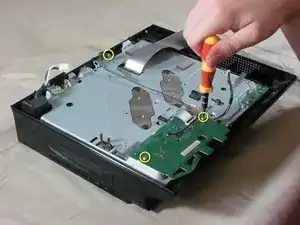
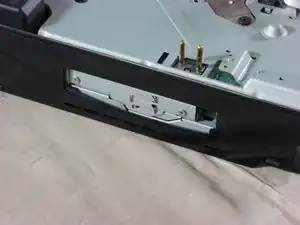
    • Unplug the optical drive power cable.

    • Detach the ribbon cable that connects the optical drive to the motherboard.

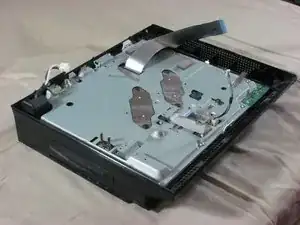
    • Set the optical drive aside.

  10. rCeasIGPGlABrYMI
    rCeasIGPGlABrYMI
    o6HfVTHTRouJgLxZ
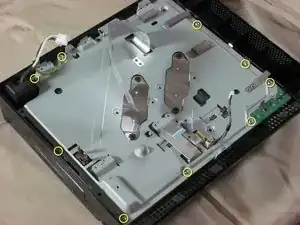
    • Remove three screws (Phillips #2) from the wireless board and antenna.

    • Detach the ribbon cable that connects the wireless board to the motherboard.

  11. xR2CtrbTFYLpoDRK
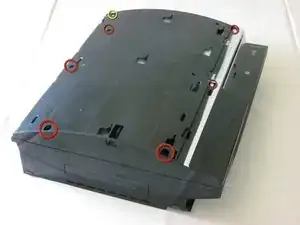
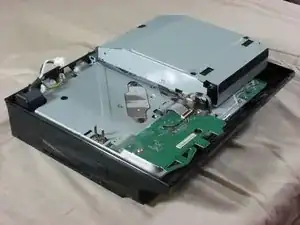
    • Remove nine screws (Phillips #2) from the perimeter of the metal plate covering the motherboard.

  12. mhla5vUsXBuUCJYL
    mhla5vUsXBuUCJYL
    tMOdiY6KkFIbHxcP
    yCSUP2XIqnUTvVrT
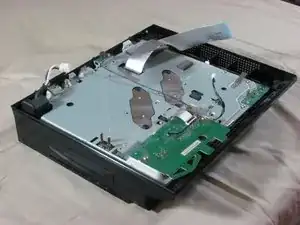
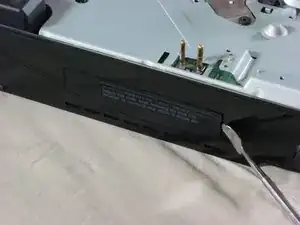
    • Remove the hard drive door with a spudger.

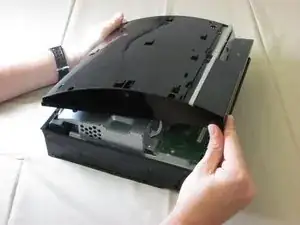
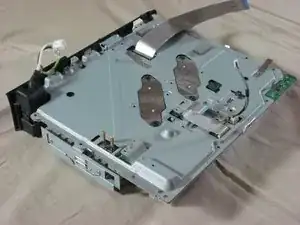
    • Lift the metal enclosure out of the plastic bottom case.

Conclusion

To reassemble your device, follow these instructions in reverse order.

iDeleted

Member since: 07/07/10

2101 Reputation

0 comments