
Introduction
-
-
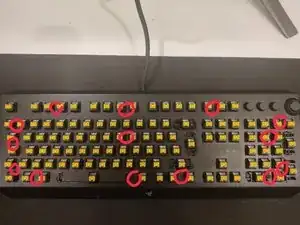
You will start by taking off the key caps. This can easily be done by simply pulling the smaller ones, but be careful with the "longer" keys, since they have a metal bar which you don't want to break or bend. The keys that are special are showed with the red rings.
-
-
-
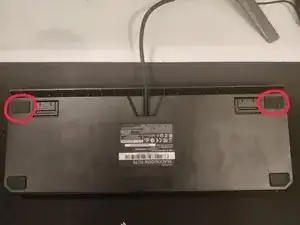
Take off the two rubber feet on the far end of the keyboard (the side that is normally turned towards your monitor) This can be done with your fingers, but I recommend using a screwdriver with a flat head.
-
-
-
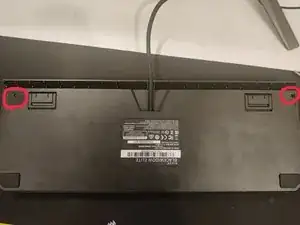
Now you will have to unscrew the two bottom screws, this is done with a small philips screwdriver. I could not get out the screw positioned towards the escape button, but that did not matter. Notice how the screws differ from each other, this is important for reassembly.
-
-
-
Now you will have to unscrew the screws sitting underneath the keycaps. This is again done with a small philips screwdriver. There are 14 screws on the front, positioning does not matter for reassembly as these are the same.
-
To reassemble your device, follow these instructions in reverse order.

One comment
Thank you for this! Helped me find the two hidden screws underneath :-)
I was hoping the top plate could be removed from the assembly for easier cleaning, but seems all key mechanisms need to be unsoldered to do this?!