Introduction

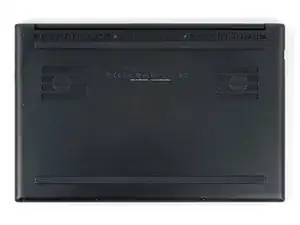
Use this guide to replace a dead, worn-out, or malfunctioning battery in your Razer Blade 15 Advanced Model (Early 2020) laptop.

If your battery is swollen, take appropriate precautions.

  1. U3WCBShbaLvURkIn
    U3WCBShbaLvURkIn
    DLKeF3nRAqw6JZHV
    • Allow your laptop's battery to drain below 25% before starting this repair—a charged battery may catch fire if damaged.

    • Unplug all cables, fully shut down your laptop, and close the lid.

  2. mwpZH3qBEQhGfMsZ
    mwpZH3qBEQhGfMsZ
    eZC5IteTOvPV2SRH
    • Use a T5 Torx driver to remove the ten 3.8 mm‑long screws securing the back cover.

  3. UyswDlrMoOuPxypO
    UyswDlrMoOuPxypO
    ZCQLS6SmYFD16roT
    AKZCEEwppCqshwfw
    • Depending on the age and condition of your laptop, the back cover may come off sooner than this guide instructs. If it feels loose, remove it at any time.

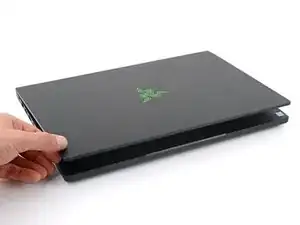
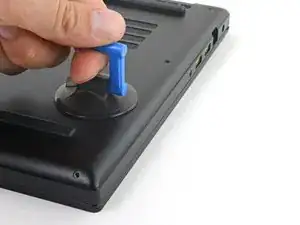
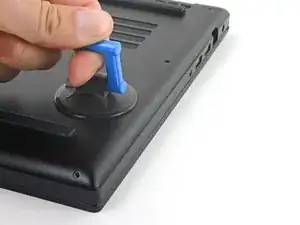
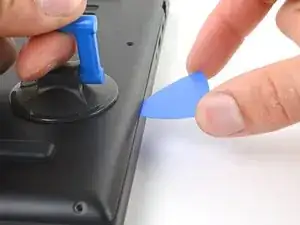
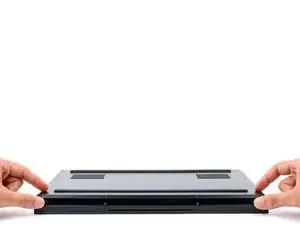
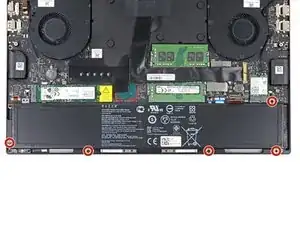
    • Apply a suction handle to the middle of the back cover's right edge, between the lower rubber foot and the middle screws.

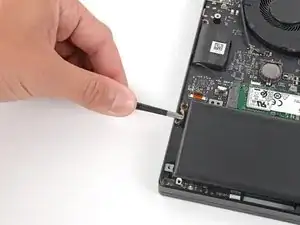
    • Pull up on the suction handle to create a small gap between the back cover and the frame.

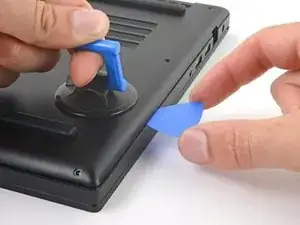
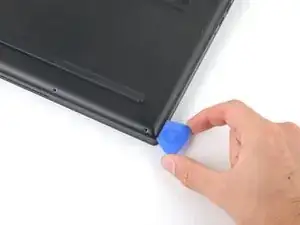
    • Insert an opening pick into the gap.

  4. 5ZeHhQqyGyPNtQ2Z
    5ZeHhQqyGyPNtQ2Z
    65pDl33yTCvLjvtV
    6GNJkCfOsbUZWFQE
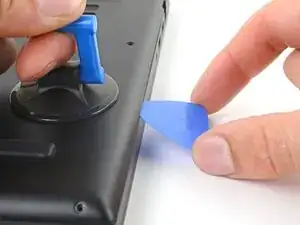
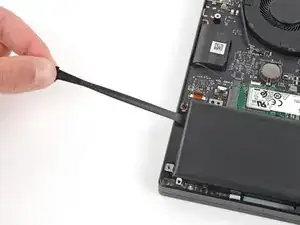
    • Angle your opening pick upward, away from the frame. Keep it angled upward as long as it's between the back cover and the frame.

  5. aoYEQ1ZuOohURDBV
    aoYEQ1ZuOohURDBV
    3wZjhrAbjWVHpYDE
    QaiFOX5uygSIVlEo
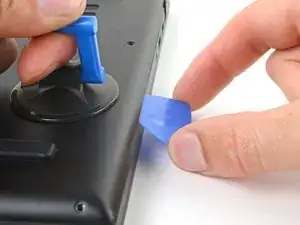
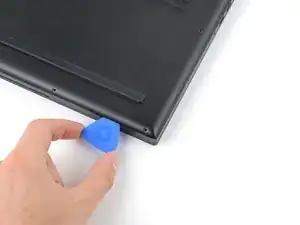
    • Slide your opening pick around the bottom right corner of the back cover to free it from the frame.

  6. aoJKrYRFNEwNCsgQ
    aoJKrYRFNEwNCsgQ
    WU5LeqALfrufkyDR
    1ig13qvemkhwD3TF
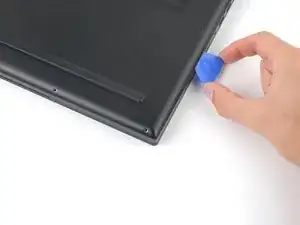
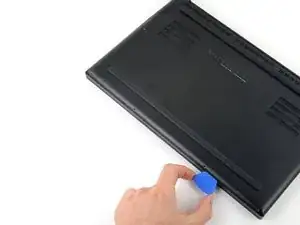
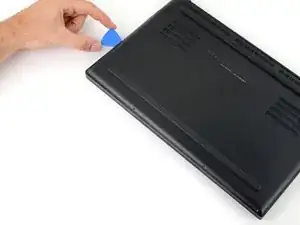
    • Slide your opening pick along the front edge and around the front left corner of the back cover to free it from the frame completely.

  7. BqSgYh6T41JWJKVM
    BqSgYh6T41JWJKVM
    YdTVUNPk3FW4GaDO
    CXegRG4dUtw3Cpol
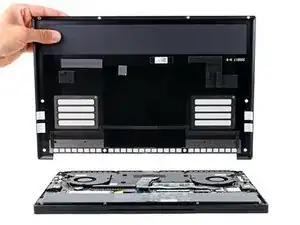
    • Remove the back cover.

    • Lay the back cover down on its rubber feet to avoid damaging the thermal pads.

  8. 2vxabbeLFF4TYtlM
    2vxabbeLFF4TYtlM
    IKvPRa4pTtoKIJHM
    p1RIxJKZIoG6spRk
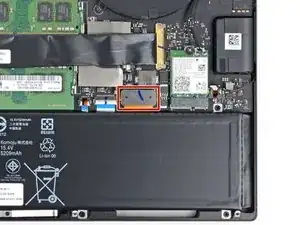
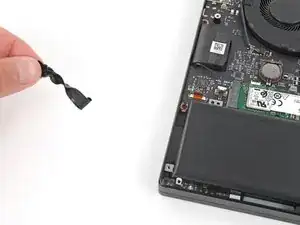
    • Insert the point of a spudger under the middle of the battery connector's long edge.

    • Lift and disconnect the battery press connector from its socket on the motherboard.

    • This will require some force. Don't pry against any resistors or chips.

    • To re-attach press connectors like this one, carefully align and press down on one side until it clicks into place, then repeat on the other side. Don't press down in the middle. If the connector is misaligned, the pins can bend and cause permanent damage.

  9. bUcB2KiCGBbCkr6k
    bUcB2KiCGBbCkr6k
    S1FAfLHfInTlOJPM
    • Use a Phillips screwdriver to remove the five 4.6 mm‑long screws securing the battery.

    • Some battery screws may have stickers on them. Pierce through them with your screwdriver or use tweezers to remove them.

  10. Xncea1PGhhMUaYUT
    Xncea1PGhhMUaYUT
    IaPGANWRuYKEGGWw
    ZXYLnZxAwaBdHLjn
    • Be very careful not to puncture or bend the battery with your tool—it can leak dangerous chemicals and/or catch fire.

    • An adhesive strip under the battery's top left corner secures it to the frame.

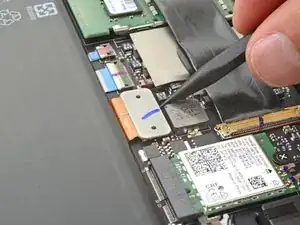
    • Use tweezers to carefully peel up the stretch‑release adhesive's pull tab near the top left corner of the battery, enough that you can grip it with your fingers.

    • Use your fingers to slowly pull the strip out slowly and at a low angle to the frame. Give the adhesive plenty of time to stretch and un‑stick.

    • If the strip breaks, don't worry! Skip to the next step for an alternate way to separate the adhesive.

  11. wMw4GyehHECRHMvI
    wMw4GyehHECRHMvI
    W4OBPWnKNmSrEDsg
    • If you successfully remove the stretch‑release adhesive, skip to the next step.

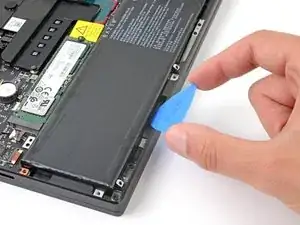
    • Insert an opening pick between the frame and the bottom left edge of the battery.

    • Slowly pry the battery up until the adhesive separates.

    • Don't apply significant force. All that's needed is constant pressure.

    • Leave the pick inserted between the battery and frame to prevent the battery from readhering.

    It’s a pull tab in the upper left corner. It's easier to pull it with a tweezers then just remove battery by hand, than trying to pick it between the frame

    Filip -

    Thank you for the comment! I've updated the guide accordingly.

    Spencer Day -

    As Filip commented, the pull tab is needed. It is in the little cavity at the top edge of the left side of the battery. No amount of constant pressure was getting me anywhere, pulling the tab out from the side removed the adhesive. Similar to a command strip adhesive.

    Will -

  12. BNrEa5ewdAdwgdPi
    BNrEa5ewdAdwgdPi
    upOi4hvSIZipfprL
    X6BKnh4yP44RIgDW
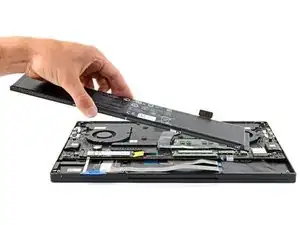
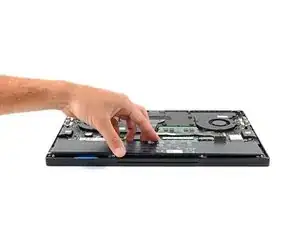
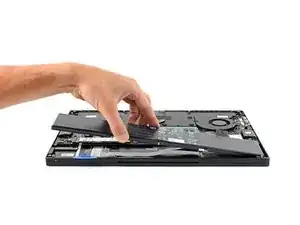
    • Grab the middle of the battery and lift the left edge.

    • Slide the battery's right edge out from its recess in the frame and remove the battery.

    • During reassembly, if your battery comes with a strip of adhesive pre‑installed under the top left corner, remove the plastic liner. If it doesn't, apply a strip of thin, double‑sided tape to the frame where the old strip of adhesive was.

Conclusion

To reassemble your device, follow these instructions in reverse order.

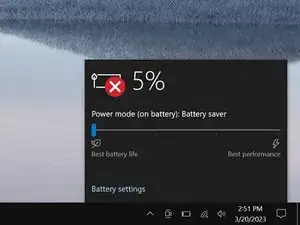
For optimal performance, calibrate your newly installed battery after completing this guide.

Take your e-waste to an R2 or e-Stewards certified recycler.

Repair didn’t go as planned? Try some basic troubleshooting, or ask our Answers community for help.

Spencer Day

Member since: 14/09/22

95583 Reputation

One comment

Hi, the battery from ifixit is just slightly too wide by the vertical edge, i think due to the protrustions that hold the battery to the laptop. is there a fix for this?

Calvin Leung -