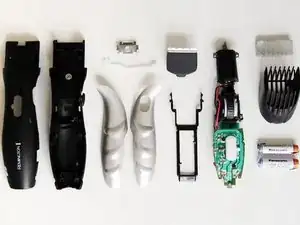
Introduction
- upgrade cost ~ € (5€ lipo + 7€ usb lipo charger)
- idea applicable to many other devices, but hard to fit properly into case (drill usb port and stabilize usb connector inside)
- requires circuit hacking (easy circuit, but finicky wiring)
- runs faster after upgrade and blades heat up slightly during use (higher voltage)
Tools
-
-
Take off the blade cover.
-
Take off the blades and take out the blade holder clip.
-
Take out the screw at the bottom.
-
Gently pry open the case while paying attention not to break the plastic latches connecting the top and the bottom halves of the case.
-
carefully separate the metallic looking grip covers
-
Disconnect the switch from the circuit (white lever)
-
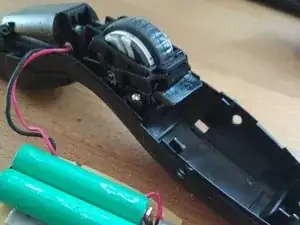
Take off the wheel and the connection to the blade cover.
-
unscrew the motor cover and take it off
-
-
-
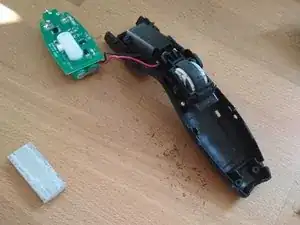
Take out the circuit board with batteries and motor
-
Unscrew the switch on the circuit board (2 parts, 2 screws)
-
Desolder and separate the battery (weakly glued on to circuit board) (also remove the foam filling below the battery in the case)
-
Desolder the motor and set it aside
-
Desolder the old charging port
-
-
-
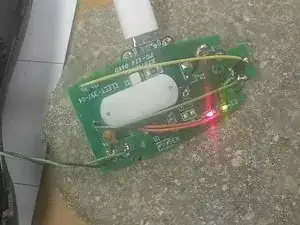
Sever the marked connections on the circuit board (scratching with a screwdriver should be sufficient)
-
Unsolder the marked components from the circuit board (keep zener diodes XX and YY or have equivalent components handy)
-
Connect the points 1 through XX with wires (I tried to keep them short and flush with the circuit board, so they would not interfere with the casing)
-
Add the capacitor to protect the circuit from the motor
-
Add the Zener diode
-
-
-
First of all test the functionality of the charging chip alone: Plug it into a usb charger and verify that both the red and green LEDs light up.
-
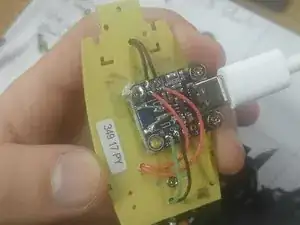
To make sure the usb charging port is at the desired position and depth in the case, take measurements (also already for the hole placement in the case) or follow the measurements in the pictures to place the lipo charger.
-
Glue the lipo charger on the back side of the circuit board: I used foamy double sided adhesive tape but had to add screws to fasten it properly. Glueing the boards together should do the trick better, but can be trouble if the lipo charging board needs to be replaced)
-
Make sure the two boards have a strong connection since it will have to take the force of every insertion and extraction of the usb cable (check by inserting usb cable and carefully tugging at it)
-
Solder the 5 wires from the charging board to the shaver circuit board (to prevent melting the other wires with the soldering iron solder the green and black GND and BAT connections first, then the red LED wires, and finally the GND wires for the LEDs)
-
Test the functionality of the charging chip again, by plugging it into a usb charger: both the red and green LEDs should light up.
-
DO NOT SOLDER CONNECT the marked section which enables 500 mA charging current. It seems to be too much for the charging chip, which will overheat and break, short circuiting the battery!!!!!!
-
-
-
Solder the battery connections to the lipo charger board (RESPECT THE CORRECT battery POLARITY!)
-
Solder the motor to the hacked circuit board across the capacitor (polarity irrelevant, since motor rotating direction irrelevant because shaver only oscillates)
-
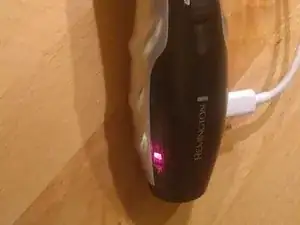
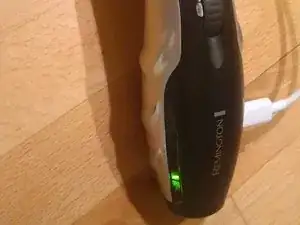
Check the functionality by charging the battery (ONLY red light when charging and ONLY green light when fully charged - both lights indicates incorrect wiring) and turning the shaver on to rotate the motor (it rotates very quickly and silently)
-
-
-
For the hole: Use your own measurements from where you placed the lipo charger board or use the measurements in the pictures
-
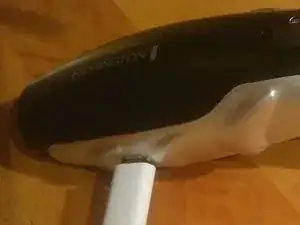
Using the dremel, drill the hole in the metallic grip for the usb port (it does not have to be a perfect fit, the usb port just has to fit inside the hole)
-
Also drill down the side of the top half of the case to fit the protruding lipo charging board and the usb port. (This hole will be hidden behind the metallic grip)
-
When you insert the circuit board into the case the usb port should now match the holes drilled
-
-
-
Congratulations, you have succeeded at an advanced household lipo upgrade! Now you can call yourself a real hardware hacker :)
-


To reassemble your device, follow these instructions in reverse order.