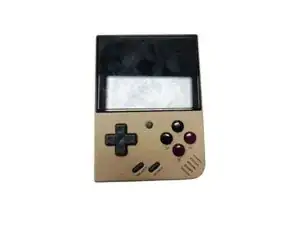
Introduction

If the front screen to your Retro Mini Miyoo Mini Plus is broken or malfunctioning. Follow this replacement guide to replace the screen.

  1. oX5l6rNdMiOPcyAL
    oX5l6rNdMiOPcyAL
    Ye2CPwAQkIESUYGh
    • Lay the device face down on a flat surface.

    • You may want to lay the device on a towel or other soft surface to avoid scratching the screen.

  2. mCdhaag1TmTrp2KD
    mCdhaag1TmTrp2KD
    P2RSVuOXEpWYVx3y
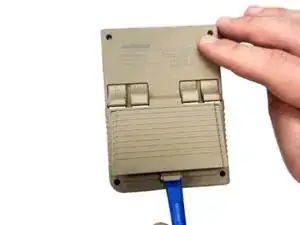
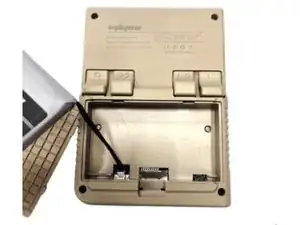
    • Use your fingernail to push in the battery compartment tab.

    • Lift the cover up to expose the battery.

  3. uQARSODbhwUMWN5B
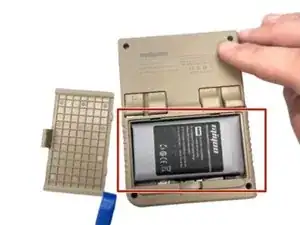
    • Use an opening tool to gently lift the the battery from its compartment.

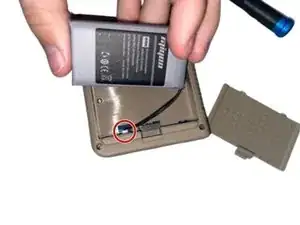
    • Gently pull the battery out and set the battery next to the system, with care not to strain the attached wire.

  4. ujJZNh5DpaapljEp
    ujJZNh5DpaapljEp
    OSLOMxAsHsHFUrs2
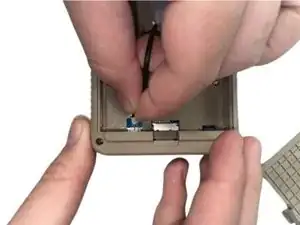
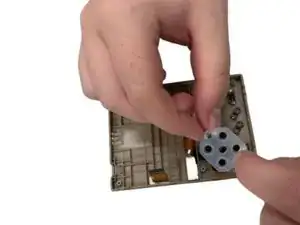
    • Pinch the white battery connector and pull it directly out of its socket.

    • Completely remove the battery.

  5. F3pplW4JequvrAcv
    F3pplW4JequvrAcv
    ILBt4Iv23warXF1y
    • When you have the new battery, put the new battery wire into the connecter.

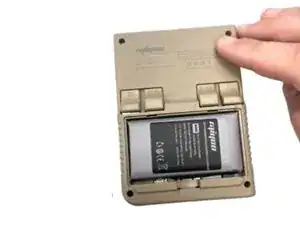
    • Place the battery back into the empty space with the wire at the bottom of the battery.

  6. 2XTsVSShfonOvLDo
    2XTsVSShfonOvLDo
    RbanvOlAdcQbjswc
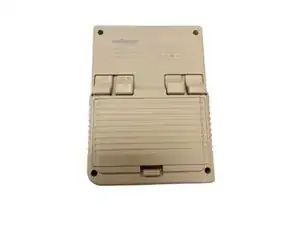
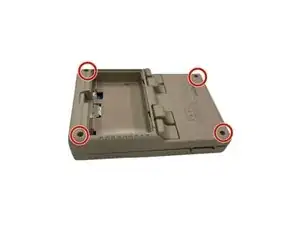
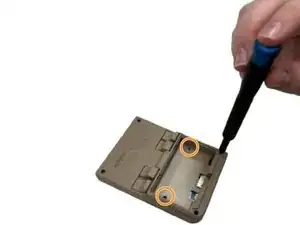
    • Remove the four screws securing the rear case with a Phillips screwdriver.

    • Remove the two Phillips screws inside the battery compartment.

  7. pYWFELsXlFnIS2iK
    pYWFELsXlFnIS2iK
    pcFPTMrSnDwHHGeG
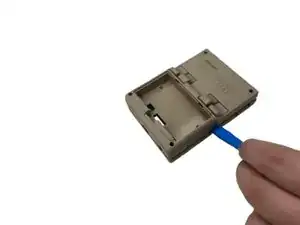
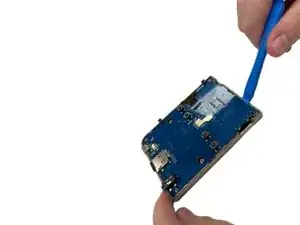
    • Insert an opening tool into the seam between the front and rear case.

    • Pry the front and rear case apart.

  8. E2EwSPMSWrCKOUPR
    E2EwSPMSWrCKOUPR
    hO2vNJfVqWE4W1YS
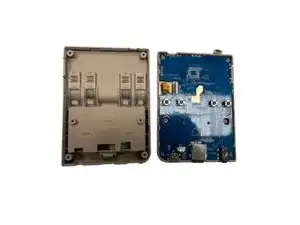
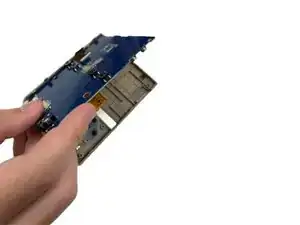
    • Gently set the rear case aside.

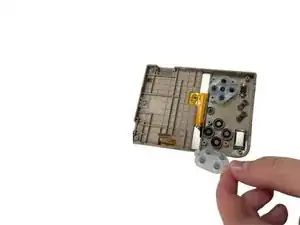
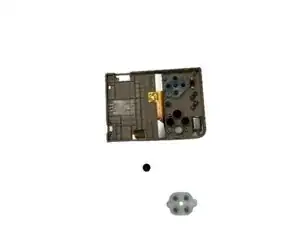
    • Make sure you lift the black tab on the left side of the motherboard and gently remove the ribbon cable as to not damage it when removing the motherboard from the case.

  9. vebLZsGHZZeBEdI6
    vebLZsGHZZeBEdI6
    JPGUGqqCrChYWZIs
    • Use an opening tool to lift the motherboard from the chassis.

  10. DlfVQqevPFA16BXv
    DlfVQqevPFA16BXv
    dXVJlFUvlbAX3VmU
    UbSutJdgHWlDqpQl
    • Gently set the motherboard to the side.

    • Remove the rubber button gasket.

  11. QCnIgcm6calWVeY3
    • Remove the button(s) you want to replace.

  12. TLaLcgGKNDTUoR4q
    • Heat an iOpener according to the instructions here.

    • Rest the iOpener Gel Bag on the screen for a minute.

    • Alternatively, use a hair dryer to gently heat the screen to loosen the adhesive that secures it.

  13. L6jeLNWT2RkMkcE1
    L6jeLNWT2RkMkcE1
    26DZOR5GBU1iTwPw
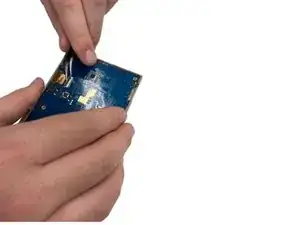
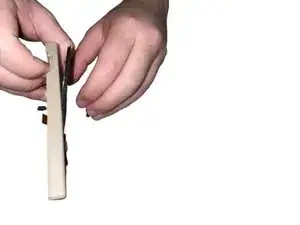
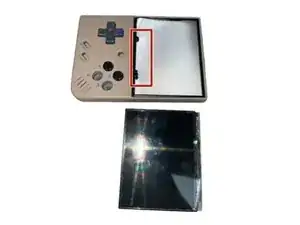
    • Gently apply pressure to the highlighted area on the front cover of the device.

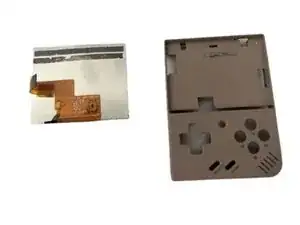
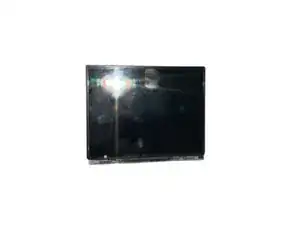
    • While applying the pressure gently peel the screen off of the device.

    • Take care not to flex the screen. If the screen feels stubborn, apply more heat.

  14. YgyeKiBqdAC3bW2g
    YgyeKiBqdAC3bW2g
    XaQH2SICPEOHPEDo
    F1MQaWeKi2XkyBqO
    • Set the new screen gently into the ridges (boxed in red) on the front of the backlit screen

Conclusion

To reassemble your device, follow the above steps in reverse order.

Take your e-waste to an R2 or e-Stewards certified recycler.

Repair didn’t go as planned? Try some basic troubleshooting.

Kaden

Member since: 28/08/24

578 Reputation

0 comments