Introduction

  1. fdXOqgRq3X1BkyXP
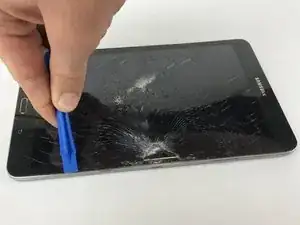
    • Begin by separating the back panel from the screen glass assembly using the plastic opening tool.

    • Insert the plastic opening tool between the edge of the glass screen and the metal frame around the device.

  2. GSFyXNlwBkdiOFOh
    GSFyXNlwBkdiOFOh
    qateXbgFkxTEpWlB
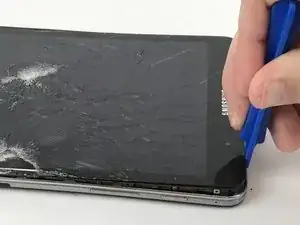
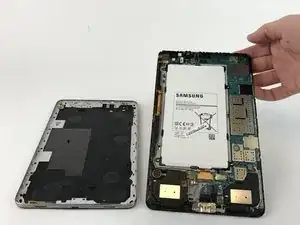
    • Continue around the entire device until the back panel is completely separated from the screen.

  3. TIMJXU1mZ2HHbUdN
    TIMJXU1mZ2HHbUdN
    tOcV1i5KW1SfgdtL
    • Remove the four 2.5mm Phillips #000 screws.

  4. PWScT5YOTlUHeW6l
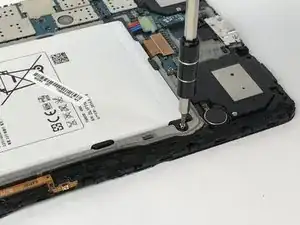
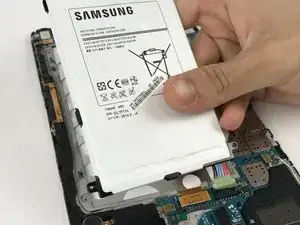
    • Gently pull up on the plastic tab that has red, blue and black wires that connects the battery to the motherboard.

  5. 5WoKvN1hNDjg2vNT
    • The battery should be completely disconnected and the new one can be installed.

    Just two things I’d like to add. In step 2, one can see where the bottom clips to the top with the mainboard, and it’s easier if one pries adjacent to those clips. Secondly, one shouldn’t tighten the screws for the battery too much, I tightened them till they were tight but ended up having to take it apart again and loosen them by around a turn or so. If they are too tight, they will warp the diffuser/reflector/light guide for the LCD panel and there’ll be brighter spots in the LCD screen. The screws originally have thread lock, so I guess if one isn’t confident the screws will stay in place it’s best to re-apply some, though as they are screwing into a plastic frame, the hope is that the plastic provides enough friction for the screw to remain in place.

    Christopher Chan -

    the first few steps of the tutorial and their accompanying photos are misleading, they make it appear as though you need to pry up the screen from the entire frame of the tablet, all you need to do it put a spudger between the gap in the textured back panel and the frame, and slide it around popping up all of the plastic clips until it comes off, its very similar to an older samsung phone, like a galaxy S5, where you just pop off the back and gain access to the battery compartment. if you followed the steps shown in the photos, you WILL crack your screen and tear its flex cables

    keep in mind popping off the back panel alone does carry the risk of snapping off some of the plastic clips holding it to the mid frame, so i would suggest helping it stay on with some TESA tape, even still, that is a MUCH less risky way to replace the battery in this thing than to try to pry the entire screen up and out of the midframe.

    Alex Frideres -

  6. wJvoo6CNDXPNacR1
    wJvoo6CNDXPNacR1
    I2DrK5MScvyXbUrw
    • Remove the two 2.5mm Phillips #000 screws.

  7. bvxXESfFoHhVXXQ2
    bvxXESfFoHhVXXQ2
    VTnic2BSgQOa6iLc
    QfgtFJZjhBk53rr6
    • Gently pull up on tab that connects the charging port to the motherboard

Conclusion

To reassemble your device, follow these instructions in reverse order.

Jonathan Romine

Member since: 12/09/16

1072 Reputation

3 comments

Thank you for your help. You are awesome :-)

Kim Williams -

I did all of this and battery says “not charging” while plugged in. Replaced both battery and port.

Brandon Torzeski -

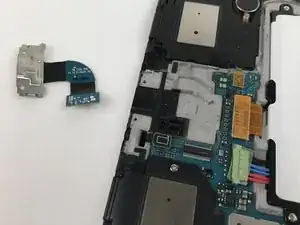
Hey Thanks guys! I was interested in the data port / charging port flex cable replacement.

It could not be easier. Cheers folks.

Jim Kirkey

Jim Kirkey -