Introduction

Use this guide to replace the condenser fan on your older Samsung French door refrigerator.

The condenser fan circulates air over the condenser coils. This cools the condenser coils and allows refrigerant in the coils to liquefy and release heat. The moving air carries the heat away.

If the condenser fan fails, the refrigerator will operate poorly or not at all because it will not be able to get rid of the heat that is released from the condensing refrigerant. It will likely stop cooling and the compressor may overheat and shut down.

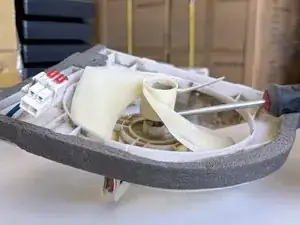
The compressor fan is is a fairly tight location, so be prepared to patiently work at removing it and at removing the fan blades.

  1. SaOfLbkeAxgmho5g
    • Unplug your refrigerator before you begin your repair.
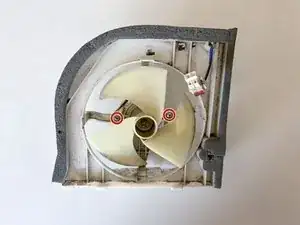
    • If you are testing or repairing the following items, you may also need to shut off and disconnect the water supply:

    • Condenser fan motor

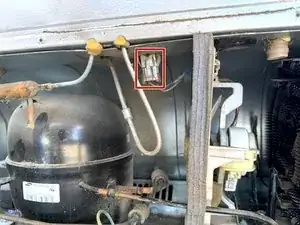
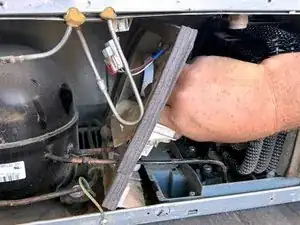
    • Compressor motor and thermal overload device

    • Water supply valve assembly

  2. KIHZJT4L1MRKxXRp
    • Use a #2 Phillips driver to remove the screws securing the rear panel to the refrigerator.

  3. R4fU1AQO32UMVGFi
    R4fU1AQO32UMVGFi
    4VJeYaed1HJhrXem
    TCqmM5xbuZZWXmrF
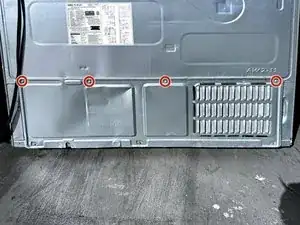
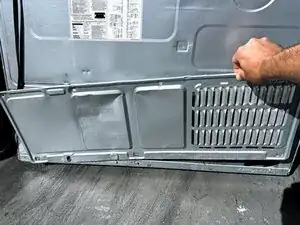
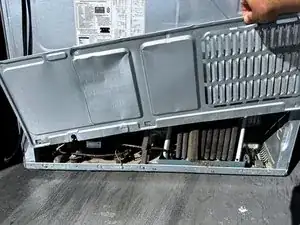
    • Lift the rear panel upward and outward to free the panel the from the tabs at the lower edge.

    • Remove the panel.

  4. FCSOgoEI4GVhASrW
    FCSOgoEI4GVhASrW
    BbdjCGuvvAVLhmOH
    LYqy12Noq5wACZjB
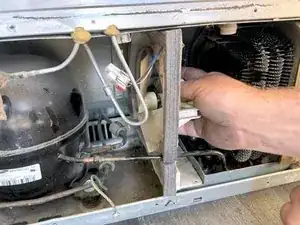
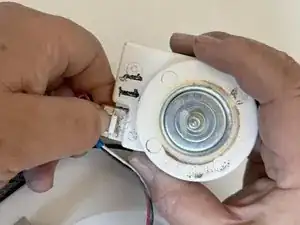
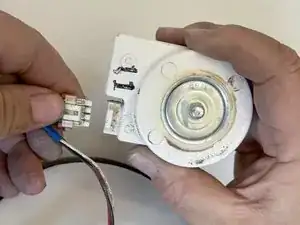
    • Locate the condenser fan power and control connector.

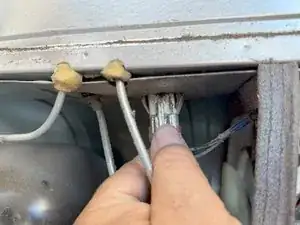
    • Grasp the connector, squeeze the locking tab, and pull down on the connector to disconnect it.

  5. HVlDovMQGoZWRnMw
    • Use a #2 Phillips driver to unfasten the fan bracket retaining screw.

  6. Uc2BZZBwXAfoBHHD
    Uc2BZZBwXAfoBHHD
    iAE1RaEXgVVZ6khT
    XxwOPclyCWASDLCs
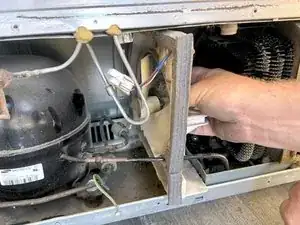
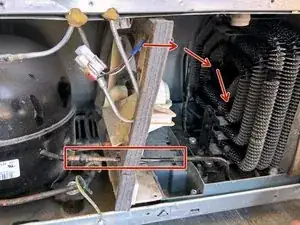
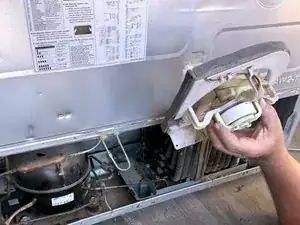
    • Slide the fan bracket toward you (toward the rear of the refrigerator.)

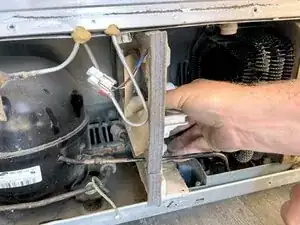
    • Then slide the bracket about 1/2"-3/4" (15-20 mm) to the left toward the compressor.

  7. TrPXycXGITYJRnOX
    TrPXycXGITYJRnOX
    URxe1IyUIL4pZ3Ev
    O6ARngUGTdLJAKpr
    • Rotate the fan bracket clockwise, as shown by the arrows.

    • There is a refrigerant tube (red box) that passes through the bracket. Do not attempt to free the bracket from the tube just yet.

    • The third photo shows the fan bracket pivoting on the refrigerant tube after it has been rotated as mentioned.

    • By rotating the bracket clockwise first, you will be able to then pivot the assembly out of the machinery compartment.

  8. WZ6VQDtgALlqlSs2
    • Remove the condenser fan assembly.

  9. tCU1YPdYydakxWxD
    tCU1YPdYydakxWxD
    IobcJ45IJkThOV6U
    • Insert a flat-blade screwdriver under the fan blade hub.

  10. pEBGsxOeV3wQjQpj
    pEBGsxOeV3wQjQpj
    HlfGnyd4fD42TCyO
    CGGTXWxFZpdQcVgY
    • Pry upward with the screwdriver on the fan blade hub.

    • You may find the fan difficult to remove. One tip is to apply the prying force in line with the shaft (vertically) as much as possible.

    • You may find it easier to break the fan free by rotating the screwdriver at first to pry upward.

    • As the fan starts to slide on the shaft, you may also want to put the screwdriver tip further from the hub. Then lift with the shank as you start to remove the fan.

  11. kFtm4AOs2OUeJKgU
    kFtm4AOs2OUeJKgU
    rYR2SjJ5CgUsGaQG
    • Remove the fan.

    • The second photo is for reference for proper motor orientation when reassembling.

  12. fVQIkqmyijKSOF15
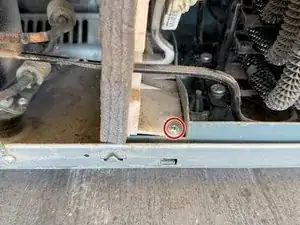
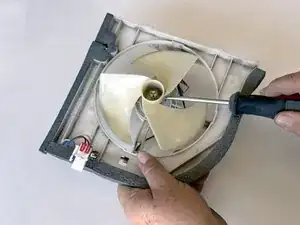
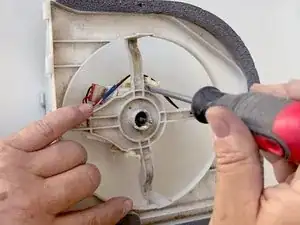
    • Use a #2 Phillips screwdriver to remove the two screws securing the motor to the motor assembly.

    • The picture was taken before the fan was removed

  13. a4j2C2fjytycljFl
    a4j2C2fjytycljFl
    j4IFCaeHoLrHRdiY
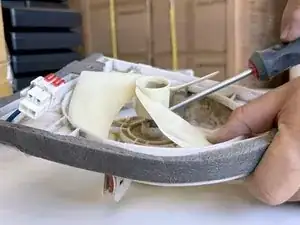
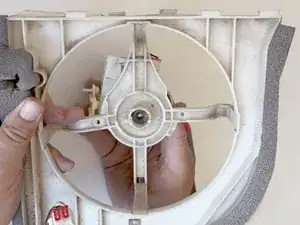
    • Use a flat blade screwdriver to pry each motor bracket clip from the motor assembly and unfasten the motor bracket.

  14. gWWBWJAvlaq6Nh2i
    gWWBWJAvlaq6Nh2i
    AZVUSOQSSGGIRMrE
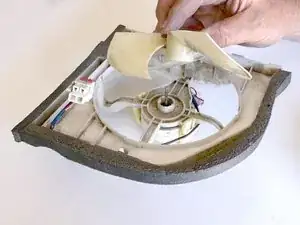
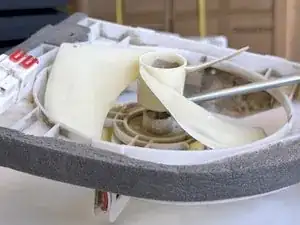
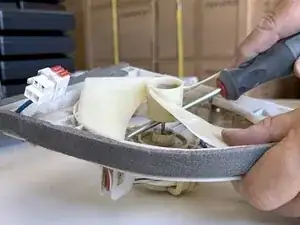
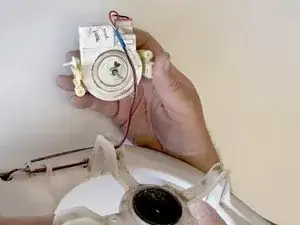
    • Reposition the motor and bracket from the motor assembly by pulling it straight off the assembly in line with the motor shaft.

    • Take care not to damage the wiring which is still connected to the motor.

  15. 6VDvaqbuoAJupKNd
    6VDvaqbuoAJupKNd
    kRISruhBHsmqkjQL
    2VVeeCJgGj4x3wnk
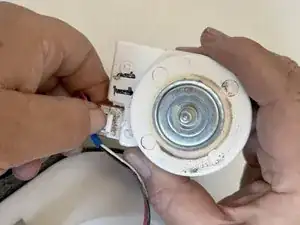
    • Squeeze the connector retaining tab to release the connector.

    • Pull the connector straight off of the motor to disconnect it.

Conclusion

To reassemble your device, follow these instructions in reverse order.

Take your e-waste to an R2 or e-Stewards certified recycler.

Repair didn’t go as planned? Ask our Answers Community for help.

Bill Gilbert

Member since: 30/06/22

37443 Reputation

0 comments