Introduction

  1. SaOfLbkeAxgmho5g
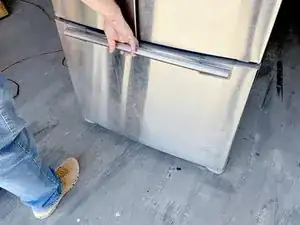
    • Unplug your refrigerator before you begin your repair.

    • If you are testing or repairing the following items, you may also need to shut off and disconnect the water supply:

    • Condenser fan motor

    • Compressor motor and thermal overload device

    • Water supply valve assembly

  2. vAeEjnKWJmKiaSLh
    vAeEjnKWJmKiaSLh
    jJD6R3IZCMXaREVE
    • Open the freezer drawer.

  3. i1y4E1iChFswDEtO
    i1y4E1iChFswDEtO
    Eb56MQbmsrtVIheL
    WoJjBq42gHggIQKS
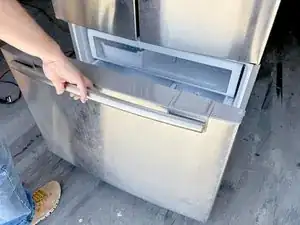
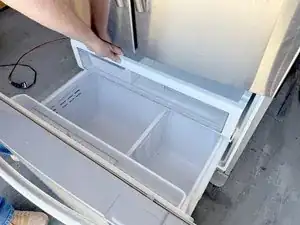
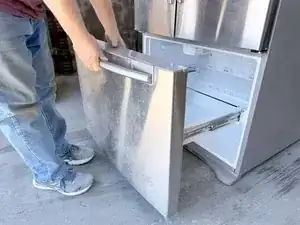
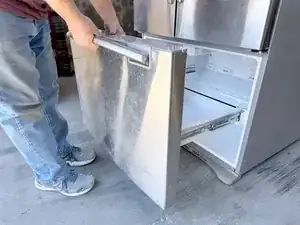
    • Pull out the upper freezer drawer.

    • Lift the front edge of the drawer.

    • Remove the drawer by lifting it up and out of the freezer compartment.

  4. XVAaafUjyZY3KNC2
    XVAaafUjyZY3KNC2
    kqWNxpGsZ4FxP6pr
    rEViTXoNAFxXLBsS
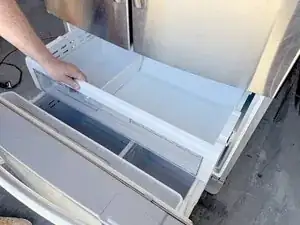
    • Unclip the basket hinge retainer by tilting the rear edge up and remove it from the drawer rail.

    • Release the small drawer basket and lift it up and out.

  5. XDDu2F3awuFIsQd5
    • Lift the drawer basket out of the drawer frame and remove it.

  6. aJXVeAlsiGpeH6yK
    aJXVeAlsiGpeH6yK
    Yjp34gQGf4lQYZCe
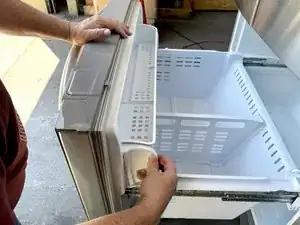
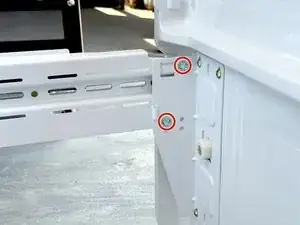
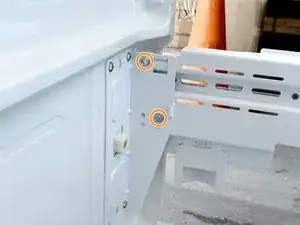
    • Use a 3/8" socket wrench, box wrench, or open end wrench to remove the bolts securing the drawer front to the right drawer slide.

    • Repeat the process for the left drawer slide.

  7. AUFqGfNQBYb4RFnS
    AUFqGfNQBYb4RFnS
    pKDCmrnLeYbBoPlg
    ClMDLOTV1AQnjHjN
    • Lift the drawer front upwards to free it from the drawer slides.

    • Remove the drawer front.

  8. dcbpQZXMoqgqYfYi
    dcbpQZXMoqgqYfYi
    rhP3mAhkK3BEuYrj
    f5GfTrMuYIgNnF1L
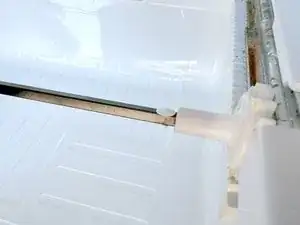
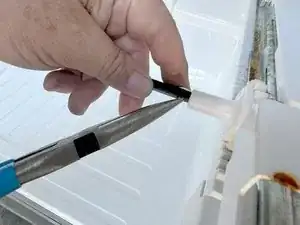
    • Rotate the slide connector rod until you can access the retaining pin.

    • Use a pair of long nose pliers to squeeze the retaining pin shank to release it.

  9. bXoiYxFbiivGLkRZ
    bXoiYxFbiivGLkRZ
    u3qHjcNp6NSuO3IC
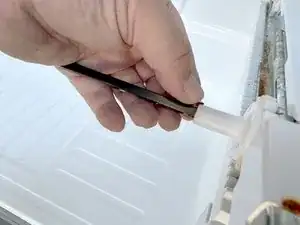
    • Pull the retaining pin out of the hole.

    • Slide the connecting rod to the right to free the left end of the rod.

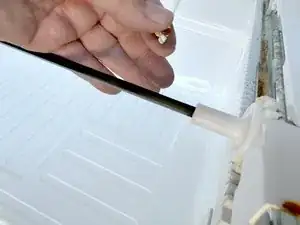
    • Remove the rod by lifting it upward and sliding it back to the left.

  10. ZFPtRMywJLyCLlOv
    ZFPtRMywJLyCLlOv
    gpoPEF1SwDYHIdXo
    • Use a #2 Phillips driver to remove the retaining screws.

    • Two views of the same screws are shown for clarity. There are not four screws.

  11. YKgDtJKoWPdKHUf6
    YKgDtJKoWPdKHUf6
    1GZtZaehDZFMADPY
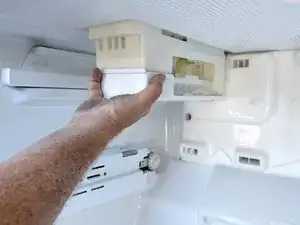
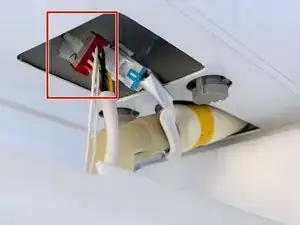
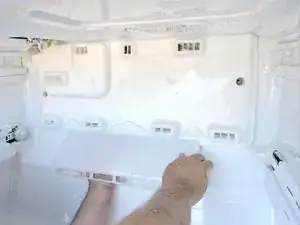
    • Pull the icemaker forward parallel to the top of the freezer.

    • This will release the icemaker from the freezer top.

    • Reposition the icemaker and hold it in one hand to prepare to disconnect it.

  12. JYVlfGdxmBYL5fjQ
    JYVlfGdxmBYL5fjQ
    YlyQa1lnnUBAChsO
    evTenfwF5RDAsJpL
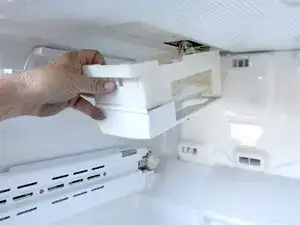
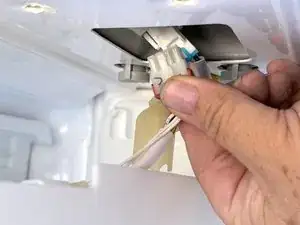
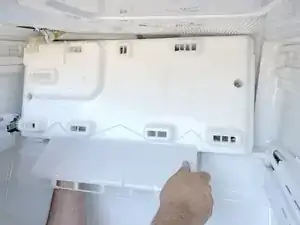
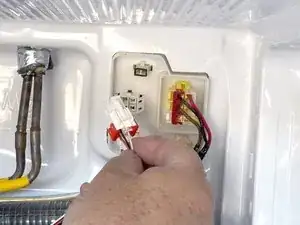
    • Grasp the icemaker connector (the one to the front) and squeeze the release tab.

    • Pull the connector out from the socket.

  13. rwNJPSQP2GQcJIr5
    rwNJPSQP2GQcJIr5
    ZSJGbtlrViGxpp44
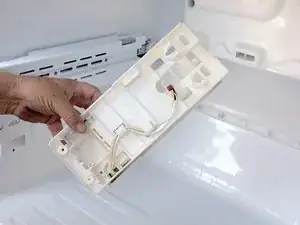
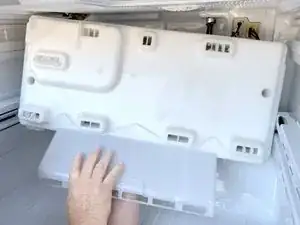
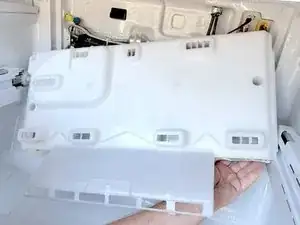
    • Remove the ice maker.

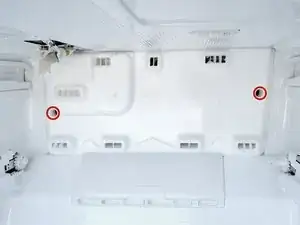
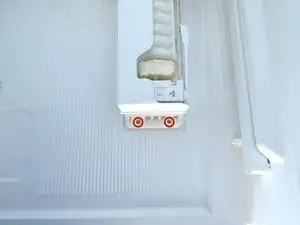
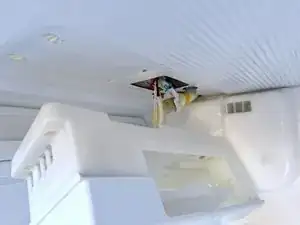
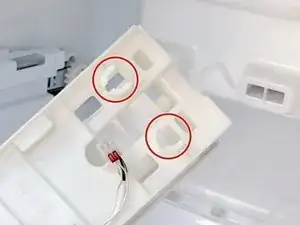
    • This view shows the slots that the mounting studs on the freezer top for reference when reassembling.

  14. fYqBKVClN5YUcQ2o
    • Use a #2 Phillips driver to remove the screws securing the evaporator cover.

  15. KBmBLovBseFXxvwt
    KBmBLovBseFXxvwt
    xlVBffMUknUSdNjN
    DkHL3ZXMlRqwiGQR
    • Lift the evaporator cover from the bottom edge and tilt the edge toward you.

  16. fOgmRmooZeXNtbXb
    fOgmRmooZeXNtbXb
    WKaSMGVLUkk5hRvg
    • Reposition the evaporator cover to allow access to the connections to the right rear.

    • Don't try to remove the cover yet, as you need to first disconnect the electrical connections to it in the upper right rear of the freezer compartment.

  17. 1K25UBDRnqFDua1V
    1K25UBDRnqFDua1V
    NwyDHbnL1jYXU4mM
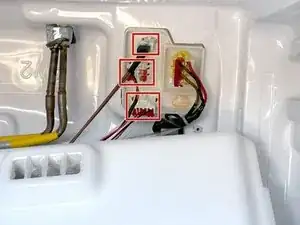
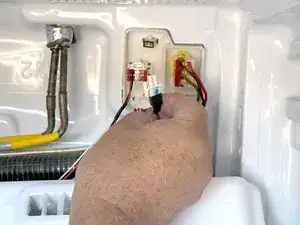
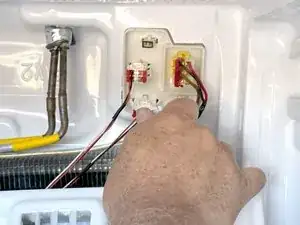
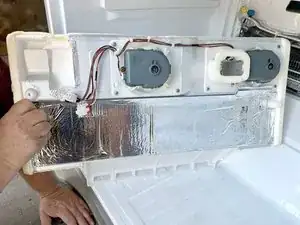
    • Disconnect the connectors by squeezing the release tab on the connector and pulling them free of the sockets.

    • Support the cover from below so there is not tension on the connections.

  18. SS4UtZqP1BTxs3od
    SS4UtZqP1BTxs3od
    6VXPkUCxUJ4NwoIr
    4nUjmWuutfnoGdBo
    • Finish disconnecting the connections while supporting the cover from below.

  19. NS2VkIRYFIYtD1fN
    • Remove the evaporator cover.

Conclusion

To reassemble your device, follow these instructions in reverse order.

Bill Gilbert

Member since: 30/06/22

37443 Reputation

0 comments