Introduction

Use this guide to replace the thermal overload protector on your Samsung refrigerator's compressor.

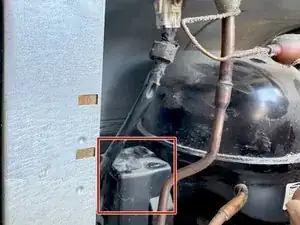
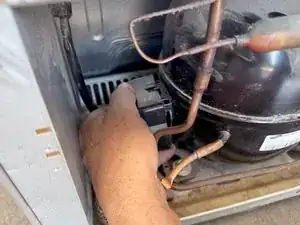
The thermal overload protector is located on the side of the compressor in a small box. On some compressors there will also be a start relay in the box as a combination unit.

It serves to disconnect the compressor if it overheats and allows it to cool down. Generally the thermal overload protector will reset if allowed to cool down.

The unit may be tripped by a number of situations. Overcharge or undercharge of refrigerant or a worn out compressor can result in this.

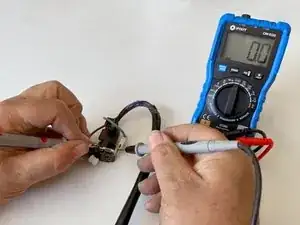
This guide requires a multimeter—if you’re new to using one, check out our video tutorial on multimeters. You might also want to take a look at this guide on using a multimeter, as well.

  1. SaOfLbkeAxgmho5g
    • Unplug your refrigerator before you begin your repair.
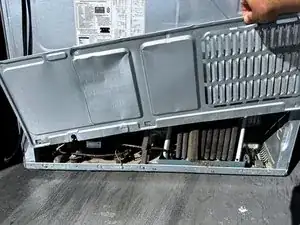
    • If you are testing or repairing the following items, you may also need to shut off and disconnect the water supply:

    • Condenser fan motor

    • Compressor motor and thermal overload device

    • Water supply valve assembly

  2. KIHZJT4L1MRKxXRp
    • Use a #2 Phillips driver to remove the screws securing the rear panel to the refrigerator.

  3. R4fU1AQO32UMVGFi
    R4fU1AQO32UMVGFi
    4VJeYaed1HJhrXem
    TCqmM5xbuZZWXmrF
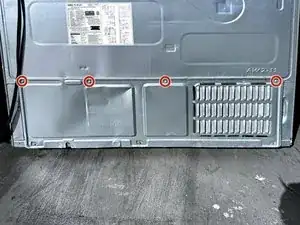
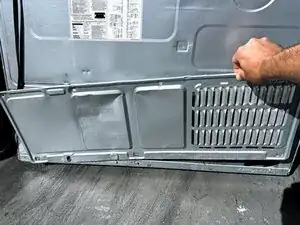
    • Lift the rear panel upward and outward to free the panel the from the tabs at the lower edge.

    • Remove the panel.

  4. ETSiDvfcioghyoUQ
    • This is the location of the thermal overload device.

  5. 3ovDERFFQKHx6DGb
    3ovDERFFQKHx6DGb
    me2mCv4Irbr3sO4C
    JoBPtFtARiJkib4C
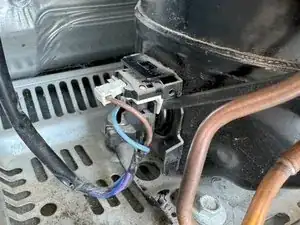
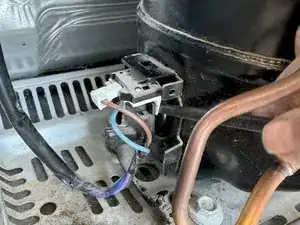
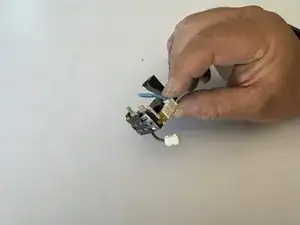
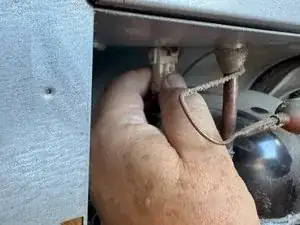
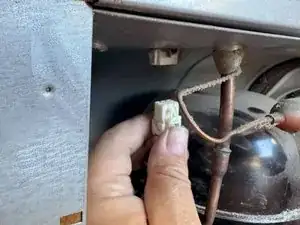
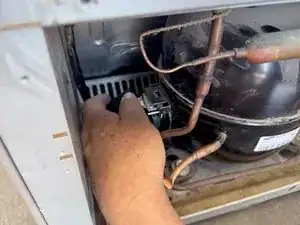
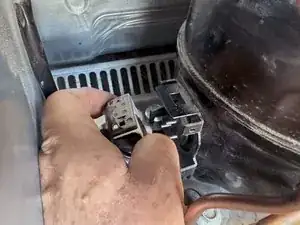
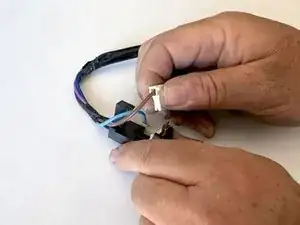
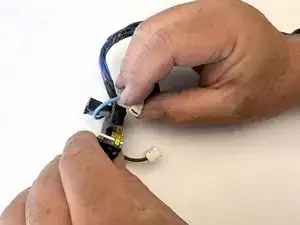
    • Squeeze the locking tab on the connector to free it from the socket.

    • Pull the connector straight down to disconnect it.

  6. BXPiNODAIBgkNNa4
    BXPiNODAIBgkNNa4
    wOepDuvJMXpCKetV
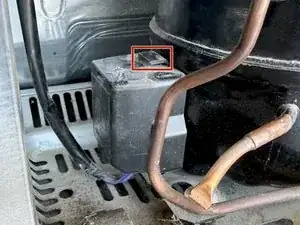
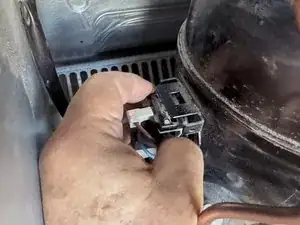
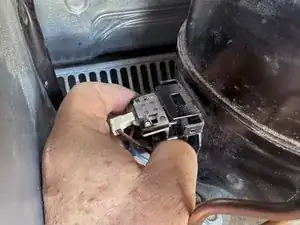
    • Location of removal slot

    • Insert a flat blade screwdriver into the slot as shown in the diagram.

    • Enlarging the second photo will help you to see the diagram more clearly.

    • Free the cover by prying as shown in the diagram.

    • This can take considerable force, and you need to make sure the screwdriver is fully inserted in the slot or you can break the slot piece off.

  7. YUO5fMJgCamVwbyS
    YUO5fMJgCamVwbyS
    LPmYRwDRFQhXGTKY
    qQybDoXHOufWThJb
    • Pull off the cover.

  8. C3aEkxqIZteDCiML
    C3aEkxqIZteDCiML
    kXweKKQjqySdGqHM
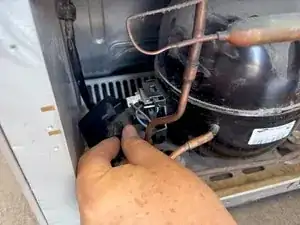
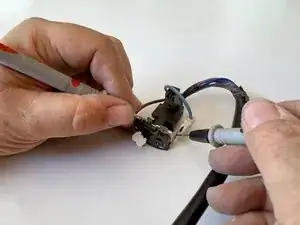
    • Use a spudger (or a flat blade screwdriver) to loosen the thermal protector from the compressor connection pins.

  9. qXT3xOaFJ4KlKalx
    qXT3xOaFJ4KlKalx
    xWAUI6dIGKrWcWb2
    rLLiBgUKLYZXfPMi
    • Grasp the thermal overload protector and pull it sideways away from the compressor.

    • If the connections are stiff, you may find it helpful to wiggle the protector from side to side while pulling to loosen it.

  10. MCZiReLsXmrXmRvO
    MCZiReLsXmrXmRvO
    a4BOq5SFwxAyBkwI
    HlJUJtHAC4kEDw2K
    • Disconnect the brown and blue leads.

  11. M3xI3V1sH6COWZuK
    M3xI3V1sH6COWZuK
    h1Wgikv5QWqQPkcE
    • Use a multimeter to test the resistance of the thermal overload protector.

    • If the thermal overload protector shows a resistance greater than 1Ω, replace it.

Conclusion

To reassemble your device, follow these instructions in reverse order.

Take your e-waste to an R2 or e-Stewards certified recycler.

Repair didn’t go as planned? Ask our Answers Community for help.

Bill Gilbert

Member since: 30/06/22

37443 Reputation

0 comments