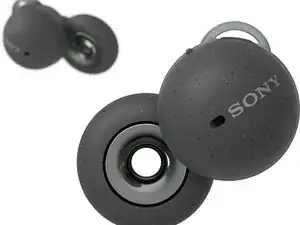
Introduction
Tools
Parts
-
-
Try to ensure all batteries are drained to below 15%. This reduces the risk of nasty surprises if the batteries are damaged during removal.
-
-
-
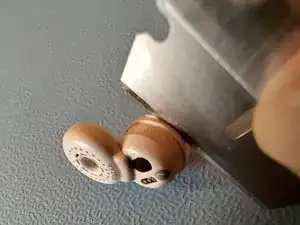
Gently press a razor blade into the seam around the bulb on the ear bud.
-
Take care to follow the seam because the razor can easily go off track and cut a little slice of plastic from around the seam.
-
Allow the razor to cut no more than 1mm into the seam around the whole bulb.
-
If necessary, run the razor a little deeper around the whole seam until the cap can be pulled off.
-
-
-
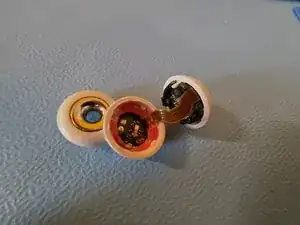
The battery cell inside is held in with red glue.
-
A little heat helps soften the glue. Use a heat gun or hair dryer.
-
The glue can be gouged out with a screwdriver until the battery can be convinced to pull out.
-
Take care not to short-circuit the battery.
-
-
-
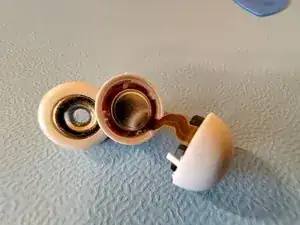
The new battery can simply be pushed into position.
-
Use B7000 or any similar rubbery glue that has a needle applicator - apply around the seam and close the earbud.
-
Wrap a rubber band around the bud until the glue has fully cured.
-
One comment
my one started distorting lhs. I had to open it to fix the membrane in place. Not quite the same as this tutorial but it helped me to find how to open it.