Introduction
-
-
Remember to power off unit, remove batteries, unplug headphones, remove any cassettes, etc. before proceeding with disassembly.
-
-
-
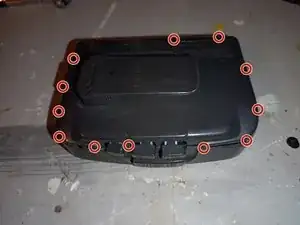
The Sony WM-FX123's case is not held together by a single screw, presumably in order to reduce manufacturing cost. Instead it is held together by plastic clips, which can easily snap if you are not careful, complicating reassembly. Refer to the photos to see where all the clips are located. There are one or two inside the battery compartment.
-
A plastic pry tool would be very handy here if you have one- a metal screwdriver could cause damage to the plastic. I carefully used a flat blade screwdriver and did manage to break one which I superglued back on.
-
Slowly and carefully pry at the indicated points in the seam where the two halves of the case meet - if you break any clips you might not get it back together!
-
-
-
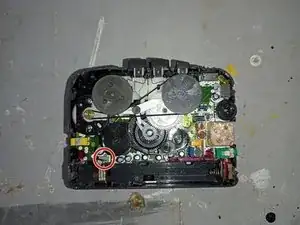
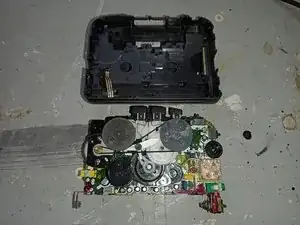
After prying the rear cover off you should be met with something that looks like this. My unit has suffered some battery damage near the battery terminals which I have neutralised and sealed with nail polish.
-
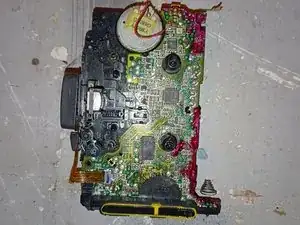
Unplug the ribbon cable (indicated in red) before proceeding to the next step! If you damage it you may not be able to easily replace it.
-
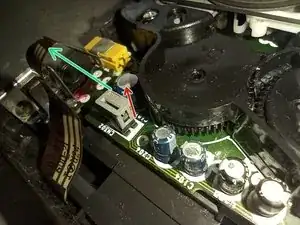
To unplug the ribbon cable, firstly pull up on the grey connector (red) until it clicks and releases the ribbon cable. Once the ribbon cable is released, pull it away from the board (green)
-
-
-
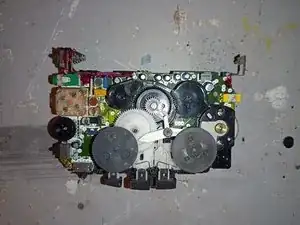
After unplugging the ribbon cable, you can now remove the board. Firstly you must gently tilt the board up at the battery end of the board, freeing the battery terminals from the case (red) before pulling the board towards you (green)
-


To reassemble your device, follow these instructions in reverse order.
