Introduction

This is a pre-requisite list of steps that will act as a placeholder for all other applicable guides pertaining to the Sony a7.

  1. Vo5kpt6JMq2LPxeS
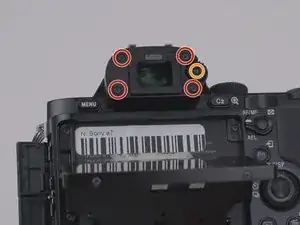
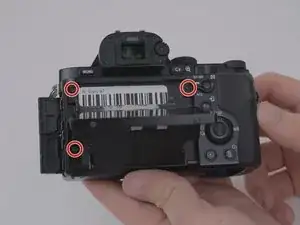
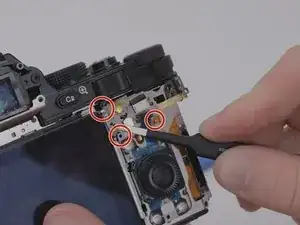
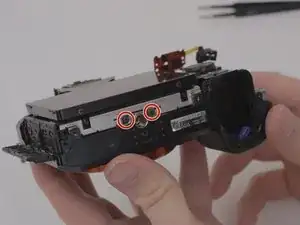
    • Remove the eyepiece cover by removing the four M1.5x4mm screws with a PH00 Phillips screwdriver.

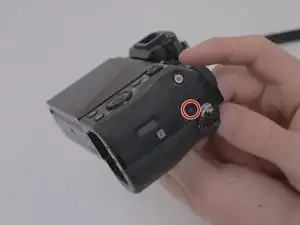
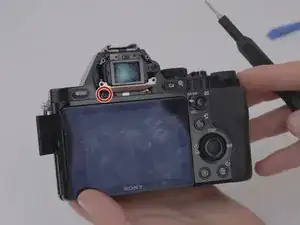
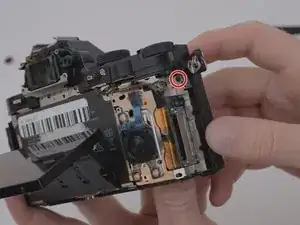
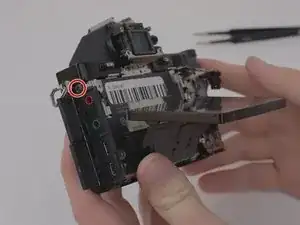
    • Remove the M1.5x4mm screw that retains the adjustment wheel with a PH00 Phillips screwdriver.

  2. vLU12CluQWT5CiiW
    vLU12CluQWT5CiiW
    WRObwWOsl1OtLHOw
    CndfKhR1qoeiIAbe
    • Remove the six M1.5x4mm screws with a PH00 Phillips screwdriver.

  3. fijRKykyyhiKUryR
    • Remove one M1.5x4mm screw with a PH00 Phillips screwdriver.

  4. lpO6PICe6Mqp3joc
    lpO6PICe6Mqp3joc
    VKbQSAnxtfyVBCyQ
    • Remove the four M 1.5x2mm screws.

  5. LHfc15wR2yRNDcaG
    LHfc15wR2yRNDcaG
    peWocfUqirjJq36y
    4HYctUkQSjCvpJQS
    • Once the screws have been removed, unsnap and lift the rear plastic cover off of the camera.

  6. FjCXMIDqKyCVNCGv
    • Using the blunt tweezers, remove the blue ribbon cable.

    • For additional guidance and tips on how to properly attach and detach connector cables, please reference iFixit's guide to connector cables here.

  7. nHeB4LAGHBJHafEX
    nHeB4LAGHBJHafEX
    qIoyyCJ6SElaBAWc
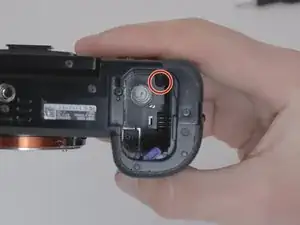
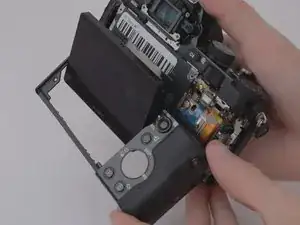
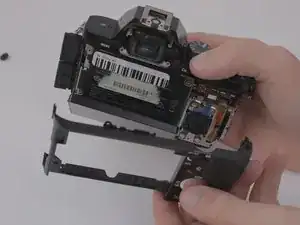
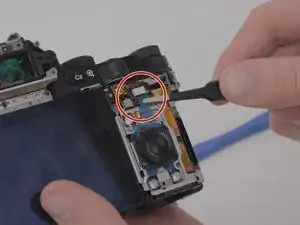
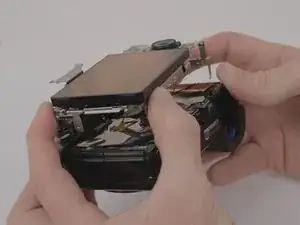
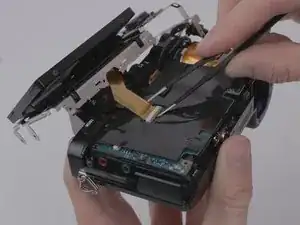
    • Place the tweezers on the side of the circuit board and lift it from underneath so as to free it from the three retaining tabs.

  8. ihZrHTBrpVKFnMgI
    ihZrHTBrpVKFnMgI
    qrVFRXZ3KNlDWiCx
    t46EKojOlK3CWO1g
    • Remove four M1.5x4mm screws using a PH00 Phillips screwdriver.

    On my A7 the screw shown first top right was a different thread to the other three, take care to put back in the correct place

    David Zhecheva-Hamilton -

  9. rtdHGSIP4H4w42SK
    • Lift the metal plate and LCD screen away from the camera body.

  10. jqcA42SOVEW5xH4s
    • Detach the amber ribbon cable from the motherboard.

    • For additional guidance and tips on how to properly attach and detach connector cables, please reference iFixit's guide to connector cables here.

    13단계에서 14단계로 오는사이에 마더보드의 왼쪽 아래부분 나사 푸는 부분이 누락된것 같습니다. 아래 20단계에서 억늡한 나사 2개 이외에 아래쪽 2개를 더 푸는것을 추가해야 합니다.

    그리고 8단계 2번째 사진의 나사는 풀 필요가 없는 나사인데.. 왜 풀어야 하는지요??

    bongjae kim -

Conclusion

To reassemble your device, follow these instructions in reverse order.

Jeffrey Coleman

Member since: 14/01/20

1328 Reputation

0 comments