Introduction

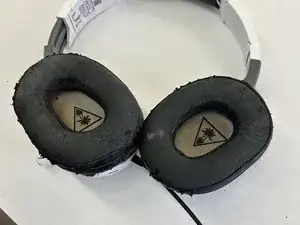
If your Turtle Beach Recon 200 Gen 2 headset isn't producing clear audio or there is no audio at all from one or both speakers, use this guide to fix damage to the internal connections in the headset. Things like dropping your headset or other wear and tear can loosen the cable connections to the speakers. It's possible that you can fix the problem without requiring a new component but just reconnecting the cables that have come undone.

Before using this guide, inspect that the port of the other device isn't piled up with dust. Sometimes a pile of dust doesn't allow for proper connection resulting in a lack of audio or no audio at all but can be fixed with ++an ESD-safe brush or small dust blower++. With this test, you will be able to determine with confirmation that your headset issue isn't an external one.

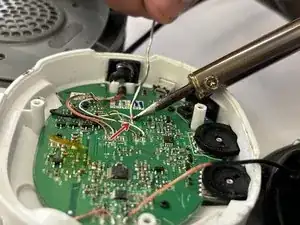
Step 7 is going to require you to identify if any wiring has been broken off. Once you've identified the wire you'll need to Solder it back to its original location. Its important to note that the soldering machine is very hot and will burn skin. Soldering can produce fumes as well so when working on this repair, be sure that your workspace is well-ventilated. For more information on soldering, take a look at this How to Solder and Desolder Connections guide.

Before you begin this repair, ensure that the headset is completely off and it's disconnected from all devices or chargers.

  1. BVKGMRbB3IRKQEP1
    BVKGMRbB3IRKQEP1
    oCSwGPWGcCTW3CtZ
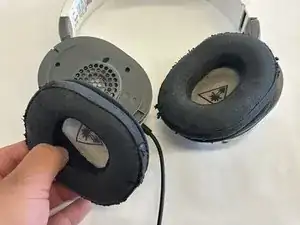
    • Before you begin, power off your headset and unplug it from the charging cable.

    • Place the headset on a flat surface.

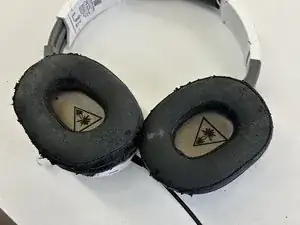
    • Grab the outer layer of the cushion and gently pull each ear cup off the headset.

  2. CydBUERI4GqQP5sw
    CydBUERI4GqQP5sw
    iewUejZPbMldjwfE
    iclKZ2CLLm6Xow4T
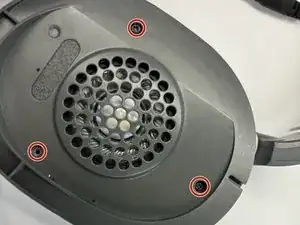
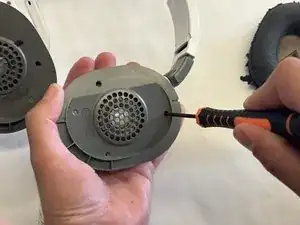
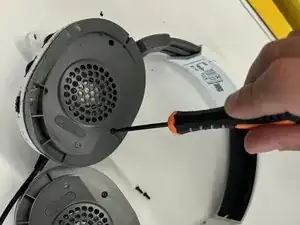
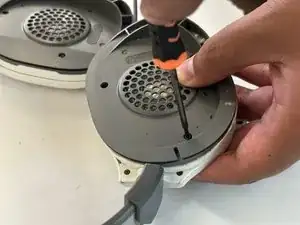
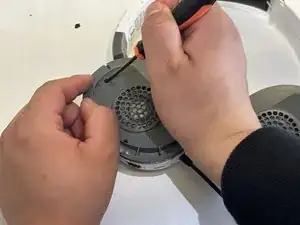
    • Use a Phillips #0 screwdriver to remove three screws from each speaker cover.

    • Use proper screwdriver practices. If you strip a screw, review this guide for tips on how to remove a stripped screw.

    • Place the screws in a secure area. You will need them for reassembly.

  3. DycXMPVBODXOnGXc
    DycXMPVBODXOnGXc
    4ZuVQosrojBtSAZG
    QcsNAhb31PSsqKGg
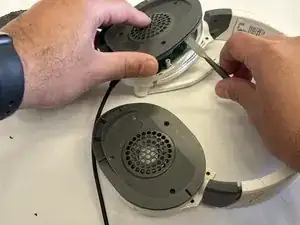
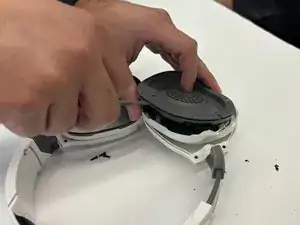
    • Use a spudger to gently pry the speakers from the headset.

    • The speaker is connected to the motherboard by a cable so do not pull the speaker off or it will rip the wire and further damage your headphones.

    • Do not push the prying tool inside the cups, or you could damage the internal components.

  4. EV3Nj2TMsARLt13X
    EV3Nj2TMsARLt13X
    EGkfFErNUPPDmohq
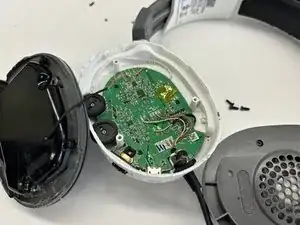
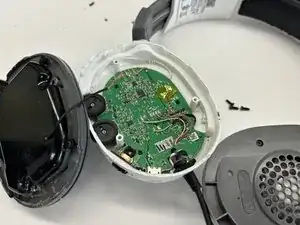
    • Set the speaker to the side without pulling the wires or cables.

    • Check if any dust has gotten into the headset.

    • If so, use a dust blower and/or ESD safe cleaning brush to clean off the dust.

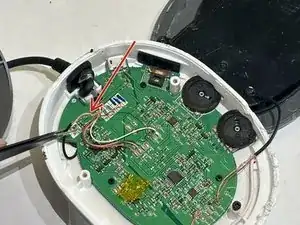
    • If a wire is broken or ripped, use tweezers to hold it and identity where the wire is meant to be.

    • Do not attempt to rip or pull any damaged or exposed wire(s).

  5. raLDKSIQHZUTGQUq
    raLDKSIQHZUTGQUq
    iZotcpRTp1lQBENy
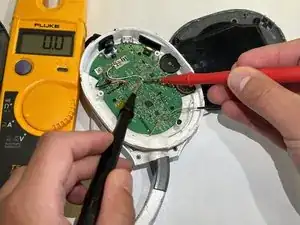
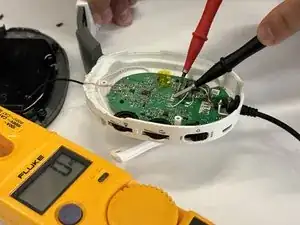
    • Use the multimeter to check for any outage or shortage of current.

    • Check any and every wire and pins you think are faulty that could be the cause of the issue.

    • Most multimeter devices have sharp points, be careful when checking for current. Touch the surface as lightly as possible.

  6. GBXsNZhlDPSEukbj
    GBXsNZhlDPSEukbj
    ab2kc4ZGpkkRaHJP
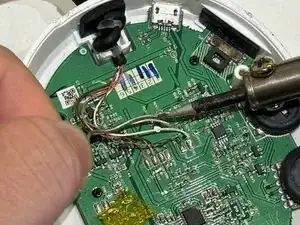
    • Use a soldering iron to re-solder any wires that have detached from the motherboard.

    • Keep your hands as steady as possible and ensure that the wires are attached to the correct solder joint.

    • The solder might release an odd smell. If possible, wear a mask to avoid inhaling fumes.

    • The end point of the soldering kit will be very hot, do not touch it with your bare hands.

  7. ZPbYDjA5DqOqlcRj
    ZPbYDjA5DqOqlcRj
    Hv36F3FAbWyt2eqm
    eVeTEZowJsgtcnWc
    • Test the headset to ensure everything is working. Plug the headset into any device with a AUX input.

    • Test the audio on a low volume setting and slowly raise it to full volume.

    • Replace the speakers.

    • Make sure they are is sitting correctly on the headset so you can replace the screws without a problem.

Conclusion

To reassemble your device, follow these instructions in reverse order.
David Valadez

Member since: 05/03/24

157 Reputation

0 comments